Baby Bib Tutorial

Here’s a quick and fun baby shower gift. I made these bibs for a friend who has a baby boy on the way! Six easy steps below.

Materials for 1 Baby Bib:

  • 1 fat quarter (front of bib)
  • ½ yard terry cloth (back of bib)
  • velcro (at least 3 inches)
  • steam-a-seam strip (at least 5 inches)
  • Coordinating thread

Step 1 – On scrap paper, create a baby bib pattern and then cut it out. Below are the dimensions of the pattern I used.

Step 2 – Trace the pattern on the fabric and terry cloth. Using fabric scissors, cut both out.

Step 3 – On the bib front, pin velcro to the tip of the baby bib where the closure will be.

As shown below, sew the velcro in place by stitching along the perimeter of the velcro and fabric. Trim excess velcro.

Step 4 – Repeat step 3 but on the terry cloth, and the other half of the velcro should be placed on the end of the bib strap. Be sure to place the velcro as shown in the picture below (i.e. velcro should be facing down).

Step 5 – With right sides facing together, align both front and back bib pieces and pin together to keep in place. You should not be able to see the velcro. Sew a ¼ inch seam along the perimeter of the bib, but leave a 5 inch opening at the bottom of the bib as designated in red below. Start and end your stitch with a back-stitch.

Step 6 – Through the 5 inch opening, turn the bib inside out. Press flat with an iron. Close the 5 inch opening by ironing inward the ¼ inch seam, and then use steam-a-seam to glue it closed. Stitch a ¼” border along the perimeter of the baby bib as shown below.

Easy-peasy quick and easy!!

Comments: 3 | Leave a comment


You can NEVER have too much fabric!


My stash of Moda charm packs (pre-cut 5″ squares) is getting out of hand and i love it! I’m in hoarding-mode with these, and seriously need to think of something to make. Don’t you just wanna take a bite out of one of the jelly rolls below..??.. Or baste in a sea of charm packs ..muahahahaahaa..>:-D …eh hem..

Moda is already coming out with their holiday themed charm packs. I bought a couple a few weeks ago and made some patchwork fabric cards with them (below) – i know it’s still Summer time (and of course now the weather is supposed to be in the 90’s this week), but with last week’s gloomy typical Seattle weather, it seemed fit!

Some other projects I’ve been working on: last night i finally quilted my cousin Paola’s T-block baby quilt. After I bind it, I will post the finished quilt. I also made a new quilt top using Moda’s Layer Cakes (10″ pre-cut squares). I plan to quilt that today, and will have the tutorial up soon. I’m also finsihing up a heart-themed table runner I made using charm packs. My next tutorial which I’ve already typed up (just need to post it!) will be on baby bibs. 🙂

Comments: 1 | Leave a comment


Bachelorette Invitations

I absolutely love how these invitations turned out! I’m throwing my girlfriend a bachelorette party so I decided to use the patchwork fabric greeting card design for her invitations. But instead of using all fabric scraps, I threw in some lace and only did 1/2 the card.


Below are the supplies I used to make the cards. After printing the invite details on the right side of the card stock, I fussy-cut the fabric to ensure each card has a lingerie print on it, and then cut a strip of lace. (so cute!)

Anyway, really fun and easy project. To make your own, check out this tutorial. Oh, and what better way to end this post than sexy fireman with moustaches? ;p When shopping for the lingerie-print fabric, I came across this awesome novelty print. Designed by Alexander Henry Fabrics. Hmm…will probably make these guys into lingerie bags or lavender sachets 😉

Comments: 2 | Leave a comment


Easy Oven Mitts Tutorial

Easy Oven Mitts Tutorial - Quilting Tutorials and Fabric Creations - Quilting in the Rain Easy Oven Mitts Tutorial - Quilting Tutorials and Fabric Creations - Quilting in the Rain

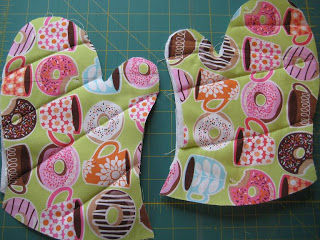
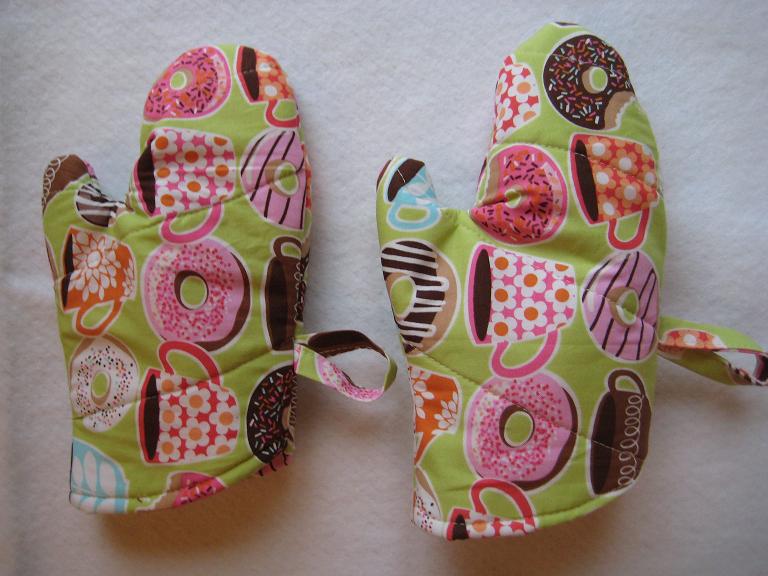
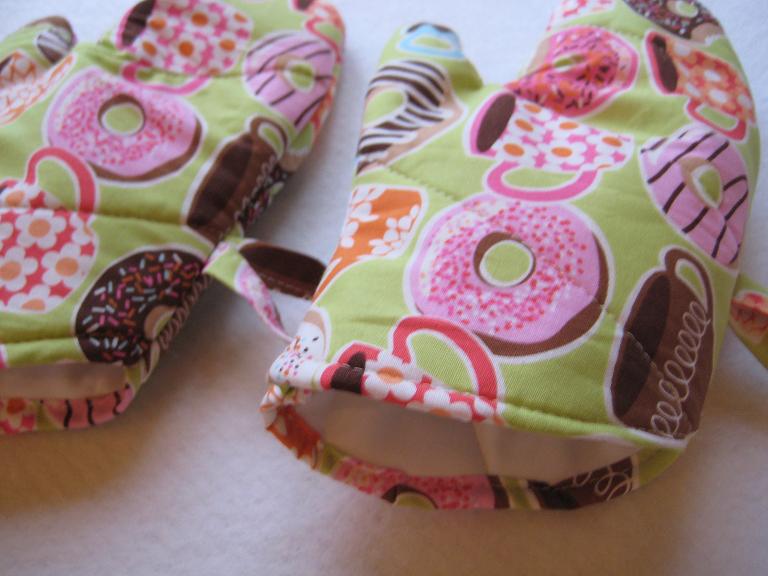
Put an end to oversized oven mitts! I admit to owning a pair, but those are going bye-bye now that I’ve made my own custom-sized oven mitts. =) This also makes a great (and quick) gift for a friend that loves to cook or bake, or a thoughtful creation for a house warming party. 9 easy steps below.

Materials for 1 oven mitt:

  • ¼ yard (main print)
  • ¼ yard (inside lining)
  • ¼ yard heat-resistant batting (i.e. Insul-Bright)
  • matching thread
  • fabric scissors


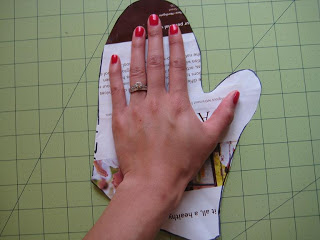
Step 1 – create your oven mitt pattern

Trace your oven mitt pattern on scrap paper (you can use your hand as a guide), then cut the pattern out using scissors. To make a custom size oven mitt to fit your hand, use your hand as an outline and draw a 2 inch allowance along the perimeter of your hand.
Easy Oven Mitts Tutorial - Quilting Tutorials and Fabric Creations - Quilting in the Rain

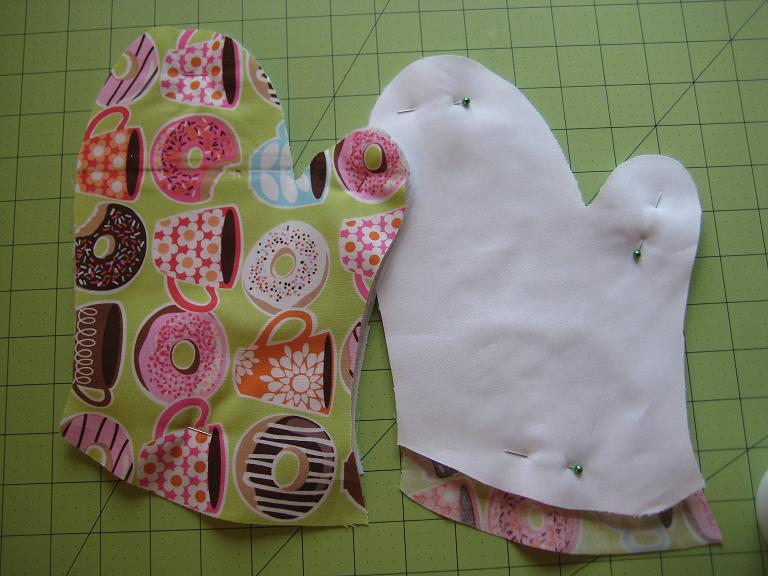
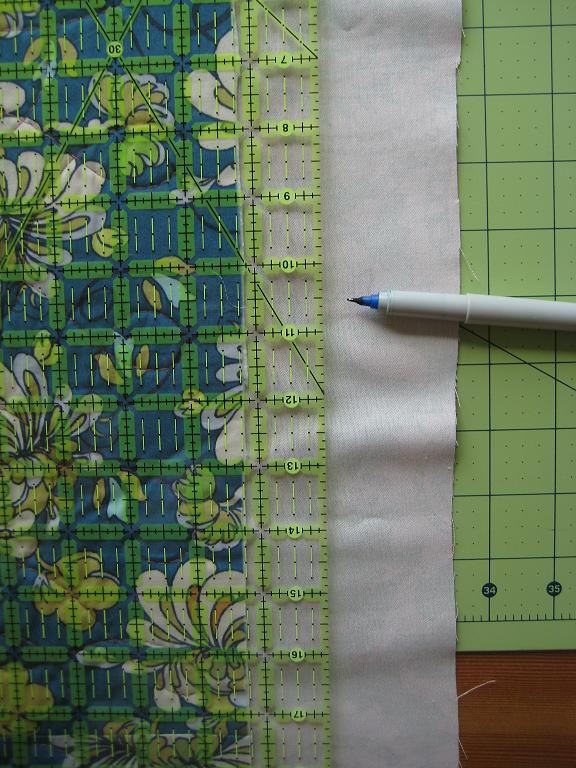
Step 2 – cut the main fabric
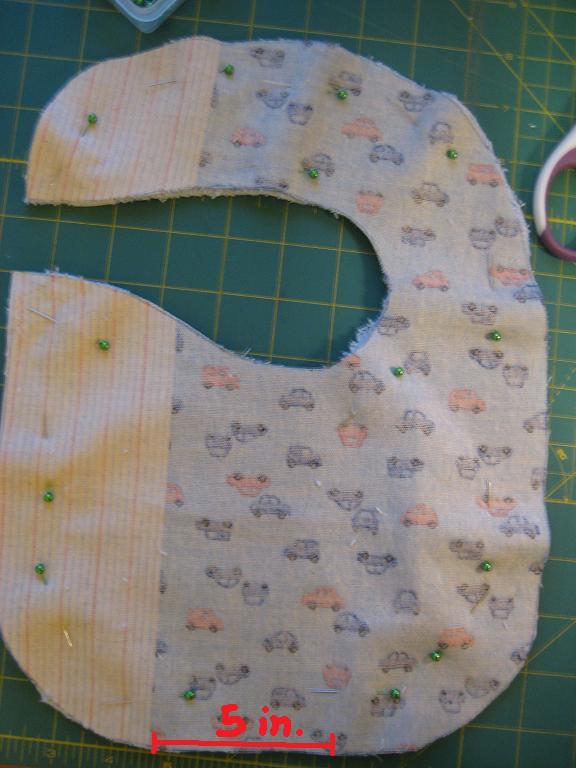
Take your main fabric print and fold it in half so the wrong sides are facing together. Place the pattern on the top of your folded fabric, and pin in place. Make sure to pin through all 3 layers to keep in place. Using fabric scissors cut a ½ inch allowance along the top perimeter of the pattern. Where the opening to your mitt will be, leave 1 inch of fabric allowance along the edge as shown in red, below. You will use this fabric later to bind the edge. Easy Oven Mitts Tutorial - Quilting Tutorials and Fabric Creations - Quilting in the Rain

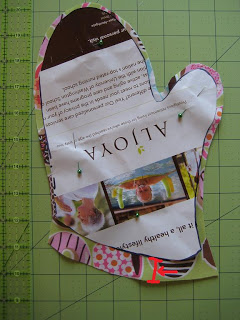
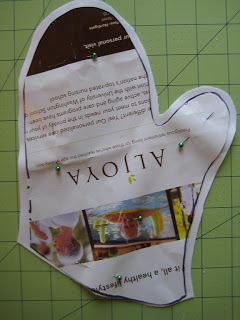
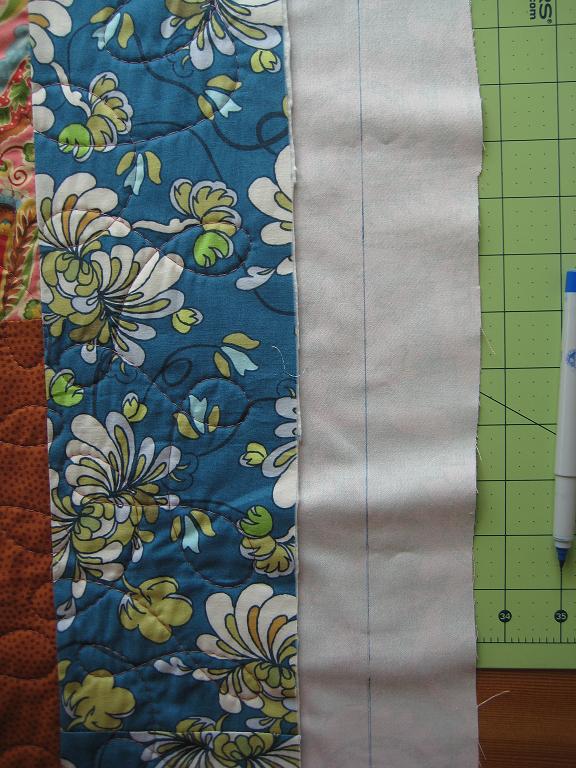
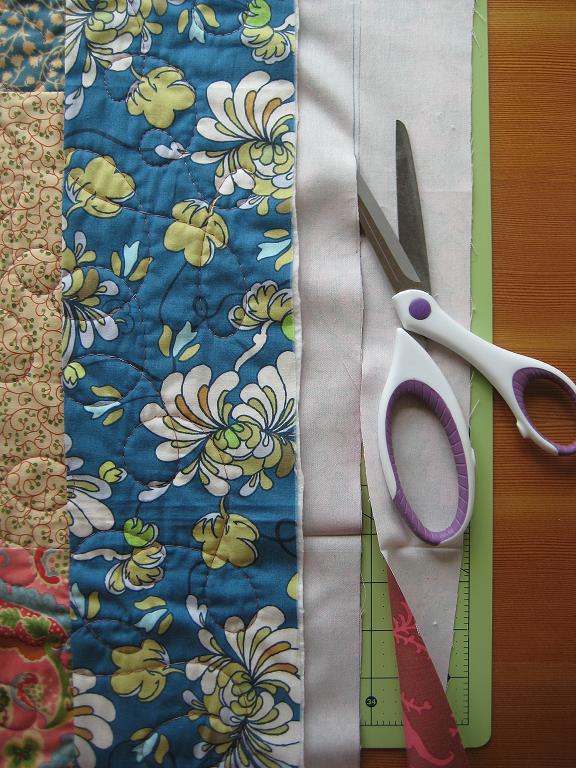
Step 3 – Cut the lining fabric and batting
Take your main lining fabric and fold it in half so the wrong sides are facing together. Place the pattern on the top of your folded fabric, and pin in place. Make sure to pin through all 3 layers to keep in place. As shown below, using fabric scissors cut a ½ inch allowance along the top perimeter of the pattern except for the where the opening will be. Do the same for the batting.
Easy Oven Mitts Tutorial - Quilting Tutorials and Fabric Creations - Quilting in the Rain

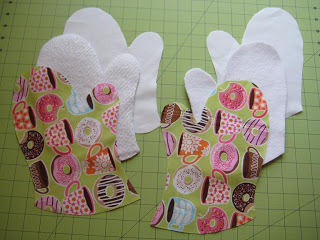
Step 4 – make a quilt sandwich
At this point you should have the following 6 pieces cut out:
Easy Oven Mitts Tutorial - Quilting Tutorials and Fabric Creations - Quilting in the Rain

As shown below, make a quilt sandwich for each side of the mitt: layer the fabric so the batting is sandwiched between the top fabric and lining fabric. Pin in place.
Easy Oven Mitts Tutorial - Quilting Tutorials and Fabric Creations - Quilting in the Rain

Step 5 – quilt both sides
I quilted a simple straight-line stitch, as shown below
Easy Oven Mitts Tutorial - Quilting Tutorials and Fabric Creations - Quilting in the Rain

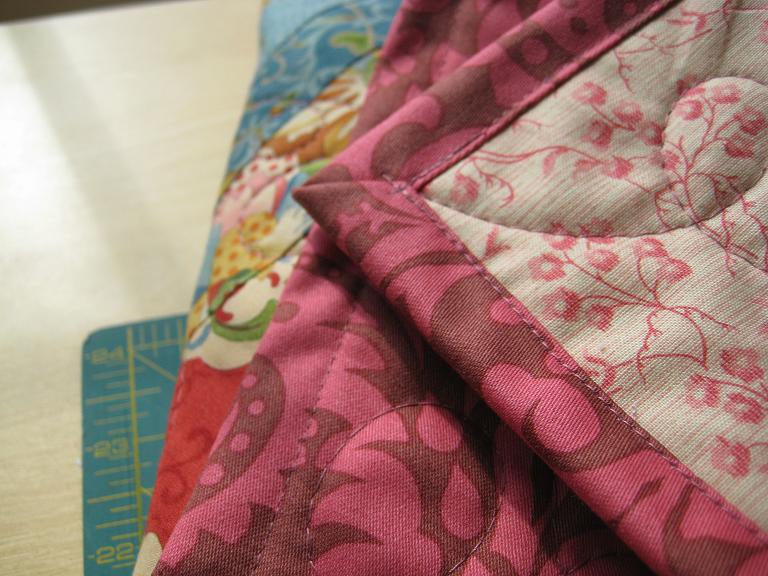
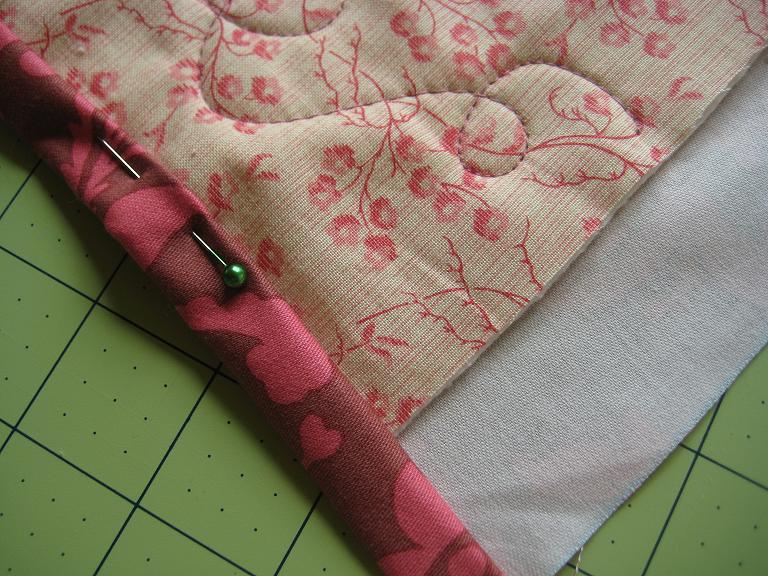
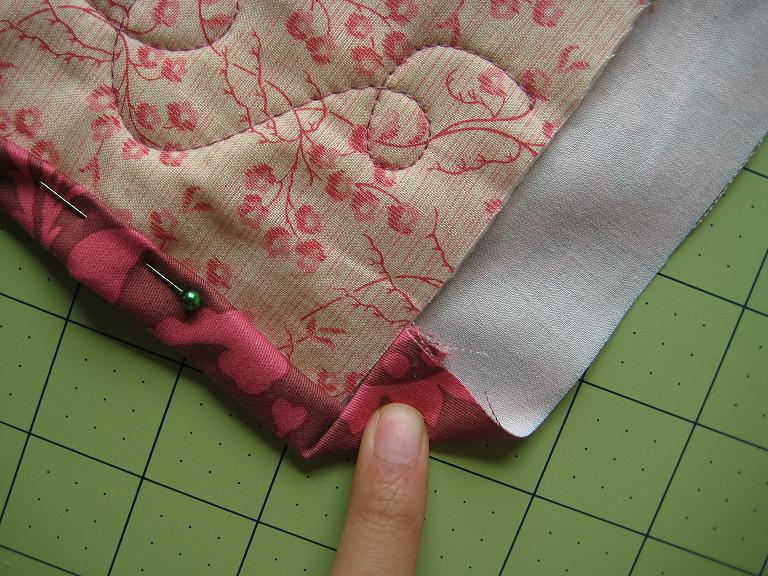
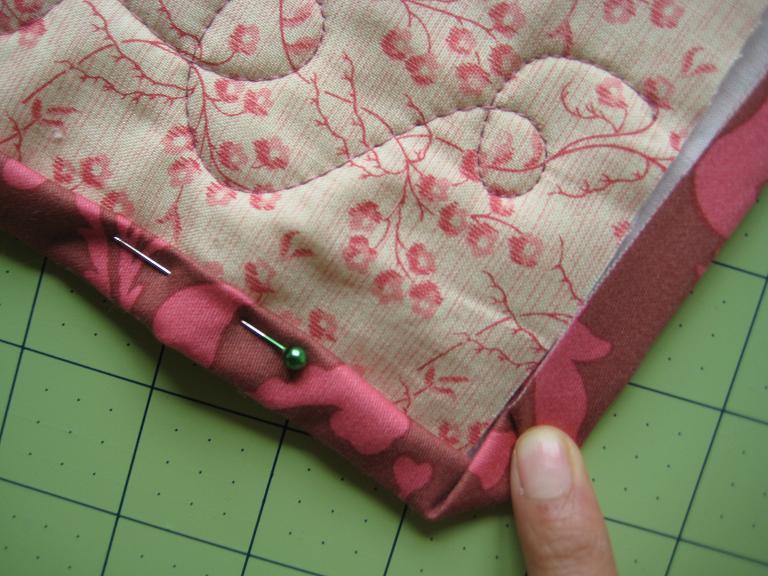
Step 6 – Bind the mitten openings
Iron the 1 inch of fabric (from step 2) in half lengthwise, and then fold it over to the lining of the mitten. Pin and sew in place. Below is how the front and back will look finished.
Easy Oven Mitts Tutorial - Quilting Tutorials and Fabric Creations - Quilting in the Rain

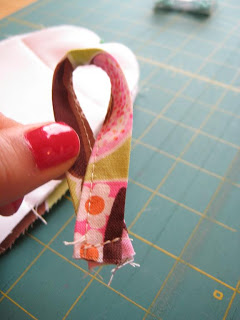
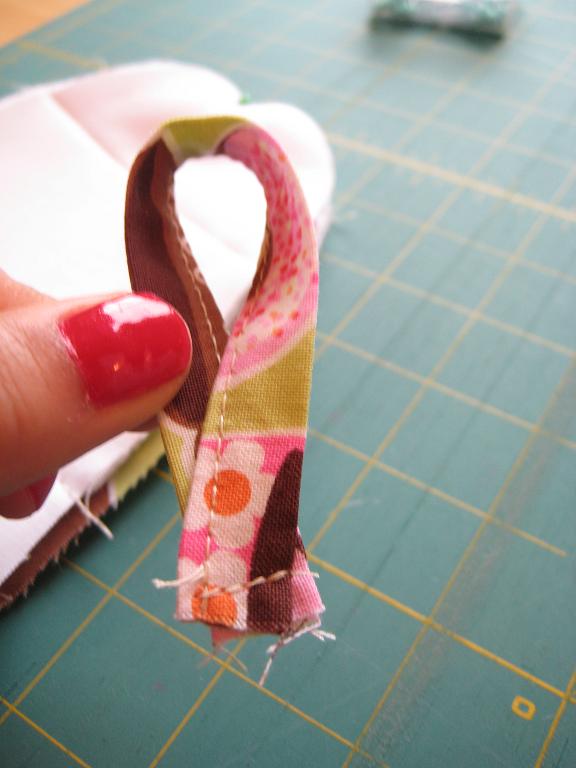
Step 7 – create a loopy-loop for hanging the mitten
Using scrap fabric from your main fabric print, cut a 1.5”x6” strip. Iron the strip in half lengthwise. On each side, iron lengthwise about ¼” inward, as shown below. Sew closed to create a binded strip.
Easy Oven Mitts Tutorial - Quilting Tutorials and Fabric Creations - Quilting in the Rain

Make the binded strip into a loop, and stitch the bottom ends together as shown below.
Easy Oven Mitts Tutorial - Quilting Tutorials and Fabric Creations - Quilting in the Rain

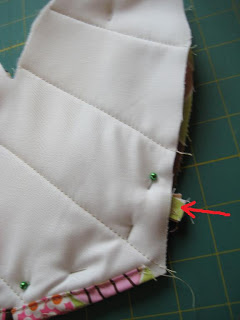
Step 8 – Pin the mitt together with right sides facing together
Take the two quilted mitten halves and with right sides together, pin in place. As designated by the red arrow below, place the loopy-loop you created in the previous step adjacent to the opening of the oven mitt with the loop facing the inside of the mitt. Pin in place. The stitched end of the loopy-loop should be sticking out ~1/4 inch as shown below.
Easy Oven Mitts Tutorial - Quilting Tutorials and Fabric Creations - Quilting in the Rain

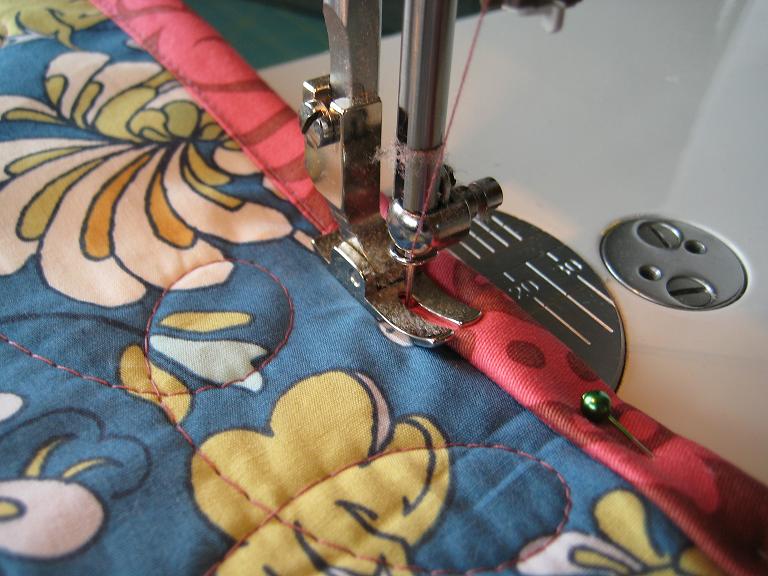
Step 9 – Sew along the top perimeter of the mitt, then turn inside out
Sew a ¼ – 1/2 inch seam allowance along the top perimeter of the oven mitt, removing pins as you stitch. Obviously you will need to leave the opening of the mitten un-stitched. Start and end your stitch with a backstitch. When you come across the placement of the loopy-loop when sewing, I recommend doing a backstitch over it to make sure it’s secured. Trim any sides of the mitt that have bulk fabric. Lastly, turn the mitten inside-out. You’re done!
Easy Oven Mitts Tutorial - Quilting Tutorials and Fabric Creations - Quilting in the Rain

Comments: 18 | Leave a comment


Quick Quilt Binding

Quick Quilt Binding - Quilting Tutorials and Fabric Creations - Quilting in the RainBinding your quilt is the LAST step in creating a quilt! There are several ways to bind a quilt, and this is one of the FASTEST ways because there is no blind stitching (by hand) involved. Also, in this method you don’t need to cut and prepare binding strips. Instead, extra fabric from the back of your quilt will be folded around to the front of your quilt top and fastened by sewing a straight stitch with your sewing machine. You will need about 1.5 inches of extra backing fabric around the perimeter of your quilt top.

Below is a quick and simple 5-step binding tutorial:

Step 1
As shown below, cut any excess batting material from your quilt sandwich (FYI for any newbie’s, a quilt sandwich consists of the quilt top, batting, and backing fabric in that order – batting is the fluffy stuff sandwiched between the quilt top and backing fabric).
Quick Quilt Binding - Quilting Tutorials and Fabric Creations - Quilting in the Rain

Step 2
Using a ruler and marker, mark 1.25 inches on the backing fabric around the perimeter of your quilt top (shown below).

Quick Quilt Binding - Quilting Tutorials and Fabric Creations - Quilting in the Rain Quick Quilt Binding - Quilting Tutorials and Fabric Creations - Quilting in the Rain

Step 3
As shown below, use fabric scissors to cut along the line you marked from Step 2. This will result in 1.25 inches of backing fabric around the perimeter of your quilt top.
Quick Quilt Binding - Quilting Tutorials and Fabric Creations - Quilting in the Rain

Step 4
Fold the backing fabric in half lengthwise (shown in 1st picture below). Next, fold that over onto your quilt top and pin to keep in place (shown in 2nd picture below). Do this around your entire quilt. I placed pins every couple of inches.

Quick Quilt Binding - Quilting Tutorials and Fabric Creations - Quilting in the Rain Quick Quilt Binding - Quilting Tutorials and Fabric Creations - Quilting in the Rain

When you get to the corners, follow steps 1 and 2 (below) for folding and pinning all corners:

  1. Fold the corner over so the edge of the binding is aligned with the quilt top.
    Quick Quilt Binding - Quilting Tutorials and Fabric Creations - Quilting in the Rain Quick Quilt Binding - Quilting Tutorials and Fabric Creations - Quilting in the Rain
  2. With the corner folded over, fold the backing fabric in half lengthwise. Then, fold that over onto your quilt top and pin in place.
    Quick Quilt Binding - Quilting Tutorials and Fabric Creations - Quilting in the Rain Quick Quilt Binding - Quilting Tutorials and Fabric Creations - Quilting in the Rain

Step 5
As shown below, sew a straight stitch along the edge of the folded binding. Remove the pins as you sew. You can also sew a zig-zag stitch instead of the straight stitch.

Quick Quilt Binding - Quilting Tutorials and Fabric Creations - Quilting in the Rain

And that’s all there is to it! Quick and simple : ) Let me know if you have any questions.

Comments: 66 | Leave a comment


Site by Spunmonkey.