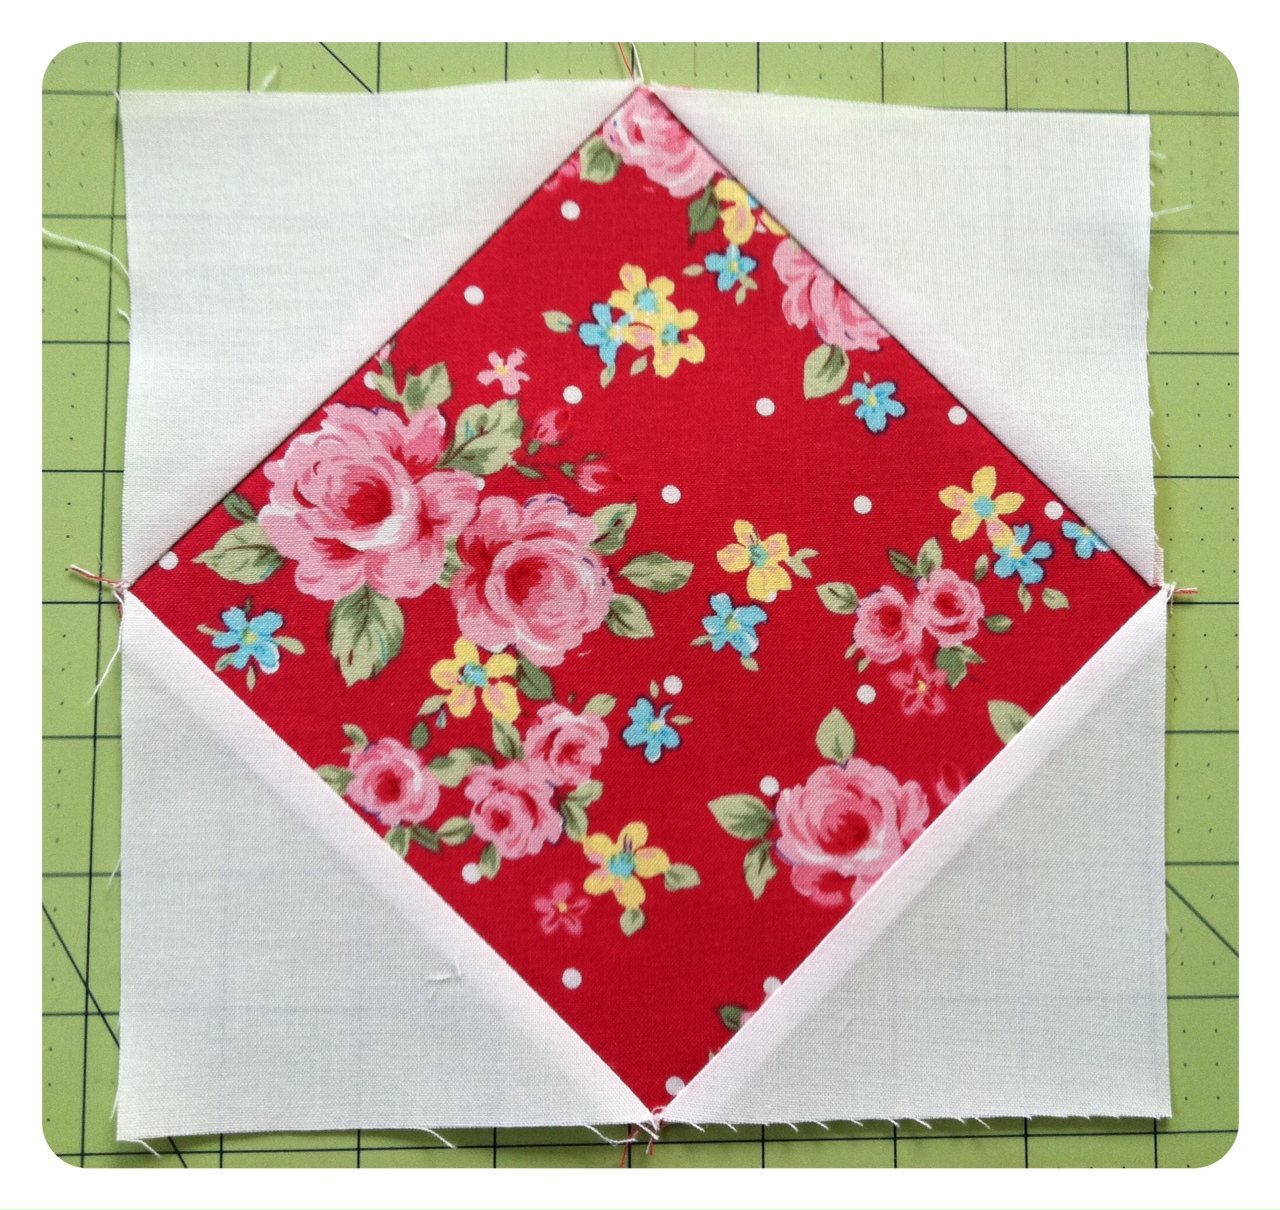
 As mentioned in my last post, this is a great quilt to showcase your favorite fabrics. It’s a simple quilt that’s made up of 46 of these blocks:
 In this tutorial I’ve also included an optional technique that shows how to turn the corner scraps into half triangle squares – these can be saved for my next tutorial or for whatever you want, so long as you don’t throw away those precious scraps! 🙂 Being a fabric addict, the thought of those babies at the bottom of the bin pains me! Enjoy the tutorial!
p.s. – you can see the finished version of this quilt in all its glory here 🙂
Materials for the Quilt Top (45.5″x53″):
- 12 fat quarters (or 1/4 yard cuts)
- 3 yards of white fabric
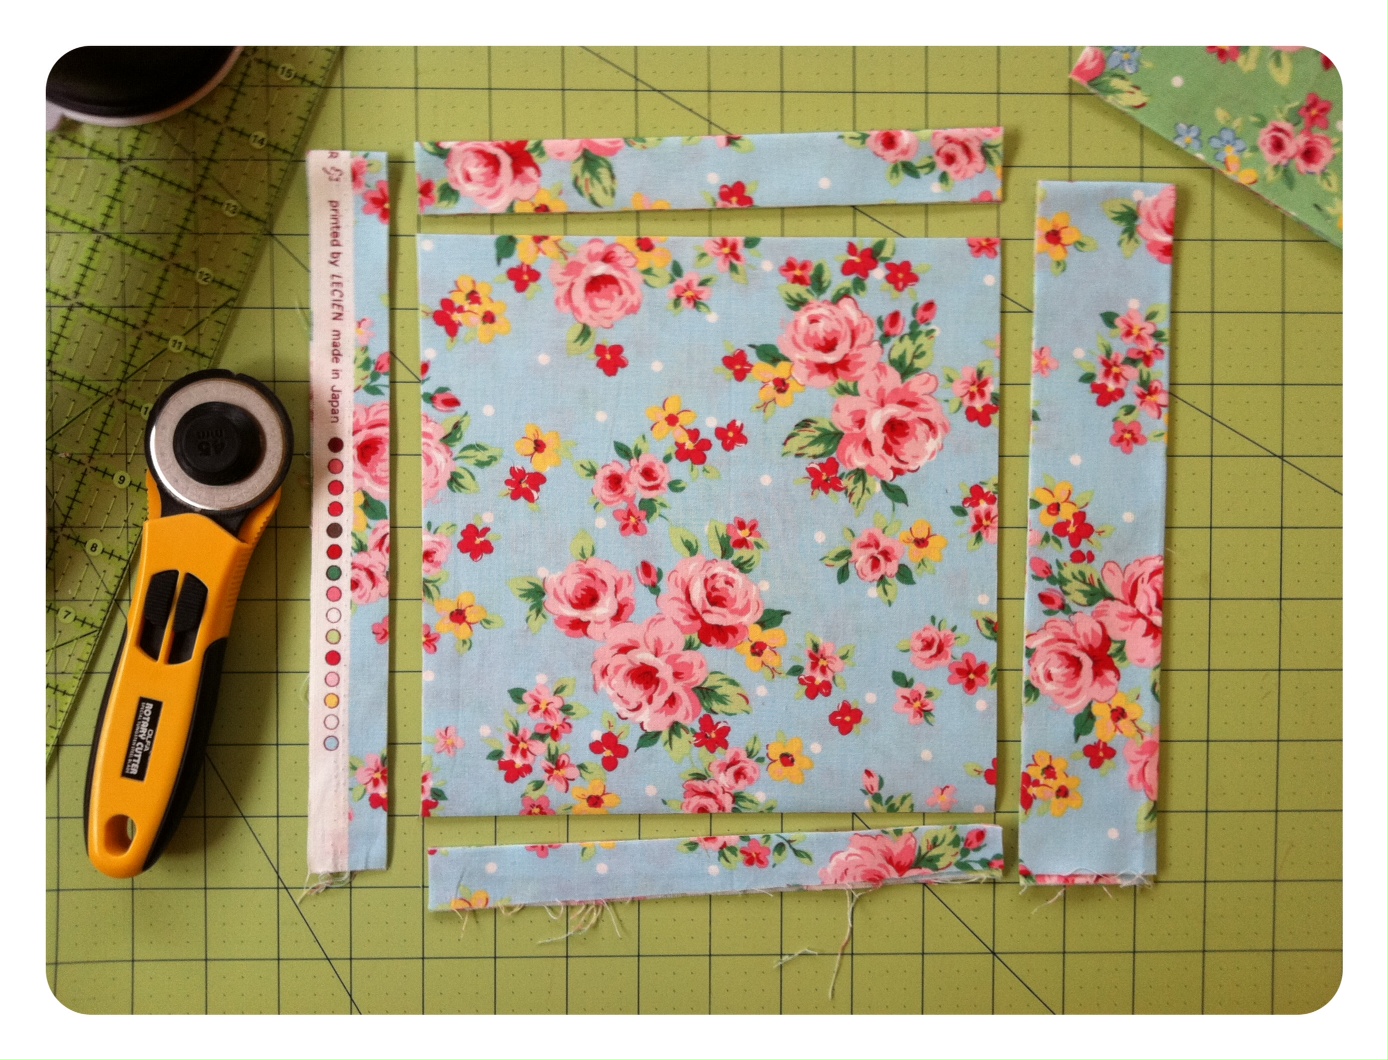
Step 1 – From each fat quarter or 1/4 yard, cut four 8″ squares for a total of 46 8″ squares. Layer your fabrics for quicker cuts (e.g. as shown below, I folded the fabric into quarters so there were four layers to cut through. When you fold, press flat with an iron before cutting).
Update (2/9/2016) – this tutorial has been updated to account for the 1/4″ seam allowance on the white corners, below. However, the phtos have not been updated. Thank you for your patience & i apologize for the error! I wrote this tutorial way too long ago!!
Step 2 – From the 3 yards of white fabric, cut a total of 46 8.5″ squares. Layer the fabric for quicker cuts. Cut 8.5″ strips along the width of fabric. Sub-cut each strip into four 8.5″ squares.
After you’ve cut 46 8″ squares from the white fabric, layer and then quarter them into 4.25″ squares. This will give you a total of 184 4.25″ squares.
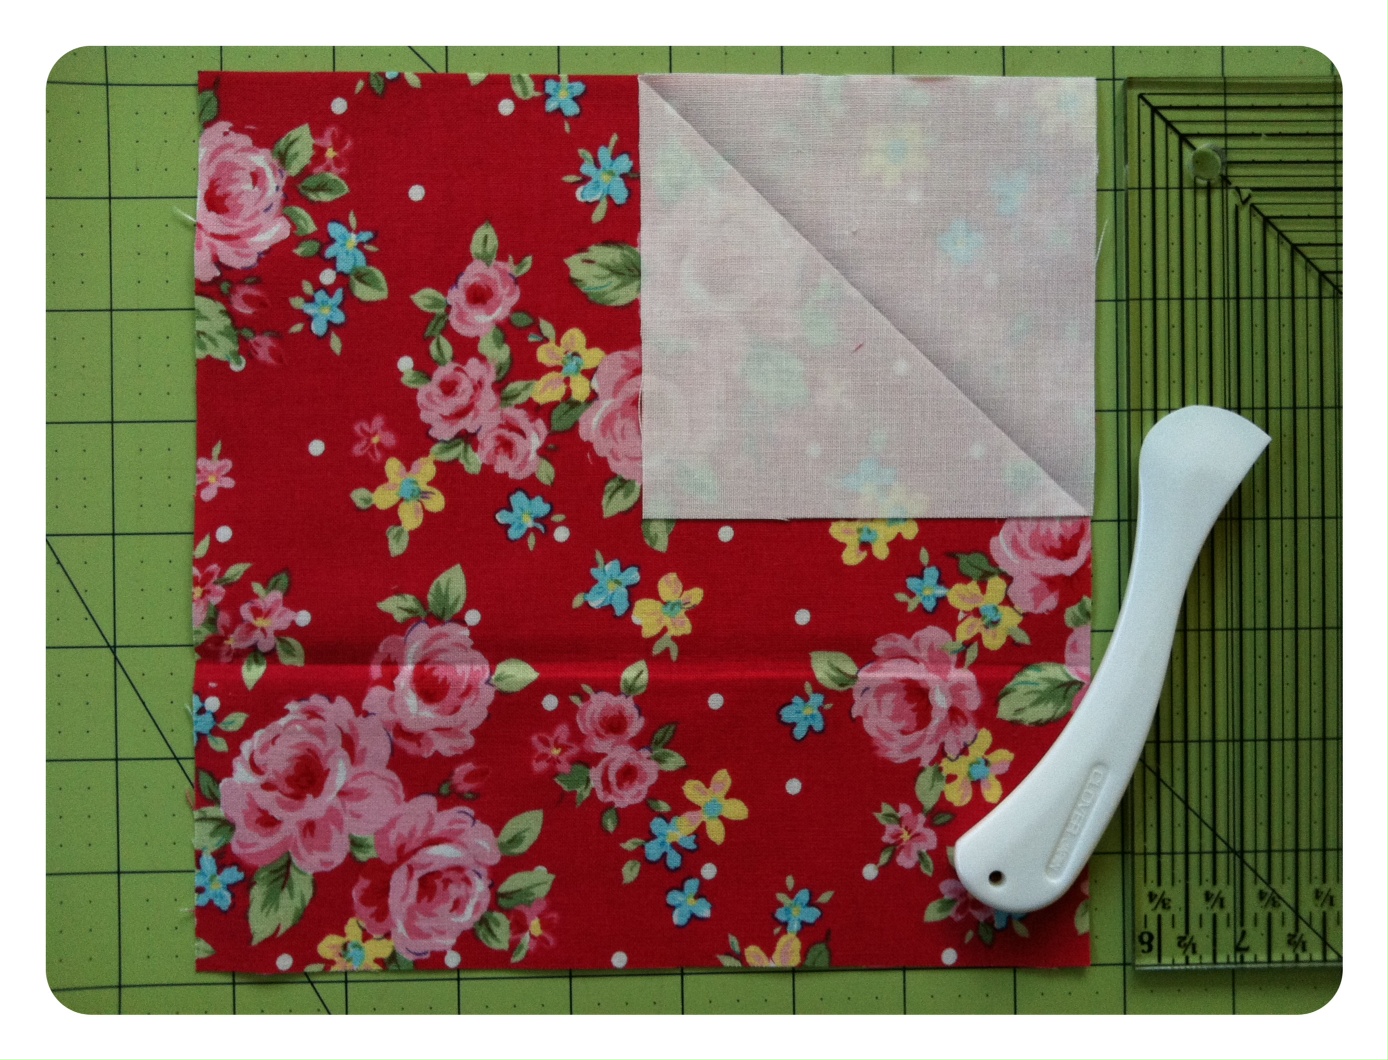
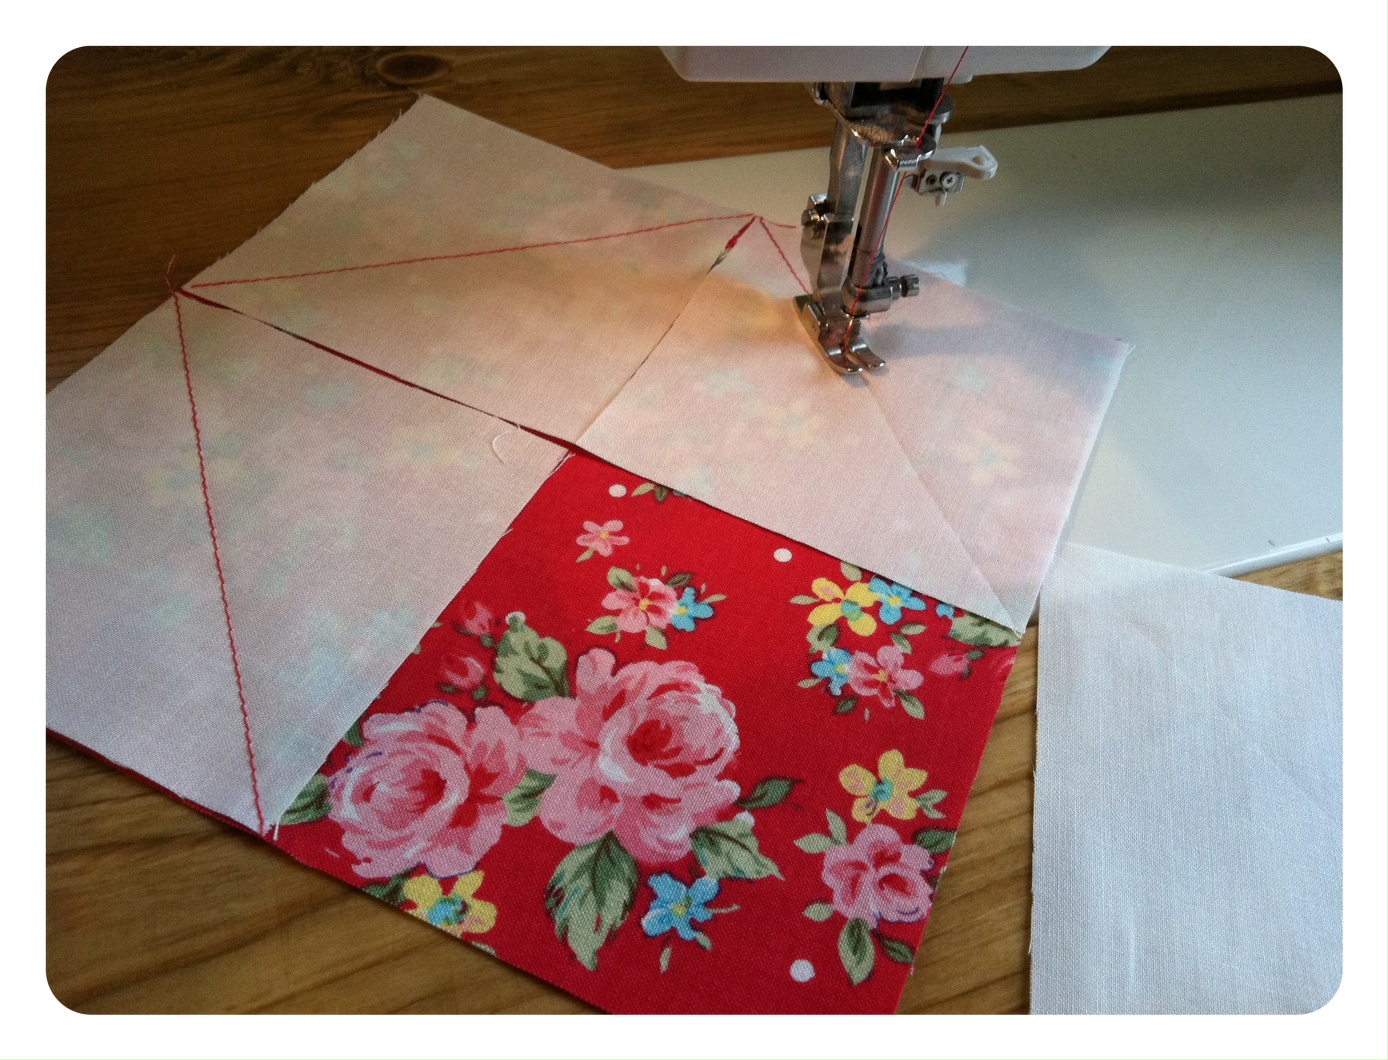
 Step 3 – Place a 4.25″ square and align it with the corner of an 8″ square. As shown below, mark a diagonal line from corner to corner on the 4″ square. I used a Hera marker which is a plastic tool that creates a crease on the fabric when pressed with a firm hand. If you don’t have a Hera marker, simply draw a line using a ruler and pen, or fold the square diagonal and press with an iron and then unfold.
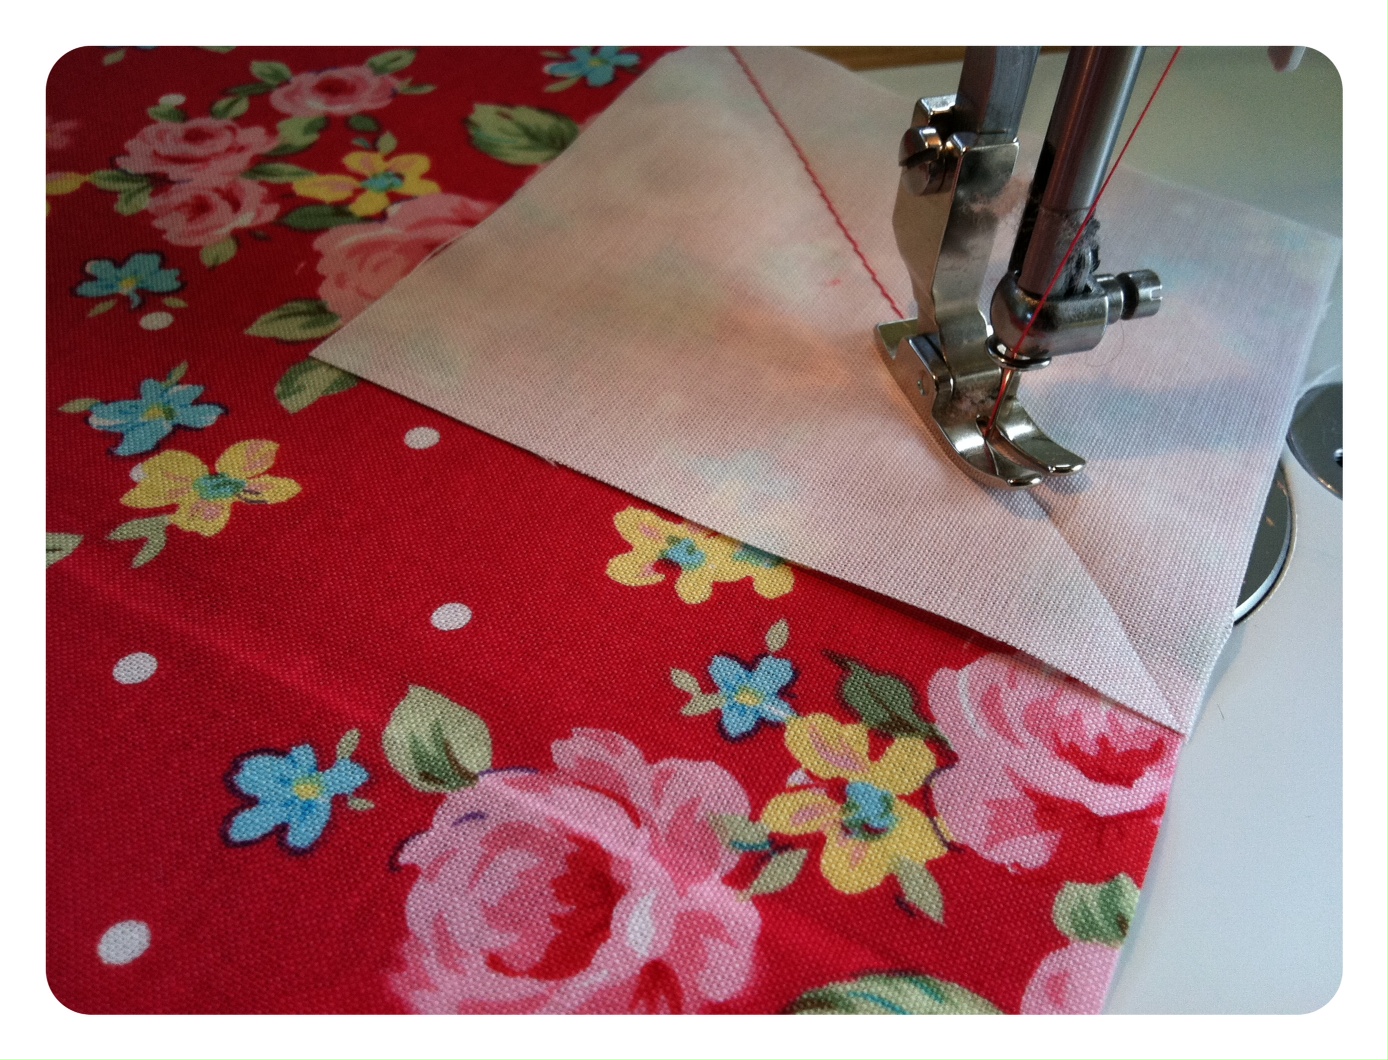
 Then, sew along the marked line.
 Step 4 – Repeat step 3 for all four corners of the square.
 Note: Steps 5 and 6 are optional for this tutorial. I’ve incorporated these steps to show you an easy way to utilize your scraps. I recommend taking the extra minute to do them. 🙂
Step 5 – After you’ve finished step 4, it will look like this. Once again, use a marking tool and mark a line 1/4″ along the outer part of the stitch that you previously sewed. Repeat for all four corners.
 Step 6 – Sew a 1/4″ seam along the line that you previously marked. Repeat for all four corners.
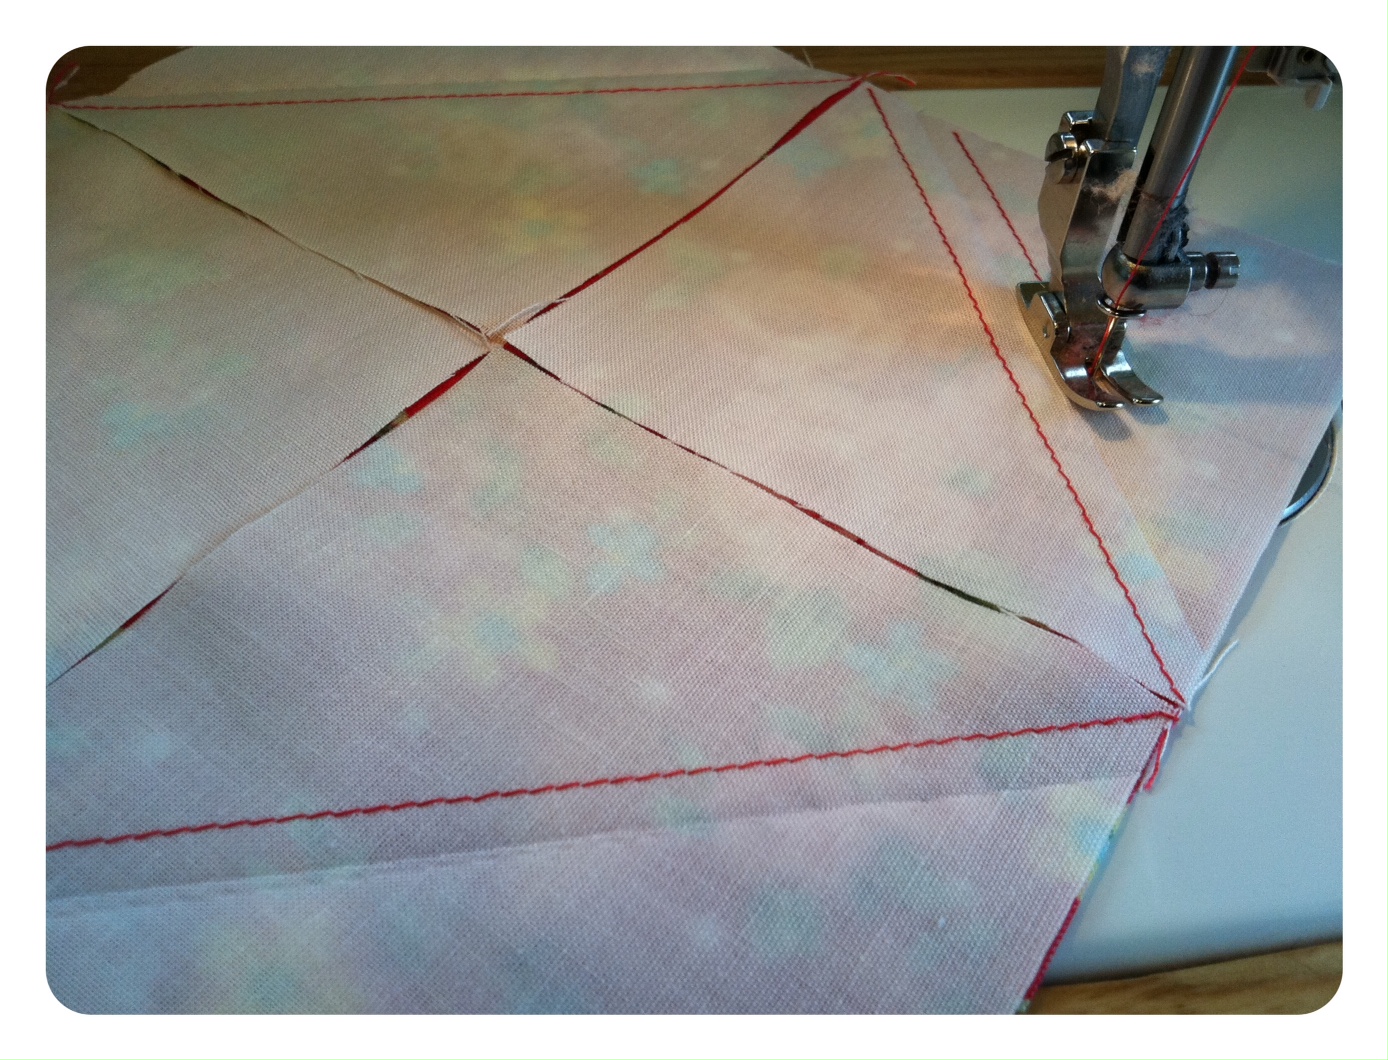 When you’re done it will look like this.
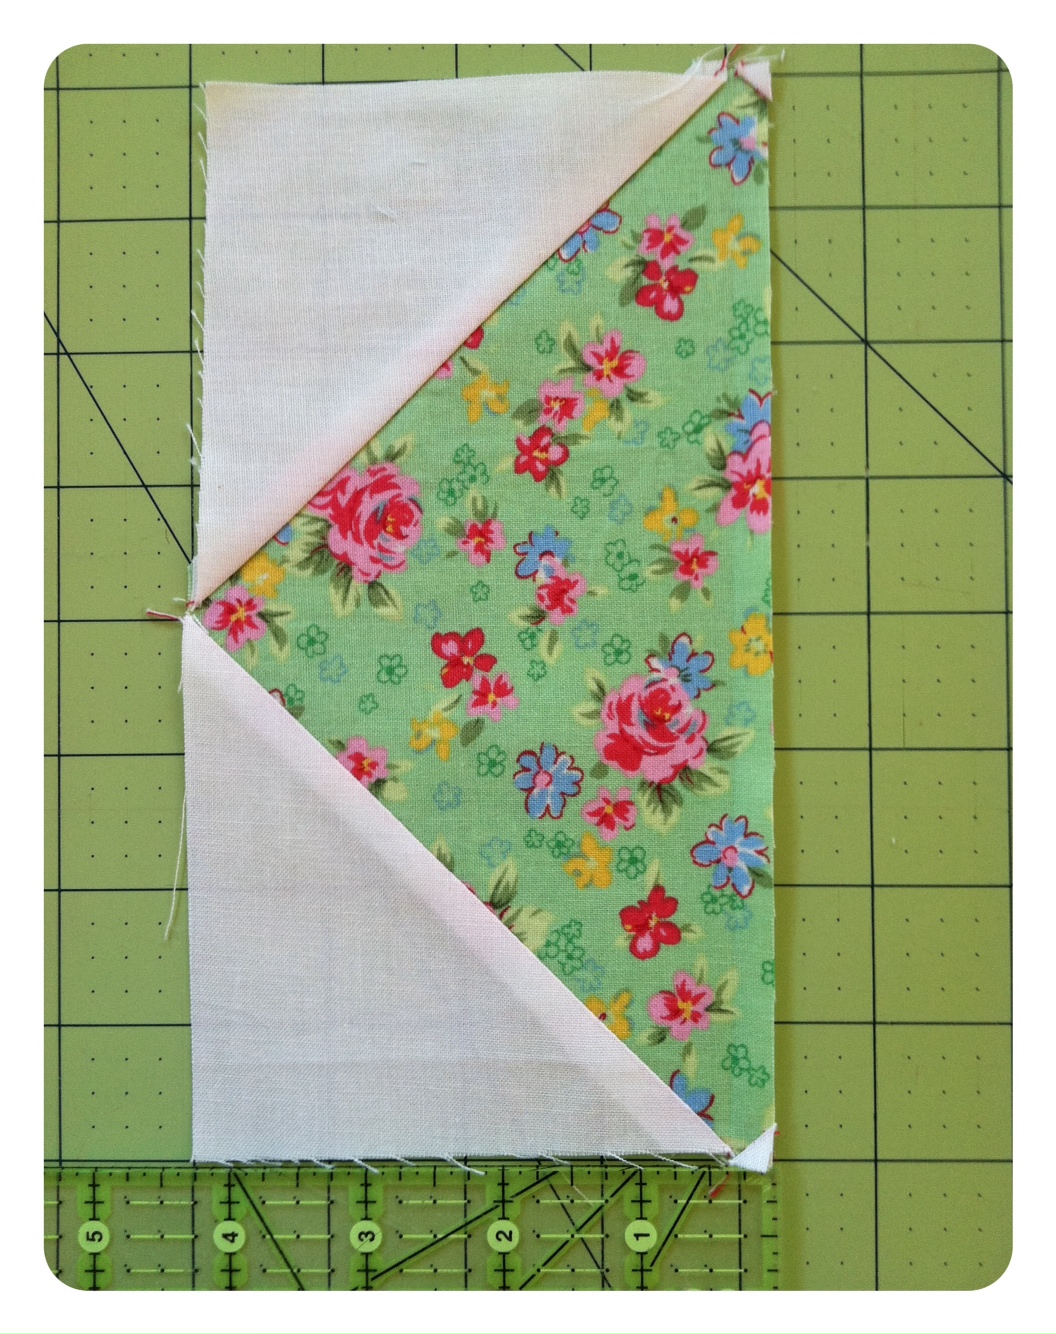
 Step 7 – Cut the corners off by cutting along the marked lines that you marked from step 5. (If you skipped steps 5 & 6, simply cut a 1/4″ seam along the outer part of the lines you sewed in step 4. Or in other words, instead of marking a 1/4″ line along the outer part of the stitch as was done in step 5, cut the line instead of marking).
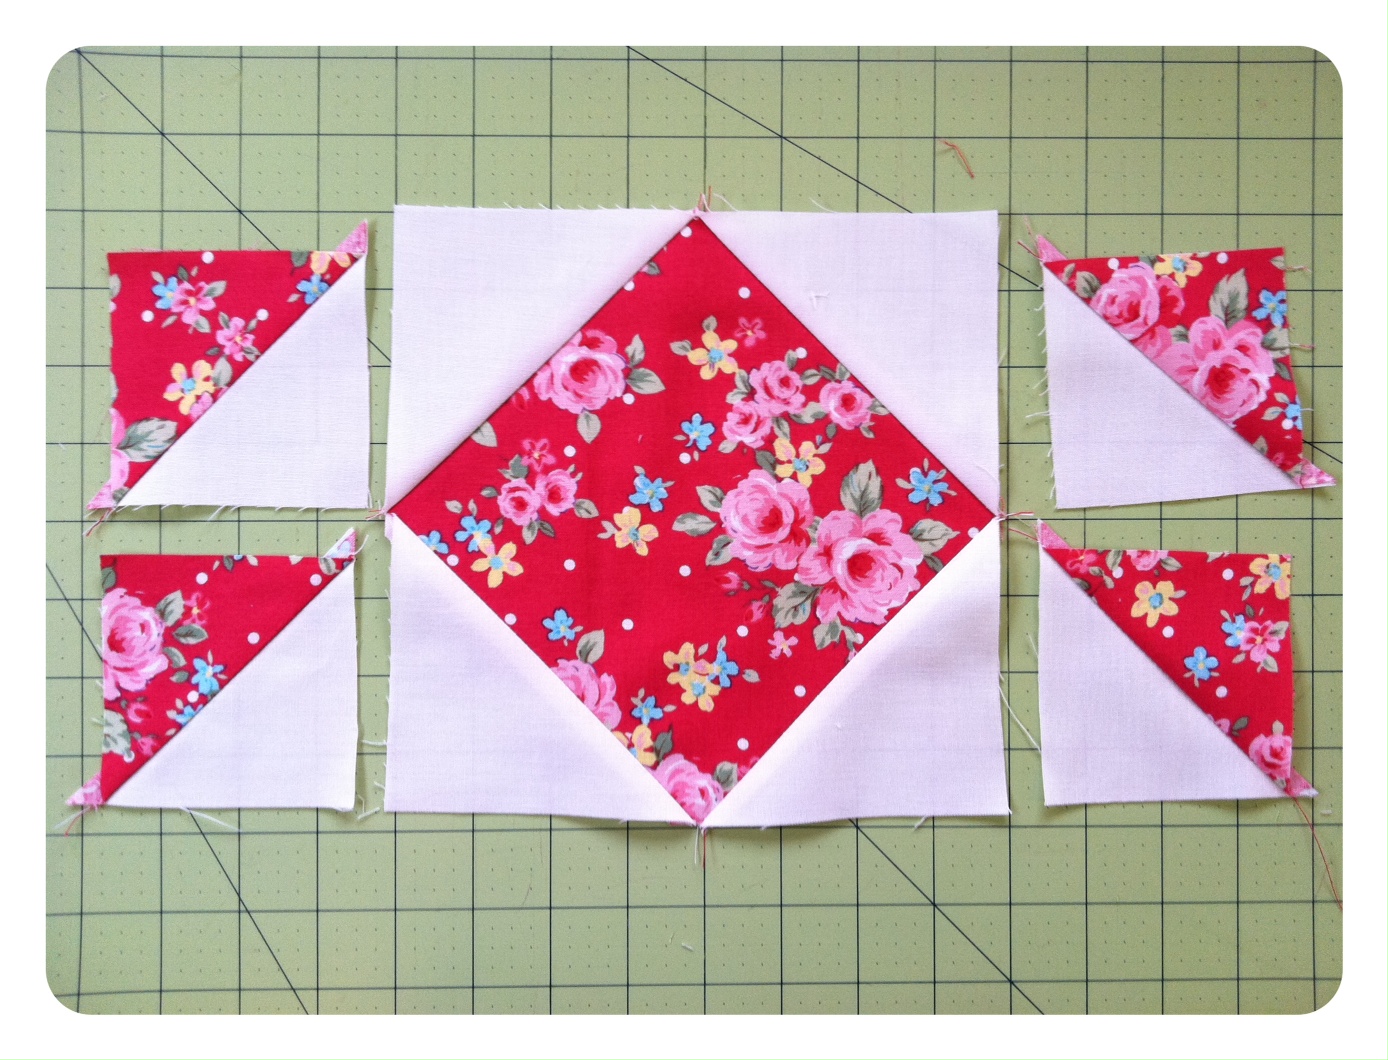
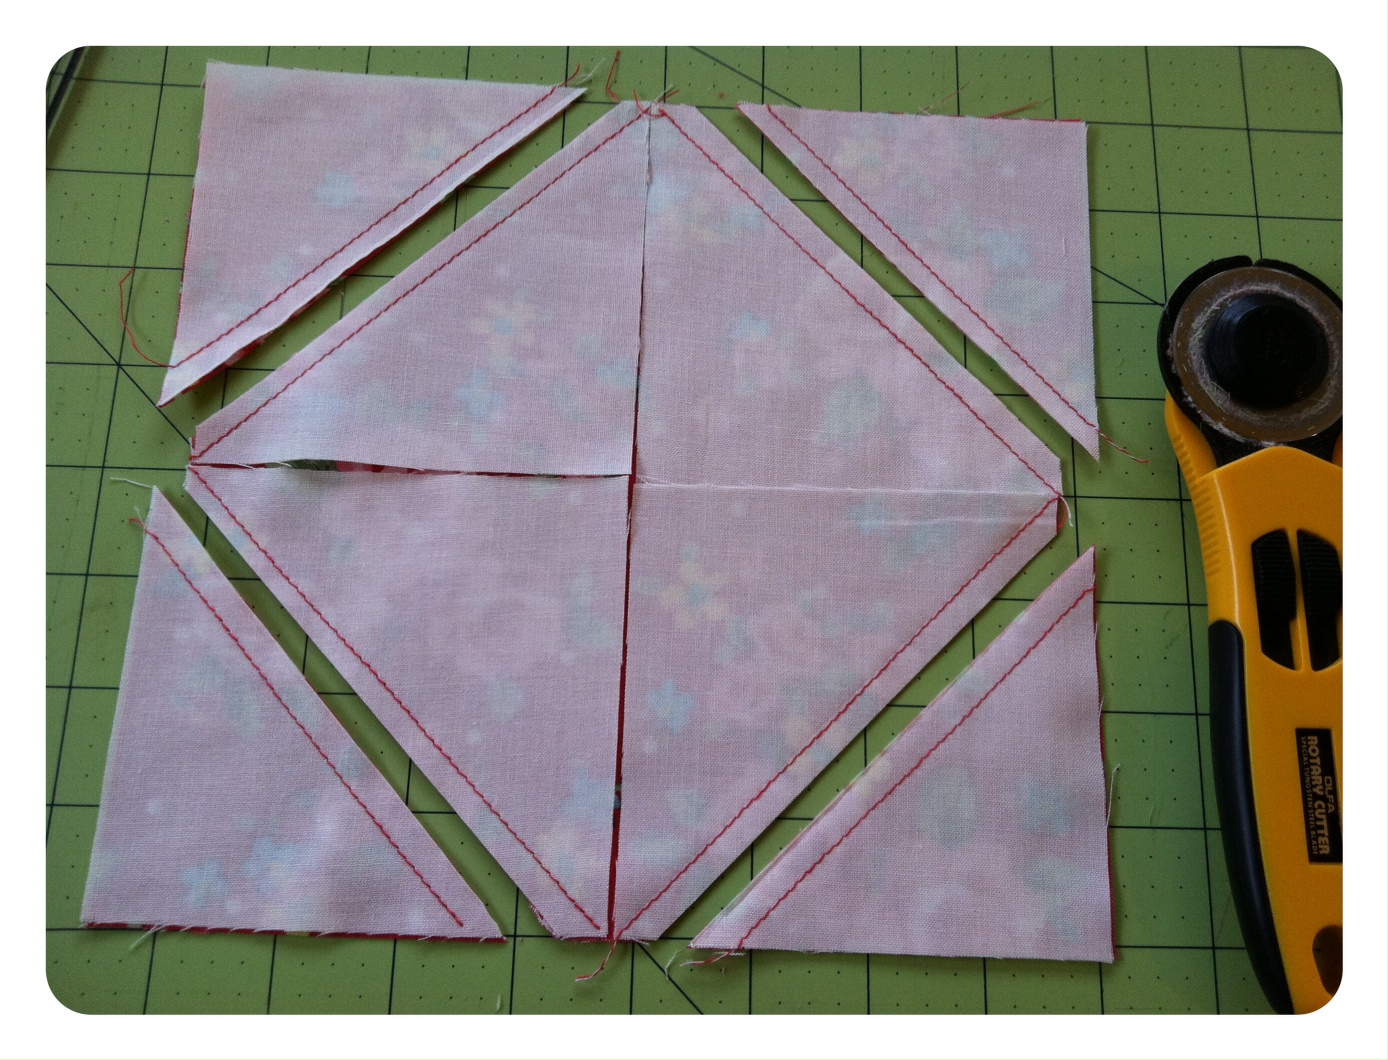 Step 8 – Press open with an iron, giving you five beautiful blocks! Note: the four half squares triangles will not be used for this tutorial, so you don’t have to press them open right now. I will be using them in my next tutorial (or you use them to create whatever you please!).
 Repeat steps 3 through 8 for all 46 8″ squares.
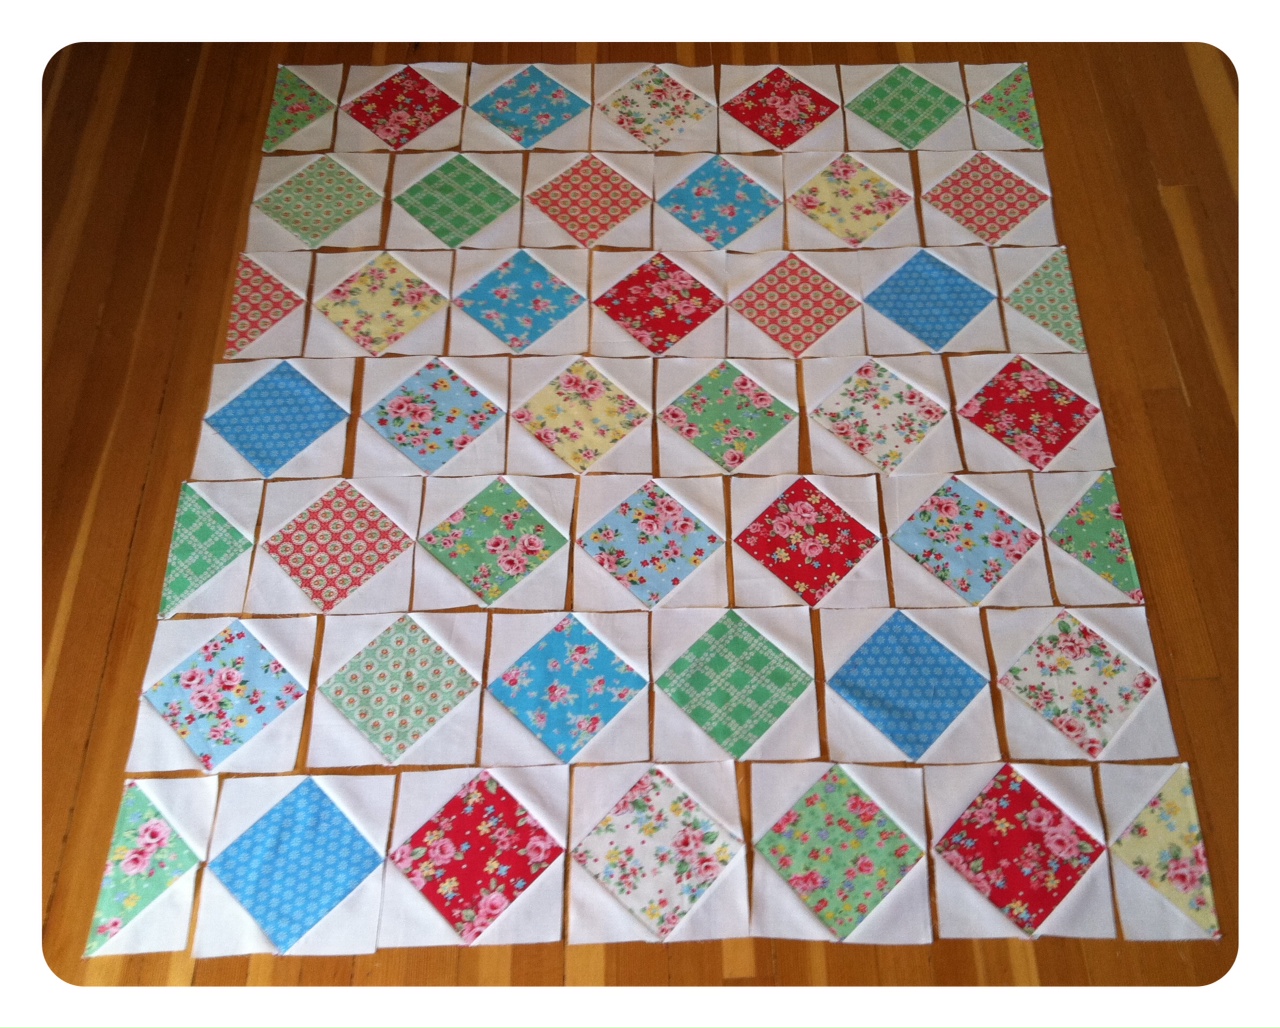
Step 9 – Take eight of the 46 blocks, and cut them so they measure 4.25″x8″. This will yield you eight end pieces.
 Step 10 – Arrange all 36 blocks and eight end pieces as shown below, with two end pieces in every other row. Sew all blocks together in each row, and then sew all seven rows together.
 That’s it! And if you happen to make this quilt, I’d love it if you shared it with everyone on the QuiltingInTheRain Facebook page!
Happy Quilting!


Comments: 39 | Leave a comment