 Recognize these fabrics? That’s because I used scraps from my latest quilt to make the above sachets. I love using every last bit! So I know I already have a lavender sachet tutorial, but I just love these simple and satisfying projects that make wonderful homemade gifts. Plus I’m really liking this ravioli design which I recently made pillow covers using the same idea. I made these sachets for a friend’s birthday and she loved them. How could you not love something that’s cute, fluffy and smells yummy year round?! :o)
Below is the tutorial in case you’re interested. Six simple steps…
Materials:
- Scrap fabric
- Coordinating thread
- Lavender buds
Step 1: Cut two 5.75″ squares. I used a thin, white muslin fabric for the back of the sachet.

Step 2: With right sides facing together, sew a 1/4″ seam around the perimeter; leave a 2.5″ opening as designated in red. Start and end your stitch with a back-stitch. Trim off the corners as shown below.

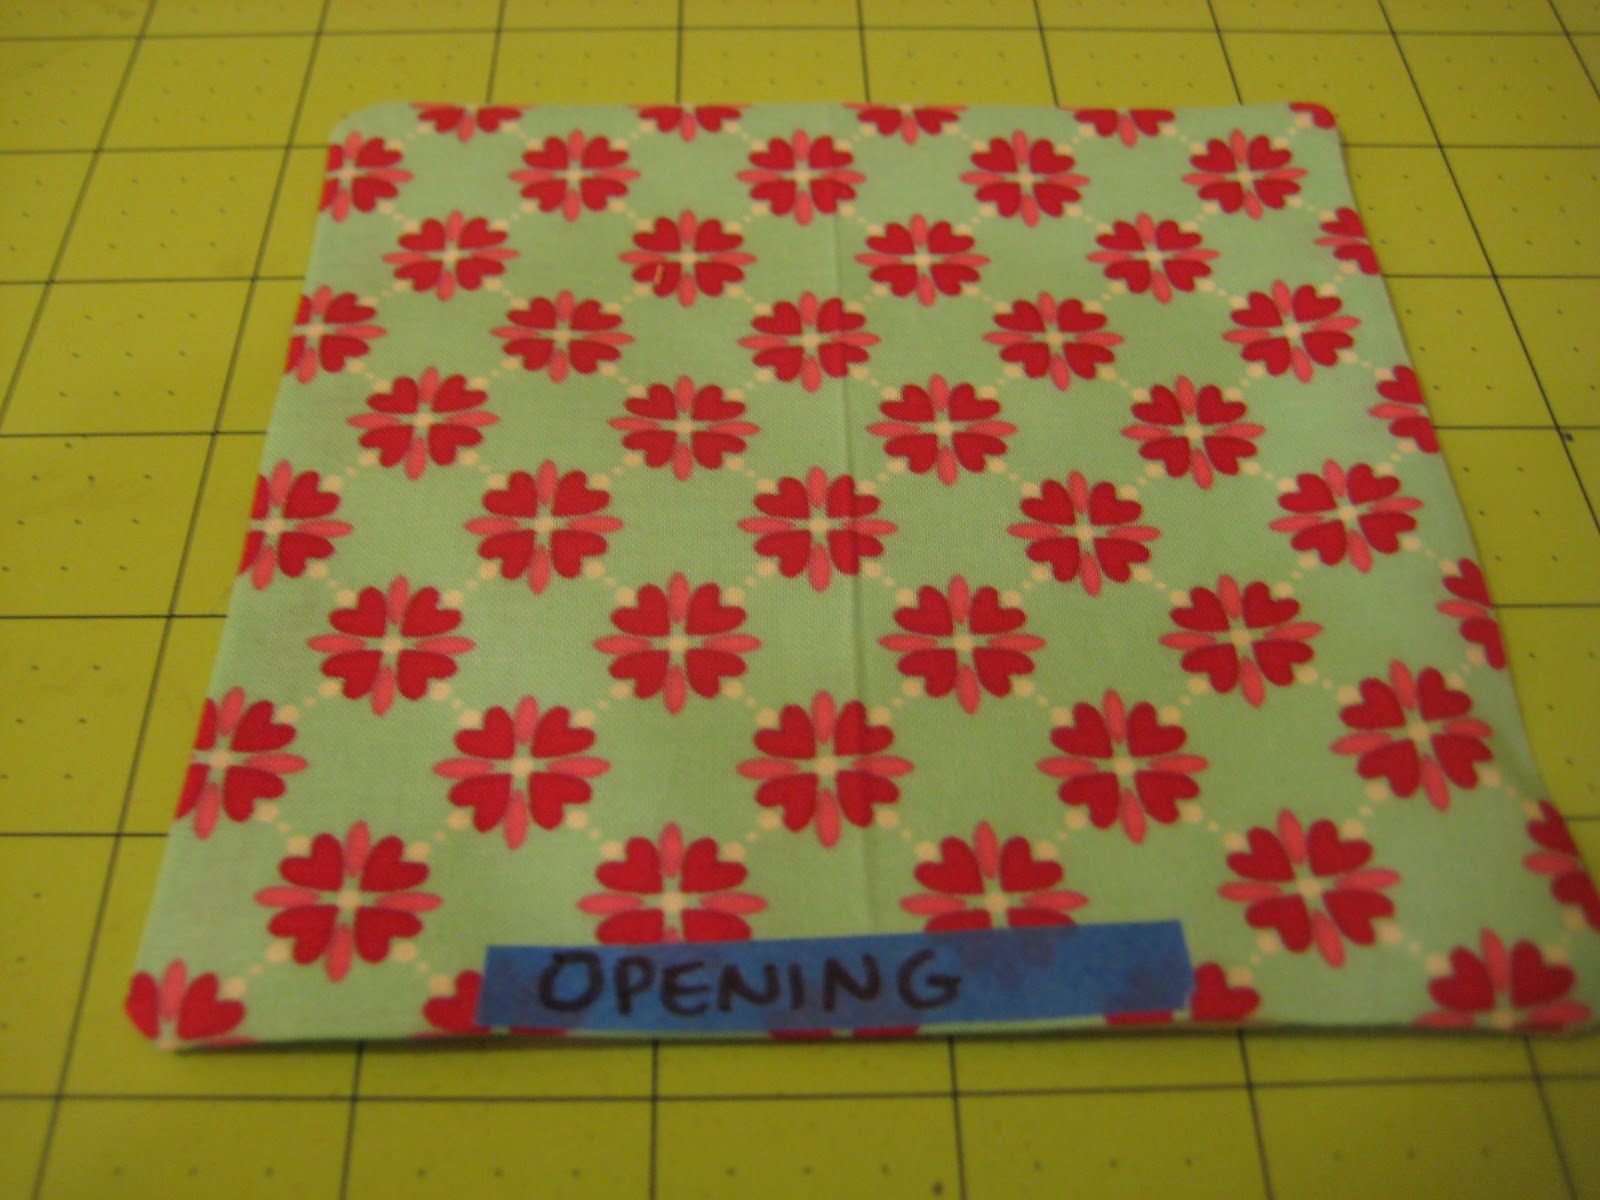
Step 3: Through the opening, turn right side out and then press flat with an iron. As shown below, mark with tape where the 2.5″ opening is.
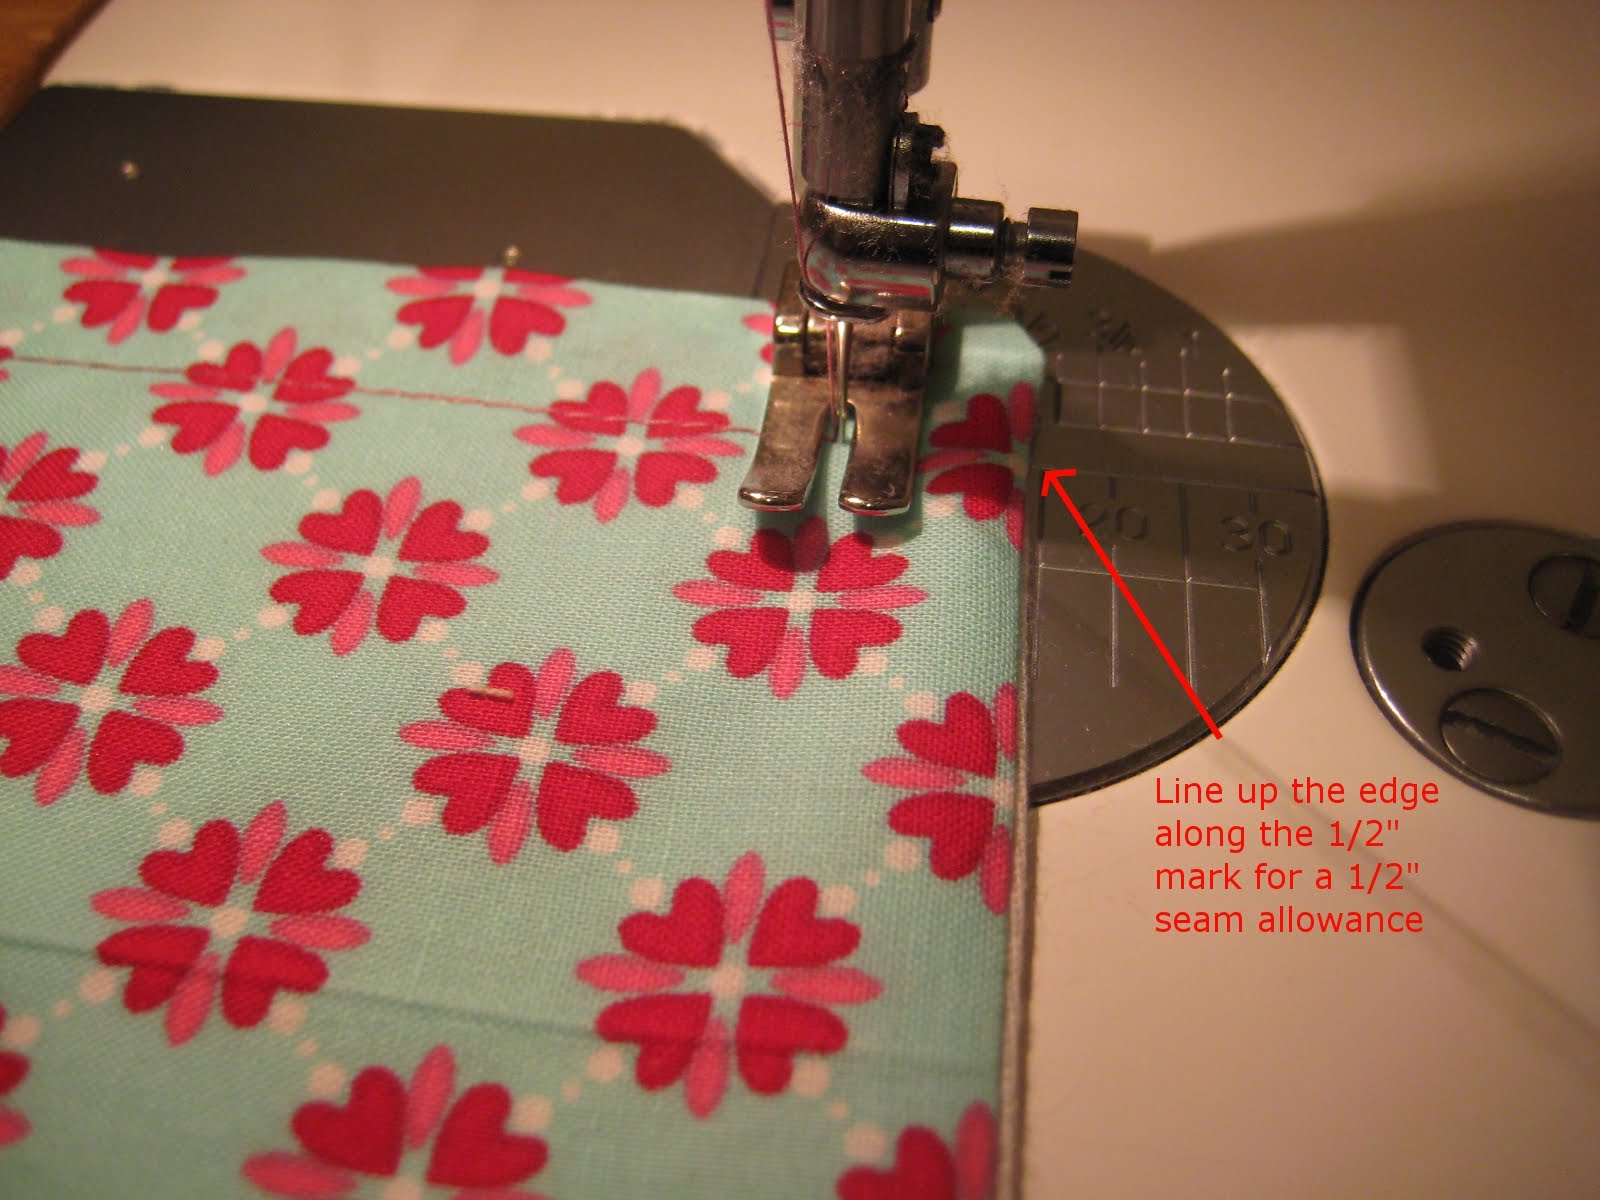
Step 4: Sew a 1/2″ seam allowance around the perimeter, except where the 2.5″ opening is. Use the tape as a guide for where to start your stitch, and where to end it.
Sewing a 1/2″ seam allowance around the corners can be a little tricky. You can either mark 1/2″ at all four corners as a guide. Or you can slow down your stitching speed as you approach the corners and eyeball where it looks like 1/2″; then simply lift the presser foot and rotate the sachet 90 degrees to see if it lines up at the 1/2″ marker on your sewing machine. If it doesn’t, simply rotate it back and sew a few more stitches until it lines up.
Step 5: Fill the sachet with lavender buds through the 2.5″ opening. I made a little scoop by folding card stock in half and using it as a scoop/funnel.

Step 6: Lastly, sew the 2.5″ opening closed. Start and end your stitch with a back-stitch. Optional: After you’ve sewn the opening closed so the buds don’t fall out, you can use fusible webbing to press the 1/2″ seam closed.
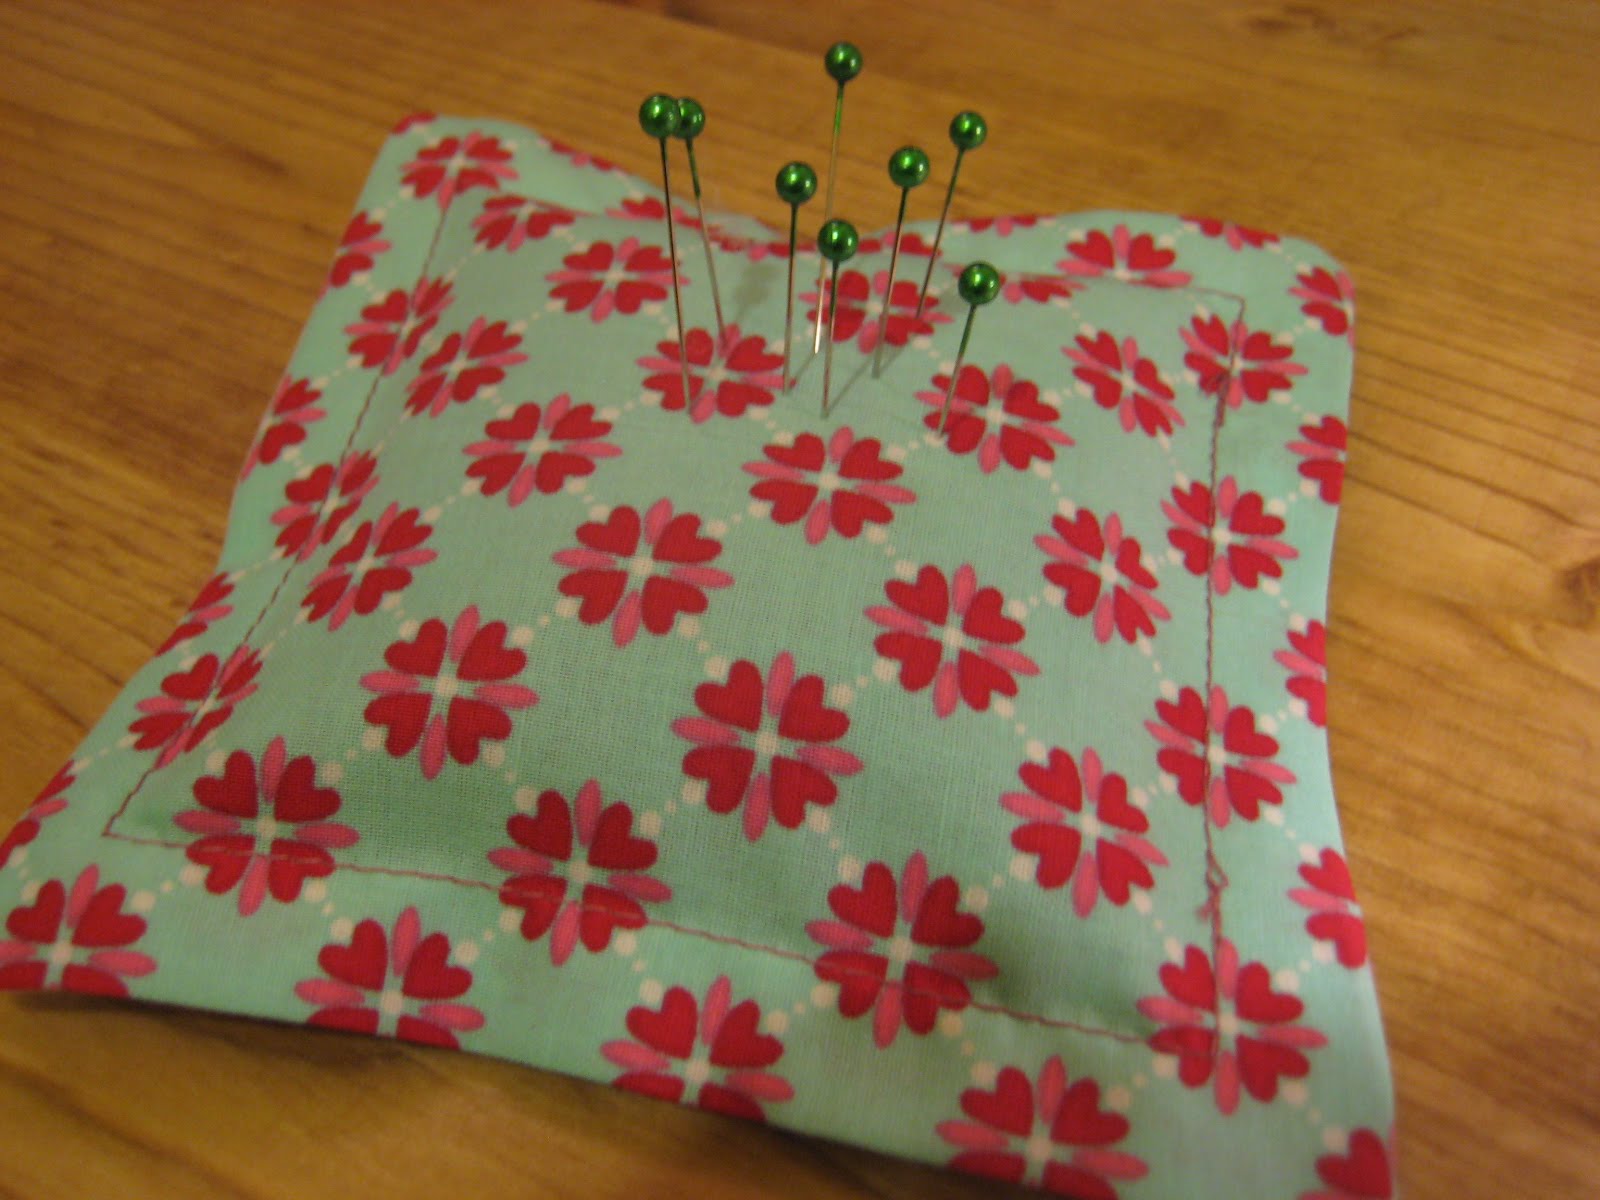
 I’ve noticed a sachet makes a pretty cute (and yummy smelling!) pin cushion too. It’s a nifty little way to get some daily aromatherapy. ;-p
 Thanks for stopping by! As always, happy sewing!
I love these sachets. Haven't made one in years. thanks for the inspiration I will whip one or more up this weekend!!
Great tutorial. thanks
Thanks, I am going to try these !
Very cute…I love the scent of lavender. Weekend project coming up! 🙂
Great blog!!!!!
thanks for sharing, I' follower now from Argentina
kisses for you
These are adorable! I wonder, however, instead of sewing the 'opening' closed – prior to sewing the two pieces together – sew two 2.5" pieces of Velcro to each side. Thus making it possible to replace the lavender buds.
I'm going to try it, for a friend's birthday, all I need now is to pick out some green fabrics and shamrock material, she's loves shamrocks . What a perfect quick gift!!!
Love them! I am going to make plenty for gifts.
Thank You
Great idea. Can also use pine needles for Christmas and cedar for woolens
Love these, making them now!!!! Thank you
Thanks ? Can’t wait to try this ? Helen in Redondo Beach, CA