Tag Archives | This and that

Latest project and 120″ quilting frame…

A few weeks ago I received my batch of Moda fabrics for my next Moda Bakery project! I will be using Moda’s new fabric line called “Bliss.” I just love the colors.

Here’s a sketch of my quilt design which uses Moda’s layer cakes and charm squares. I’m just about finished and plan on quilting it tonight, so stay tuned for the next tutorial shortly.

Speaking of quilting, last night my husband and I were up until midnight extending my Imperial Quilting Frame from crib size (60″) to King size (120″). I’m intimidated by my quilt frame now – it’s completely taken over our upstairs and what was left of my husband’s guitar corner is no more… :- [] i owe him!!

Here’s the final set-up with the layers rolled up and ready to quilt!

Comments: 2 | Leave a comment


Bachelorette Invitations

I absolutely love how these invitations turned out! I’m throwing my girlfriend a bachelorette party so I decided to use the patchwork fabric greeting card design for her invitations. But instead of using all fabric scraps, I threw in some lace and only did 1/2 the card.


Below are the supplies I used to make the cards. After printing the invite details on the right side of the card stock, I fussy-cut the fabric to ensure each card has a lingerie print on it, and then cut a strip of lace. (so cute!)

Anyway, really fun and easy project. To make your own, check out this tutorial. Oh, and what better way to end this post than sexy fireman with moustaches? ;p When shopping for the lingerie-print fabric, I came across this awesome novelty print. Designed by Alexander Henry Fabrics. Hmm…will probably make these guys into lingerie bags or lavender sachets 😉

Comments: 2 | Leave a comment


Upcoming Projects…and sweet Keylie

I just returned from vacation so I haven’t had a chance to make a post in a while. Here’s an update of what’s in the works: I have several tutorials lined up – i just need to post them. 🙂 The tutorials are how to free-motion quilt and stitch-in-the-ditch. Also, a super quick way to bind a quilt. Before posting another full-on quilt top tutorial, i’m planning to post a couple smaller quick and easy sewing projects. And before summer hits, I have a really cute pattern for a halter top dress. I’ve never been a garment girl, so that will be my first attempt. 🙂

I couldn’t end this post without showing off Keylie modeling some quilts i’ve made for my mom and step-dad. 🙂

In this picture: there’s a small quilt hanging on the wall, a small pillow that i made the case for, and obviously the quilt at the foot of the bed. And then of course there’s the beautiful fluff-ball in the middle, her name is Keylie (when pronouncing Keylie, think “keylime” pie). Keylie is my mom and step-dad’s dog. Keylie is also Paige’s arch enemy when Paige is feeling bi-polar. (Paige is 1 of 2 of my furry children).

Comments: 1 | Leave a comment


Converted Crafts Wardrobe

I’ve been a busy bee working on a quilting tutorial I hope to post soon. In the meantime, I thought I’d post this revamped wardrobe project that my husband and I worked on a month ago.

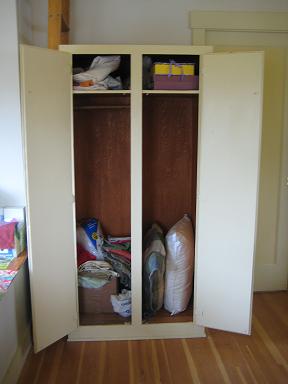
When we moved to our house there was a yellow-tinted wardrobe in our loft that the previous owners had left. For the longest time we used it to store junk and other misc. crap that we wanted out of site. After making a Goodwill run, we decided to convert it to a funky storage unit where I can store all my fabrics and quilting supplies.

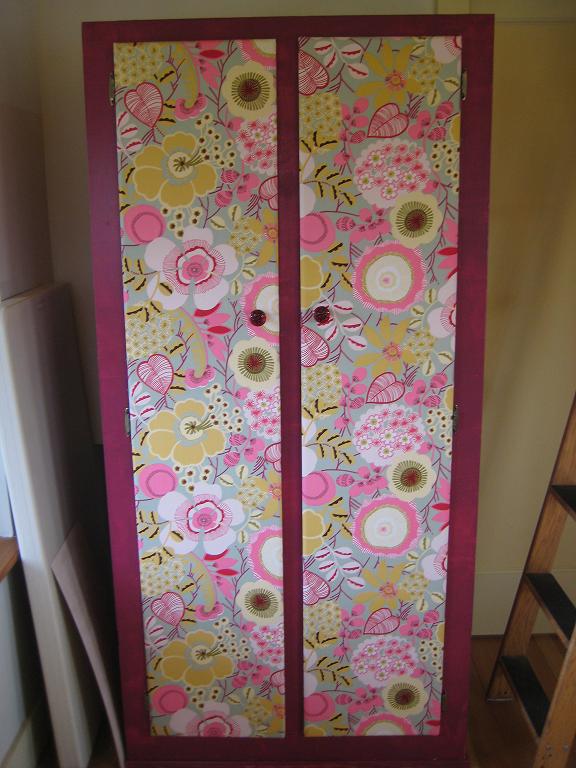
Below is a BEFORE and AFTER picture. 🙂

Converted Crafts Wardrobe - Quilting In The Rain Converted Crafts Wardrobe - Quilting In The Rain

How we did it:
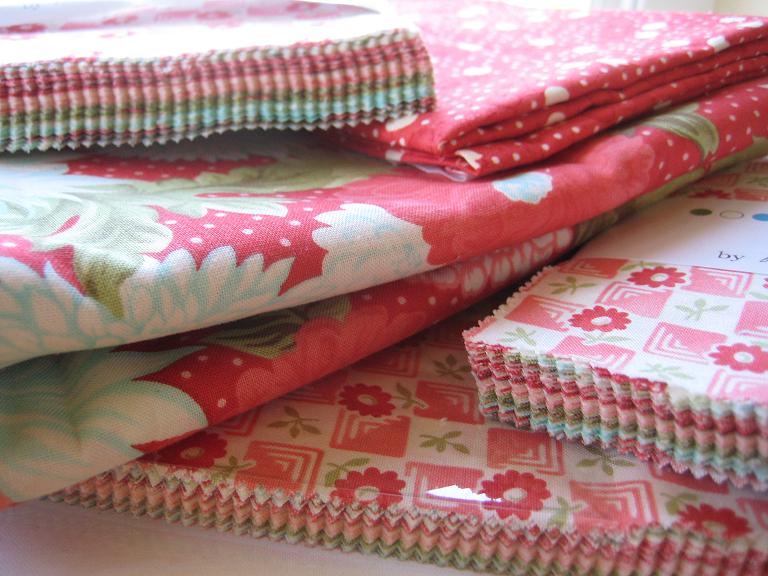
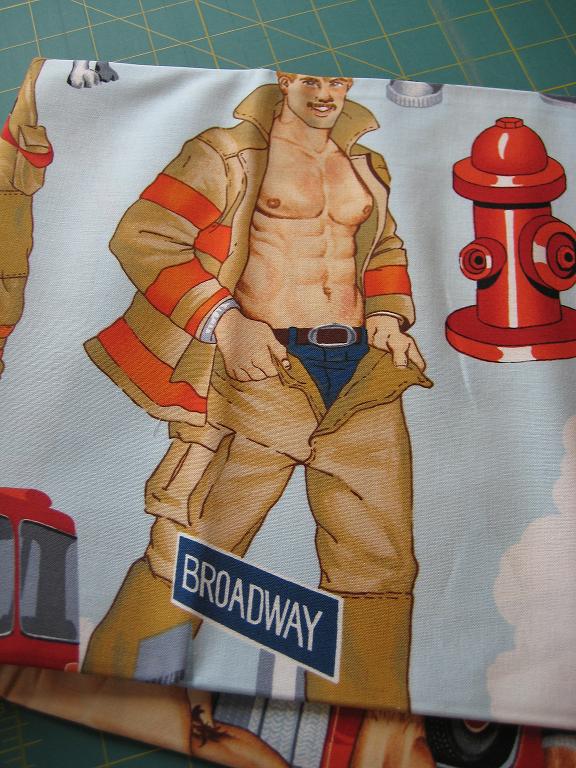
1. I started by finding a fabric print that really caught my eye and that would inspire my creativity. The print I chose is by Alexander Henry, I bought it from one of my favorite local quilt shops (the Quilting Loft) in Ballard. I only needed 2 yards to cover the doors.

2. I measured the doors and cut the fabric, adding an inch to each dimension to allow enough fabric to fold and nail to the inside of the door. I folded the extra inch of fabric in half around each dimension, pressing it with an iron to hold the fold in place. Then my husband used a brad-gun to upholster the fabric to the door.

3. Prior to hanging the upholstered doors, we painted the cabinet. I went to Lowes with a swatch of my chosen fabric to find a good match; the smallest can of paint was just enough to apply 2 coats.

4. My husband installed shelves inside the wardrobe for my fabrics and peg board on the inside of each door for hanging all of my quilting rulers and thread, as shown in the photos below.

Converted Crafts Wardrobe - Quilting In The Rain Converted Crafts Wardrobe - Quilting In The Rain

It was a simple and fun project that we did together. 🙂 And now when I open my crafts wardrobe I can easily see all of my supplies. Before I had fabrics stashed away in boxes that I had forgotten about, and my quilting rulers were starting to bend from being stored improperly.

Shown in the 1st picture below, my husband cut the shelves in a triangular shape for storing the ironing board . It’s nice having a place to hide it!

Converted Crafts Wardrobe - Quilting In The Rain Converted Crafts Wardrobe - Quilting In The Rain

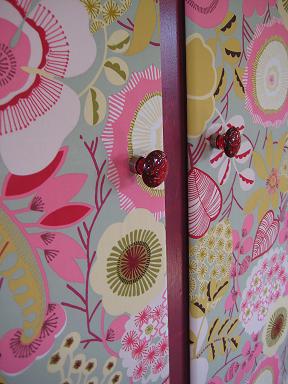
Check out the knobs on this baby! 😉 I ordered them from Home Depot; I never thought I’d be so excited to receive knobs in the mail. It was the finishing touch to this project AND unfortunately the most expensive piece 😐

Comments: 5 | Leave a comment


Site by Spunmonkey.