Now that I’m working on my book, I won’t be working at the Stitch and Sew Studio as much during open sew hours; however, I will still be teaching classes there on the weekends. 🙂 During my time there (almost 7 months!), I’ve met some really great people and made some wonderful friends. They’ve learned sewing tips and tricks from me, but I think I’ve learned the most from them! Here’s a super easy and fun invisible zipper tutorial that I learned from Teresa and Meg. Thanks gals! 😉
Keep in mind that there are many different ways to do this, and this method is a very simplified and practical way to do it. If it works, then I’m all for bending the rules! It’s funner that way anyway. Enjoy!
Materials:
- Fabric for the front and back of your pillow. the fabric will need to be 1 inch bigger than the pillow size. Example: To make a cover for a 21 x 21 inch pillow, you will need two 22 x 22 inch squares cut from your fabric.
- Zipper – should be at least 2 inches shorter than the finished pillow length. Example: If you’re sewing a cover for a 21 x 21 inch pillow, get a 19 inch long zipper.
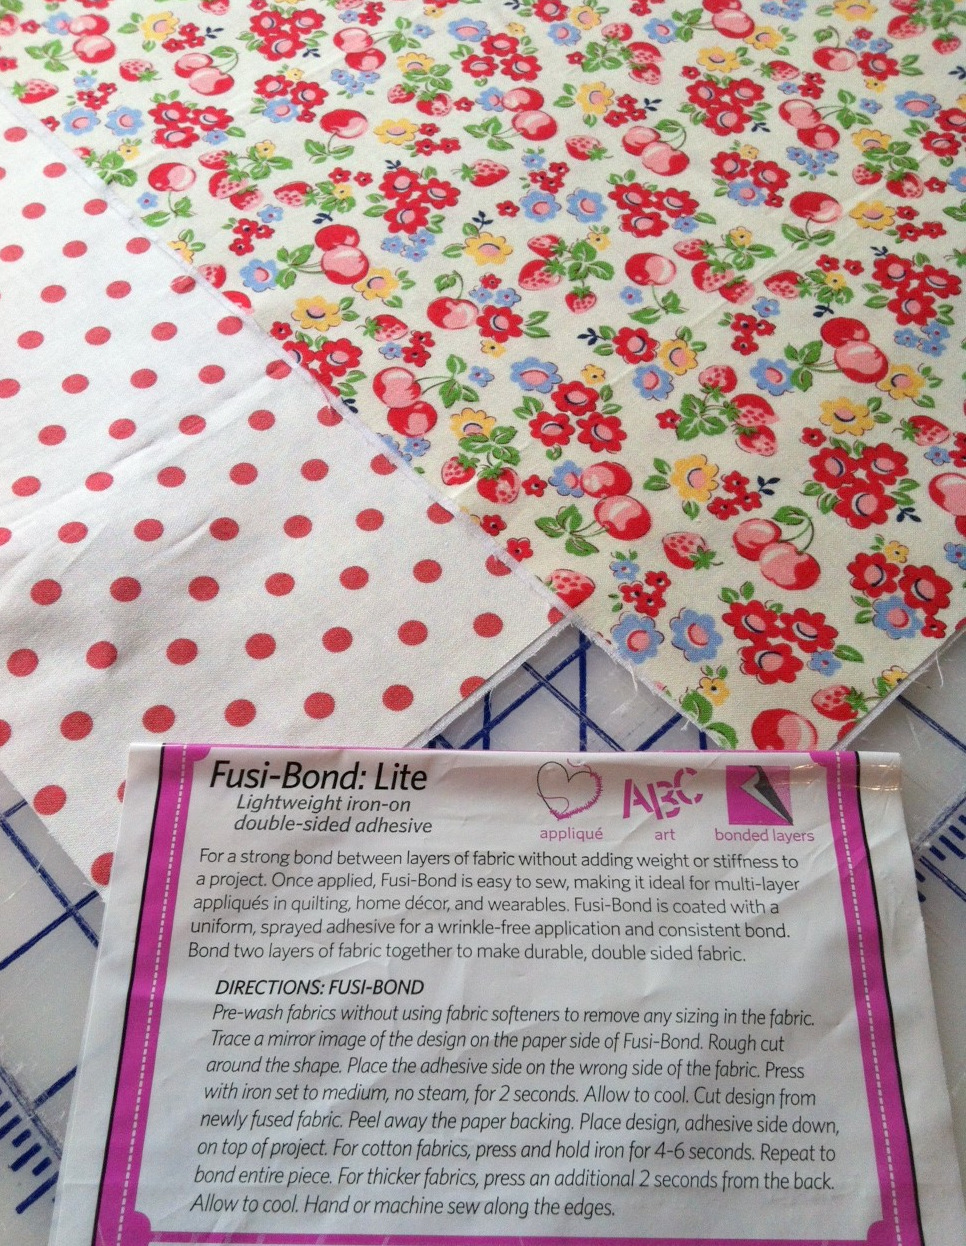
- Optional: Lightweight interfacing such as Fusi-Bond Lite. Iron this stuff on any quilting cotton weight fabric to achieve a home decorating weight fabric. (It’s like an iron-on muslin).
1. Prepare both sides of fabric for the front and back of the pillow. In this tutorial I made a pillow cover for a 14″ pillow, so I cut two 15″ squares from my fabric. I also ironed on lightweight interfacing to make my cotton fabric more of a home dec weight.
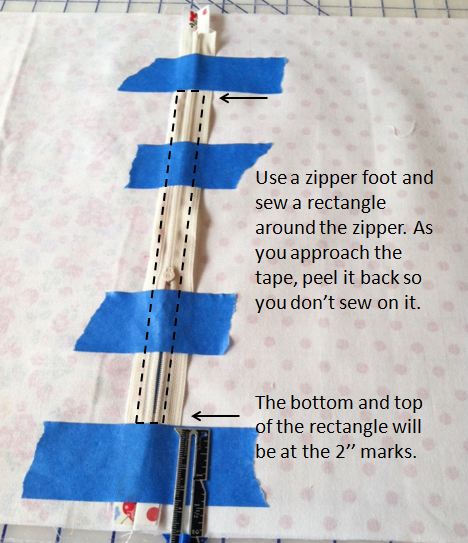
2. Take your prepared fabric, and align them with right sides facing together. Pin to keep the layers from shifting. On one edge, mark 2 inches from the top and bottom as shown below.

3. Along this edge, sew a 1/2 inch seam allowance. When doing so, use a regular stitch within the 2 inch markers, and then use the longest stitch length in the center (this is where the zipper will be). Make sure to back-stitch at the start and end, as well as before you begin a new stitch length.
Click to Enlarge.

4. Press the seam open with an iron. Take your zipper and unzip it half way. You can use a thin strip of tape to help keep the unzipped part closed.
.JPG)
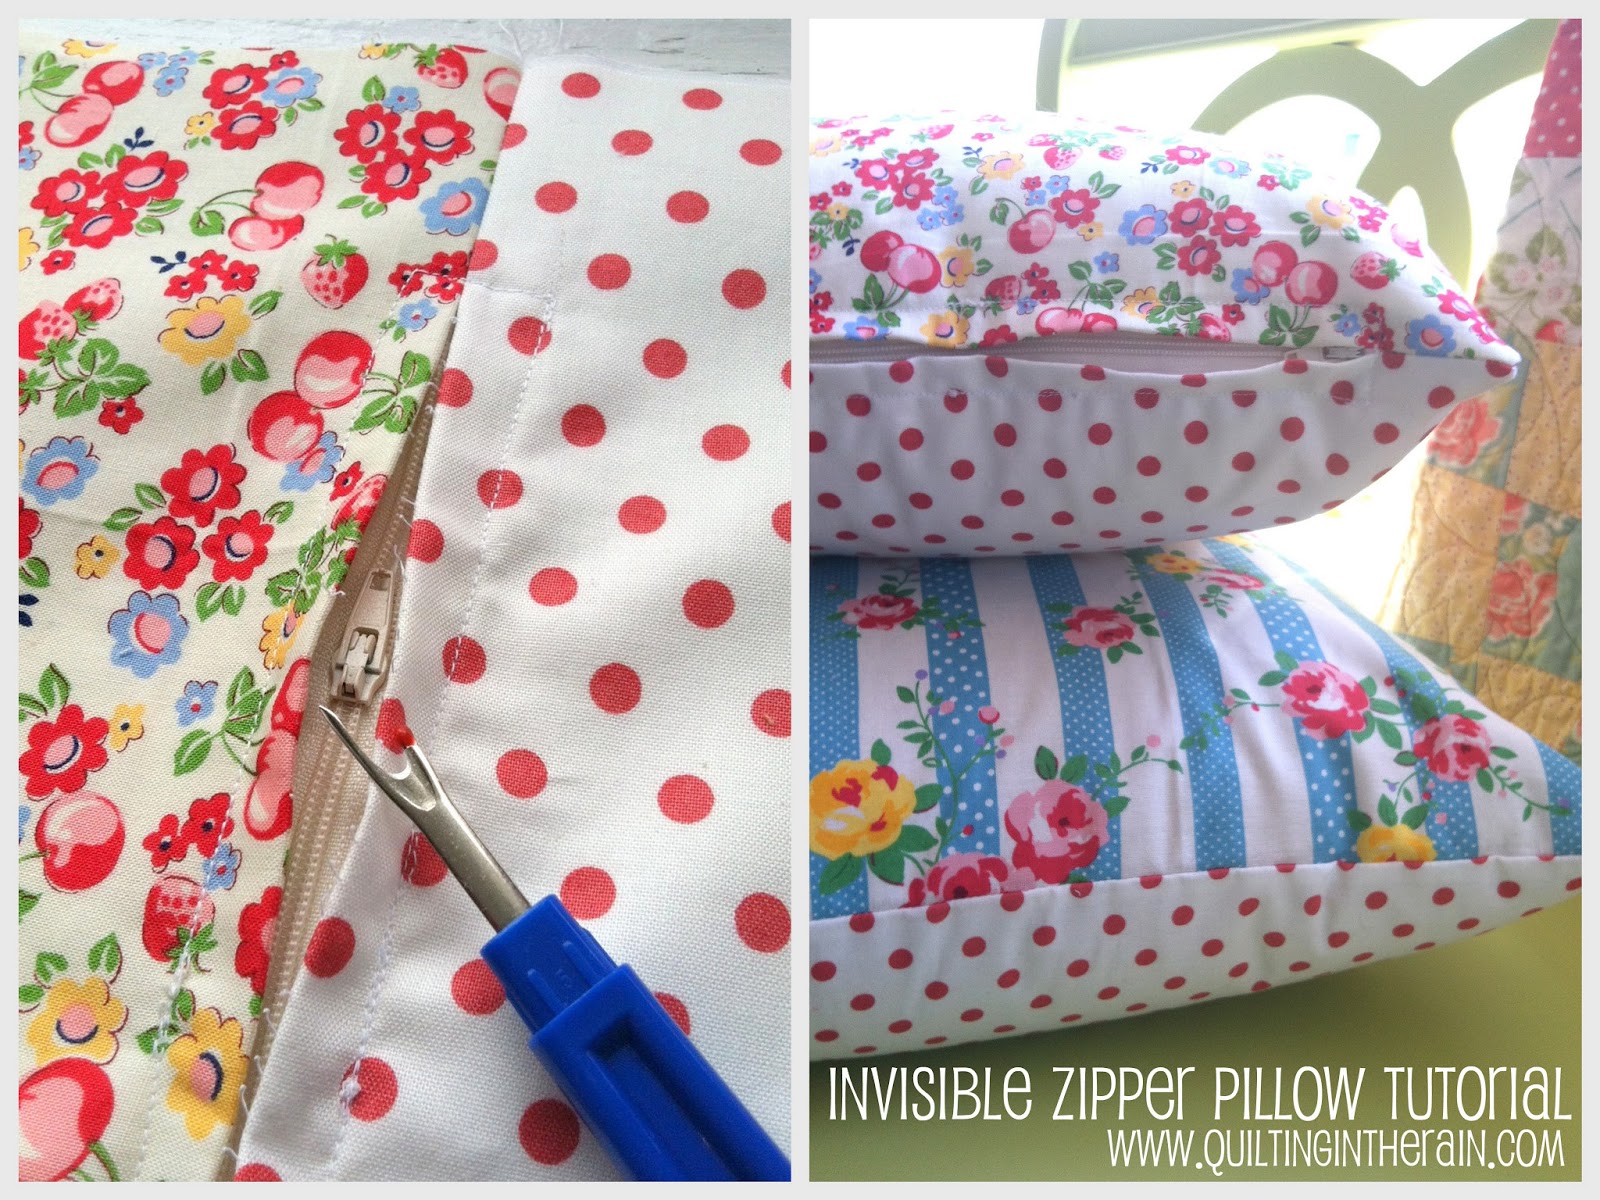
6. Here’s the satisfying part. 🙂 Flip the pillow cover right side up and use a seam ripper to tear open the long stitches you sewed from step 3. This will unveil your zipper.
.JPG)
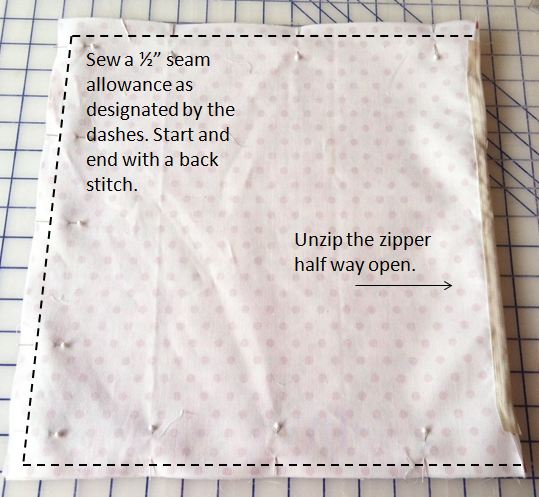
7. Next, make sure the zipper is at least half way unzipped and then align your fabric once again with right sides facing together. Pin to keep the fabric from shifting. Sew a 1/2 inch seam allowance around the perimeter (as designated by the dashes below) except where the zipper is. clip the corners to get rid of extra fabric bulk.
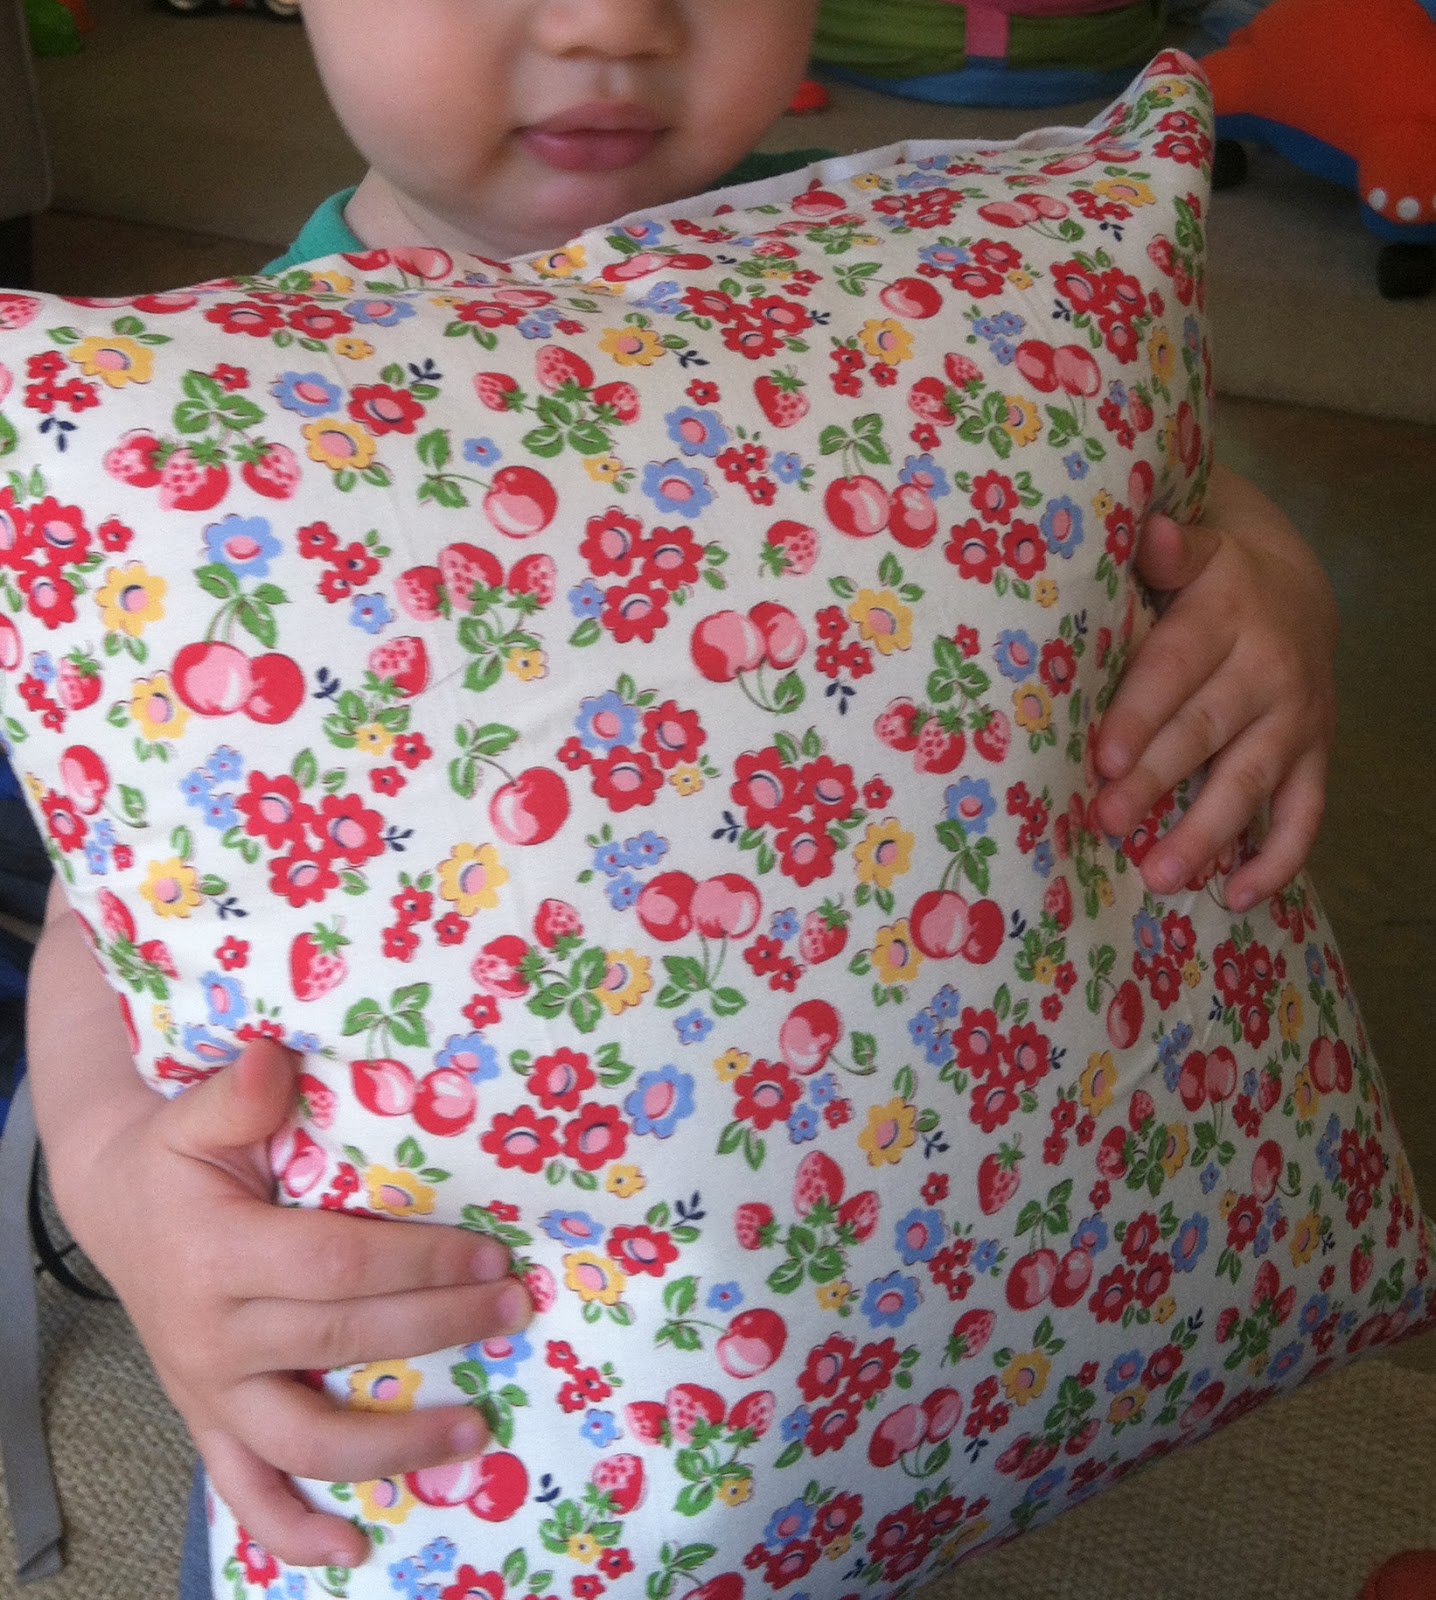
7. Turn the pillow cover right side out through the zipper opening. Last but not least, make lots and lots of beautiful, cozy, bright and cheery pillows!

Saving this for future use. I make a lot of pillows and now I can make them with hidden zippers. So much more stylish than the envelope styles I make most. Thanks so much!
Love the fabrics too! So retro.
This is exactly what I was looking for….! Thank you. I wanted this type of “invisible” zipper and you did a great job showing how to do it.
Спасибо!
oh! Thanks you! it´s a good tip! I love the flowers fabrics…
Oh this look easy…thanks for sharing the tutorial.
Love the fabric! Is it something recent (i.e. can I buy it anywhere?)
This is the best tutorial I have seen for a zippered pillow. Thank you so much!
sorry, but that is not an invisible zipper!
Your right, but it is a great way to sew in a zipper.
While this is a good tutorial on putting in a zipper, it is not an invisible zipper which uses a much different technique and is invisible in the seam.
Wow that is a GREAT tutorial! I love the directions and pictures. I've done this a different way – that worked well, but I'm still anxious to try your method. Thank you!
This may not be a truly invisible zipper, but, it is a very easy tutorial and a practical solution to placing zippers in cushions.
I always put zippers in my cushion covers and I very much like the way you have done yours. Thank you for sharing.
Thanks Jennifer! I enjoy figuring out how to simplify things because (in my opinion) when sewing becomes something where you have to always follow the rule book, it takes the fun away! If it works, then I'm all for breaking the rules 😉 Thanks for checking out the tutorial.
This is a great tutorial and easy to follow. I don't care if it's not text-book correct as long as it makes my life easier when installing zippers. Great job.
Ok gonna try this today, great tip using the blue tape, thanks for this great looking tutorial.
I now have 4 new cushions on my sofa, whipped up in no time, thank you for this amazing tutorial!
I have seen lots of good tutorials on this site. This is not one of them. Just plain old fashioned way of putting in a zipper without all that tape, temporarily stitching edges together & then having to undo all that mess. Sorry guys….this one stinks.
Let’s not be so nasty. This is one gal trying to help another. We should all be so generous with our gifts and our precious time.
Easy to criticise, but What are you contributing with?
Why don’t you publish something clever?
If there is anything stinking here is you.
Easy to follow tut! Thanks for sharing!
Man, this is the best pillow zip tutorial I've found! Thank you so much for sharing. I don't know what I would do ith out blogger like yourself that take the time to share with the rest of the online sewing community. I don't think y'all truly know how much you are appreciated….have a great day….blogger taught sewist
Bless you!!!
This is actually very similar to the way my home ec teacher taught us to put zippers in! It brings back happy memories and I love the concept of using it for a pillow edging. It's EXACTLY what I was hoping to find when I searched for a new zipper tutorial – innovative, easy and fun, with a beatiful tailored finish! Thanks so much!
I have done zippers this way for a very long time. Only I use scotch tape, it holds it in place just fine. This method is great it is not a true invisible. But great tutorial for someone learning. Then next is the placket zipper. LOL
Excellent tutorial, the clearest one I’ve seen. Thank you!
Can’t wait to try this! Thank you for sharing such an amazing tutorial. I am no longer zipperphobic!
I make my pillows using “snap tape” for the closure. They are a favorite of my grandkids and nieces and nephews.
I’m so happy to have come across your tutorial, it is the easiest and most detailed version I have seen! I love using the type to help hold the zipper in place. Thank you so much for sharing those!
Clever! Very clever!
Thanks for the memory refresher! I live in the interior of BC so not that far away from you! Happy Quilting. I would love to do quilt as you go for a large quilt but not sure how to put the quilted blocks together! I will check out your site. Donna