Archive | January, 2011

New year projects


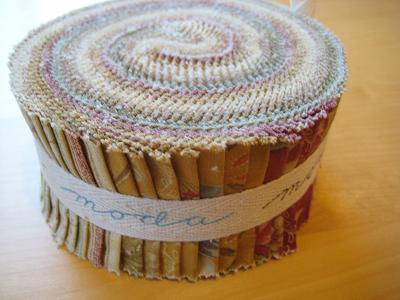
I’m just about finished with another Moda Bakeshop tutorial which uses the delicious Jelly Roll, shown below. The print I used is called ‘Wild Rose’ by Blackbird Designs. I will have the finished rug and tutorial up shortly so stay tuned!
Also, I plan on doing another fabric giveaway soon…I’ll probably keep it on the theme of jelly rolls. Check back for details!

A couple other new things… my husband and I got a new couch which means I need to populate it with new pillows. Therefore, I’ll be sewing some creative pillow shams in the near future. I also have some quilt projects lined up, as always. πŸ™‚ Hopefully I have more time to sew this new year! I apologize in advance if my tutorials have bad lighting. By the time I get home from work, it’s already dark!

Lastly, my husband is building me my very own custom sewing table! (eeeiiyeeeah!! x-)))

Comments: 4 | Leave a comment


Kindle Sleeve


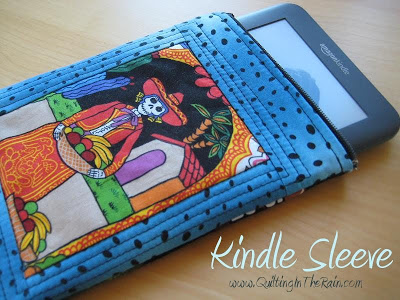
I got my husband a Kindle for Christmas and by special request I made him a ‘Kindle sleeve’ to keep it bundled up and safe from scratches. πŸ™‚ It was a fun and quick project. The longest part was figuring out the measurements, but since I’ve already done that you don’t need to! 6 easy steps below. Enjoy!

Materials:

  • Scrap fabric and batting (measurements are in step 1)
  • Zipper (at least 8″ long)

Step 1 – Cut the following from your fabrics and batting:

  • Backing fabric (this will be the inside lining of the sleeve; I used a thin felt fabric) – two 6.25” x 8.5” rectangles
  • Batting – two 6.25” x 8.5” rectangles
  • Top fabric – two 6.25” x 9” rectangles (the top fabric needs to be ½” longer than the backing and batting).


For one side of the top fabric, I pieced together scrap fabrics and then trimmed the final piece to measure 6.25” x 9” as specified above.


Step 2 –Make two quilt sandwiches: Sandwich the batting in between the backing fabric and top fabric; the wrong sides of the backing and top fabric should be facing the batting. Quilt the two sandwiches however you like (I quilted zig-zags for the beer print, and echoed the dia de los muertos print).

Step 3 – Iron over the extra ½” of top fabric as shown below.

Step 4 – Attach the zipper. As illustrated below, make sure there is ¼” of space between the edge of the fabric and the start of the zipper (click image to enlarge).

Sew along the zipper (align the side of your presser foot with the edge of the zipper to sew a ¼” seam).


Step 5 – Repeat the previous step, but on the other side of the zipper.

It should look like this when you’re done attaching the zipper.

Step 6 – Flip the two quilted panels together so that the right sides are facing each other. As shown below, sew a ¼” seam around the perimeter of the quilt (except for where the zipper is). Start and end your stitch with several backstitches to secure the ends of the zipper in place. Before sewing around the perimeter, make sure the zipper is at least ΒΎ of the way un-zipped.

Lastly, trim off any extra fabric along the edge and corners (but outside of the ¼” seam allowance) to prevent unnecessary bulges. Trim off the extra zipper as well.

Turn right side out and you’re done!

Comments: 8 | Leave a comment


Site by Spunmonkey.