Tag Archives | Fabric Giveaways

Home Sweet Home Quilt Tutorial

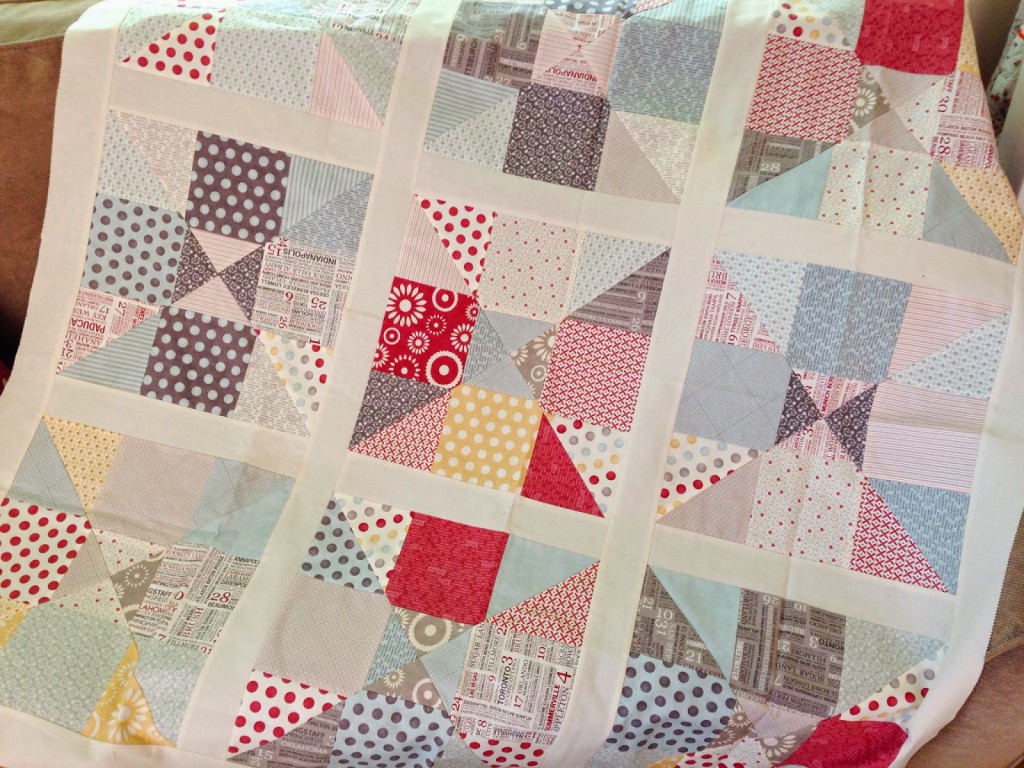
 I finally got this tutorial up! Thank you ALL so much for your fabulous quilt name suggestions. I love picking your crafty brains 😉 It was a tough choice, but I decided to go with Home Sweet Home (thank you Anna from Switzerland for the idea!). If you’re familiar with my tutorials, you’ll know that I love simple and quick quilts that require little to none fussy measurements. Well, this is one of them! In fact, this quilt practically requires no measuring! That’s the beauty of pre-cut fabrics – you can whip up a quilt top over a weekend. Check out my tutorial below 🙂

A printer-friendly version can be found HERE.

Materials for a 47″ x 47″ quilt:

  • 2 charm packs (or 81 pre-cut 5″ squares)
  • Ten neutral colored Jelly Roll strips (or 3/4 yard neutral colored fabric; from this, cut ten 2.5″ x 42/44″).
  • 5/8 yards binding fabric
  • 3 yards backing fabric

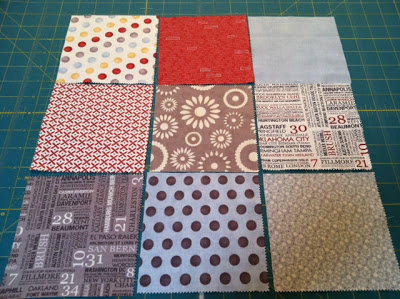
Step 1 – Choose 9 charm squares (or pre-cut 5 inch squares) and make a 9 patch block by sewing 3 rows together with 3 blocks per row.
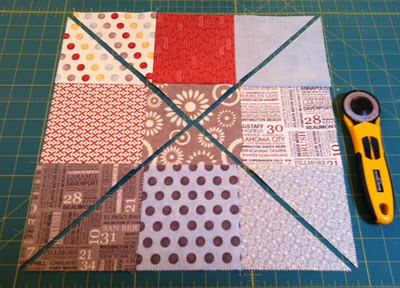
Step 2 – Using a rotary cutter and ruler, cut 2 diagonal lines from corner to corner as shown below.
Step 3 – Repeat steps 1 and 2 to make a total of 3 nine patch blocks. Cut diagonal lines from corner to corner for all 3 blocks. This will give you a total of 12 triangle pieces.
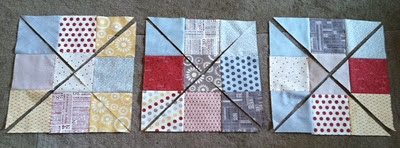
Step 4 – Here’s the fun part! Rearrange all 12 pieces to your liking.
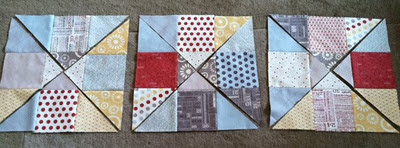
Step 5 – Then sew the rearranged pieces back together as shown below. This will give you a block that measures roughly 13.3″ x 13.3″. Repeat until you have a total of 9 finished blocks.


Step 6 – Take three jelly roll strips (or three 2.5″ x 42/44″ long strips), and then sub-cut each strip into three 2.5″ x 13.5″ strips. This will give you a total of six 2.5″ x 13.5″ strips. With right sides facing together, sew a strip to the side of a finished block, press flat with an iron and then trim the excess ends (since your finished block measures 13.3 inches, this is simpler then trying to measure 13.3 inch long strips).
Sew the remaining strips to create sashing between the blocks that looks like this:

Step 7 – Use two more jelly roll strips (or two 2.5″ x 42/44″ strips) for the middle sashing. with right sides facing together, sew the first row of blocks to the sashing, then press flat with an iron. Repeat until all three rows of blocks are connected by the two sashing strips. Trim the excess ends.

Step 8 – Use two more jelly roll strips (or two 2.5″ x 42/44″ strips) for the top and bottom borders. After sewing them on, trim the excess ends. Lastly, sew the left and right side borders on. Each side will measure roughly 47″ long, so you will need to sew some jelly roll strips together to get two 2.5″ x 47″ long strips. I simply sewed three jelly roll strips together (or three 2.5″ x 42/44″ strips) from end to end and then cut that in half. After sewing them onto the sides of the quilt top, trim the excess fabric.
That’s all there is to it! Like I said, it’s a non-fussy cut quilt and fast to piece together. Here’s a picture of my quilting buddy, Bodie, that I thought I’d sneak in. He was ready for a walk in this photo. 🙂
Happy Quilting! And if you make this quilt, don’t forget to share it on Quilting In The Rain’s Facebook page for all to see!

Comments: 46 | Leave a comment


Jelly Roll Giveaway!

Hi All! My Rainy Days quilt tutorial is being featured on Sew We Quilt @ Stash Manicure today, August 15th. Click the link below to check it out, and for a chance to win TWO jelly rolls! Sweet deal!

On a different note, I’m off to a slow start on my latest bakeshop tutorial, but at least I’ve started! I wanted to share some photos of my little helpers keeping me company while i quilt. Putting together a tut requires a lot of photos…though Bodie and Paige started encroaching on my photos, they “started” out as perfect little models…

Here are before pictures…(Paige on the left, Bodie on the right)
Bodie was content, but Paige got restless…
…and here are after pics :-p I left the room for one minute to find Paige rolling around in my patchwork.

Their way of of telling me they were ready for a walk. 😉 Anyway, I hope to wrap this tutorial up in the next week or so, so stay tuned. Thanks for stopping by!

Happy Quilting!

Comments: 58 | Leave a comment


Jelly Roll Giveaway!

This giveaway has ended. The winner will be posted on Tuesday as I am under the weather today. Happy Quilting 🙂
-Jera

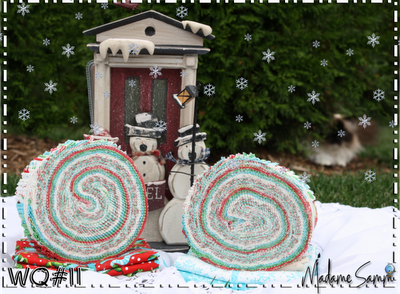
In celebration of my latest Moda Bake Shop tutorial called Summer Love (check it out here), I wanted to host this jelly roll giveaway! I’ve had a good three weeks to admire this yummy roll and am ready to have someone make something fabulous with it (like perhaps my Summer Love quilt ;)! This is new collection called Terrain by Kate Spain. This is an extra special giveaway as this collection won’t be available in stores until September, but if you win it you’ll get the latest Moda line!

For a chance to win this jelly roll, please participate in the following:

  1. Leave a comment to this post and tell me how long you’ve been quilting/sewing. And make sure you leave a way for me to contact you! 🙂
  2. If you like what Quilting In The Rain is all about, you can ‘Like’ me on Facebook (link on the right) for updates on my latest tutorials!

This giveaway will end on Sunday. I will contact the winner and mail the jelly roll to you – and yes, I will ship international!

Thanks for stopping by! Happy Quilting!


Spring Giveaway Winner!

Hi all! I apologize for the delay in posting the winner. As some of you may already know, Blogger was having issues for the last 24 hours where people’s comments were lost, and I was unable to make any posts. I did the best I could to recover comments by looking at both my gmail inbox and blogger’s comments, and then counted down the winner using a random number generator.

The winner for my Spring Layer Cake giveaway is Debbie S. (comment #16)! I will contact you via email, so please reply and let me know your shipping address.

Thank you for all that participated in this fun fabric freebie! Stay tuned for more future freebies. As you all know, I love love LOVE fabric, and enjoy giving it away in the hopes that it will inspire others to create something beautiful!

Happy quilting!

Comments: 2 | Leave a comment


MBS Tutorial and a Giveaway!!!

As a celebration of my latest Moda Bakeshop (MBS) tutorial called Strawberry Fields Forever! (I’d love it if you left me a comment if you feel so inclined), I wanted to host this Layer Cake giveaway as my tutorial requires only one layer cake to make the quilt top.

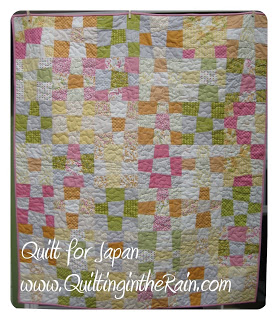
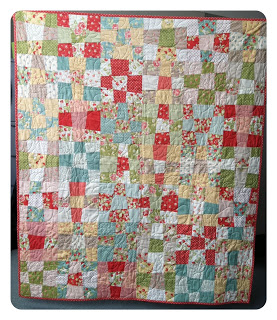
For those of you that frequent my blog, you may recognize this quilt as I’ve already made two using this pattern: my Quilt for Japan using the Sunkissed collection, and of course, Strawberry Fields Forever (original post found here). Make one yourself using your favorite collection by checking out my MBS tutorial!

Anyway, onto the good stuff… To enter to win the Layer Cake, simply answer the following question via a comment to this post:

What are your favorite kind of patterns (e.g. intricate quilt patterns, garments, accessories, patterns using pre-cuts, etc.)? I really love this craft, and am genuinely interested in knowing what you all like to sew. 🙂

And just as a side note, if you like sewing tutorials and if you’re addicted to fabric, I urge you to ‘Like’ me on Facebook (by clicking the button below). See how convenient I’ve made it for you?! And/or if it’s more convenient to follow me on blogger, there is a ‘Follow’ button to the right.

That’s it! I will draw your name using a random number generator so be sure to leave some way for me to email you. I will post the winner next Friday. And yes, I will ship international!

Happy Friday!

Site by Spunmonkey.