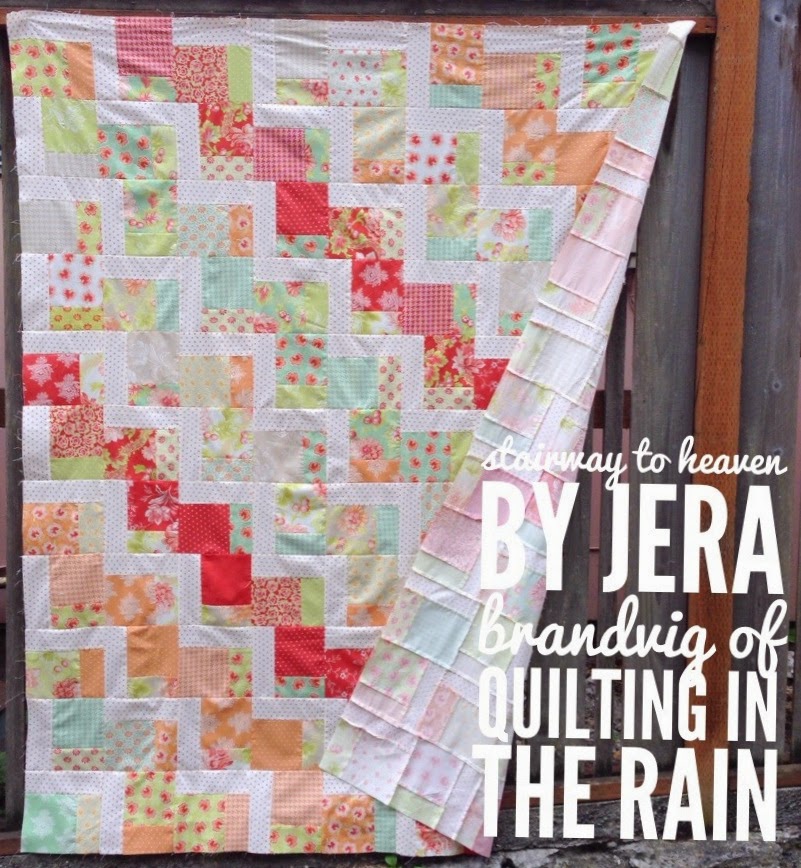
Hi All! In case you missed it, my Stairway to Heaven quilt was featured over on Moda Bakeshop last week. You can find a printable version of it HERE, or simply scroll down. Also, major props to @auntiePami over on Instagram for coming up with the awesome quilt name – thanks again! 😉
This is a super simple quilt that’s great for a beginner or anyone that
wants a fast and fun project, as this pattern uses a quick cutting
shortcut shown below. Your quilt will be done in no time!
Unfortunately I wasn’t able to actually quilt and bind this in time for my MBS blog post so check back if you want to see the finished quilt.
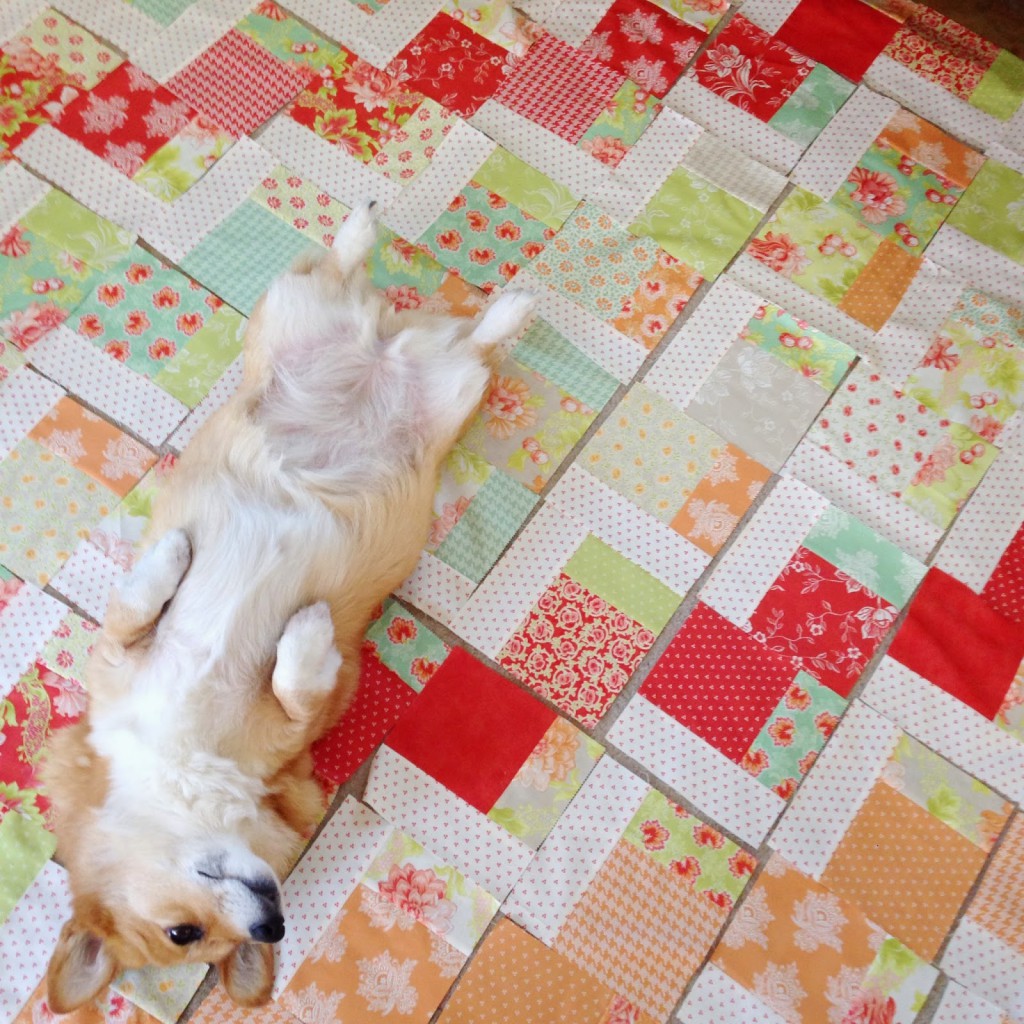
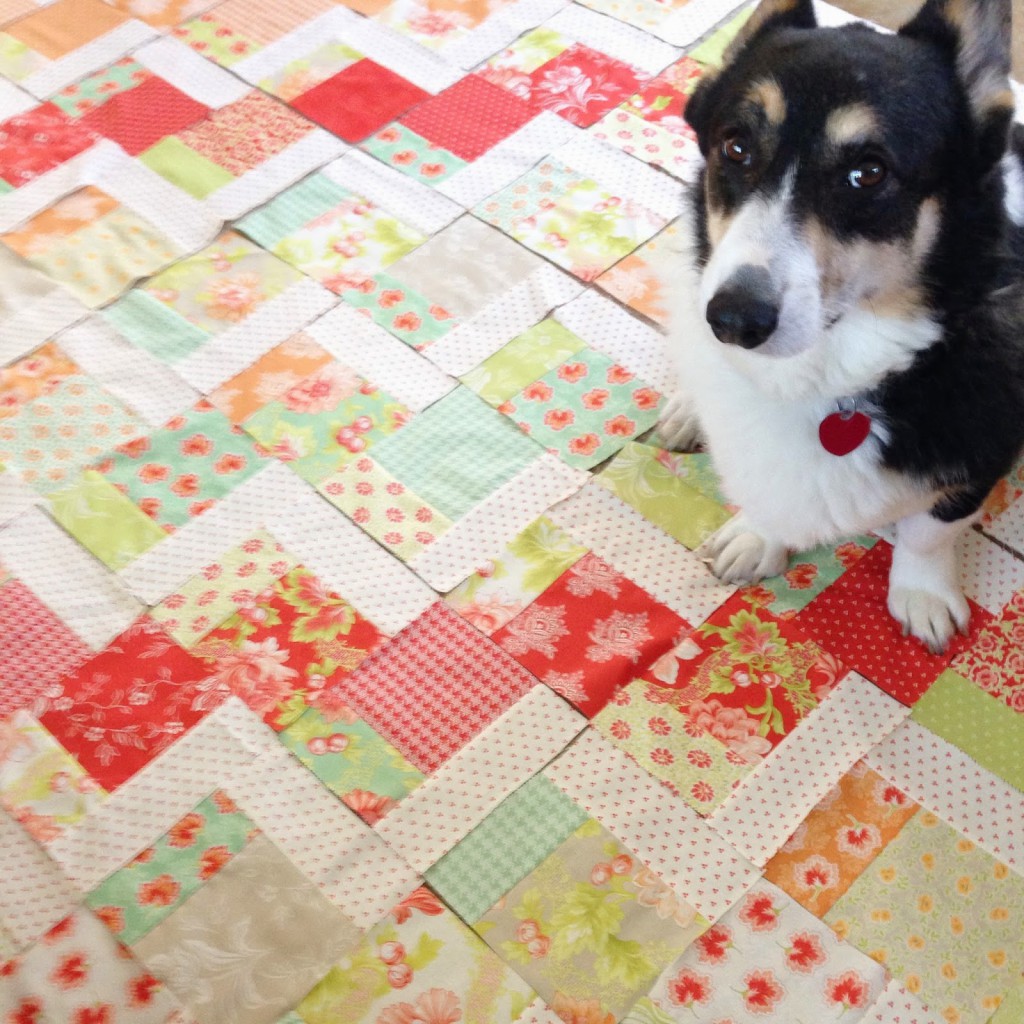
Before I begin, here are some pretty pictures of the quilt top with my child and furry children. 🙂 Thanks so much for stopping by and enjoy the tutorial!

My quilting buddy Paige (below) does her signature roll and says “hello!”
And Bodie (a bit unsure of himself, and still terrified of my sewing machine) is wondering if he’s posing correctly like Paige always does. ;-p He’s a sweetheart!
This makes a ~72″x60″ quilt.
Materials
- 1 Layer Cake (you will need 25 of the 42 squares)
- *1 Jelly Roll (you will only need 15 of the 42 strips)
- 1 1/8 yard of solid
- 1/2 yard binding
- 3 1/2 yards backing
*Alternatively, you can cut your own strips from five different 1/4 yard cuts (cut three 2.5″ strips along the WOF from each quarter yard for a total of 15 strips)
Instructions:
Before you begin, please note that “assemble” refers to sewing your pieces together (with right sides facing together, sew a 1/4″ SA and then press open with an iron.
Step 1: Cut the 1 1/8 yard solid fabric into sixteen 2.5″ strips along the WOF.
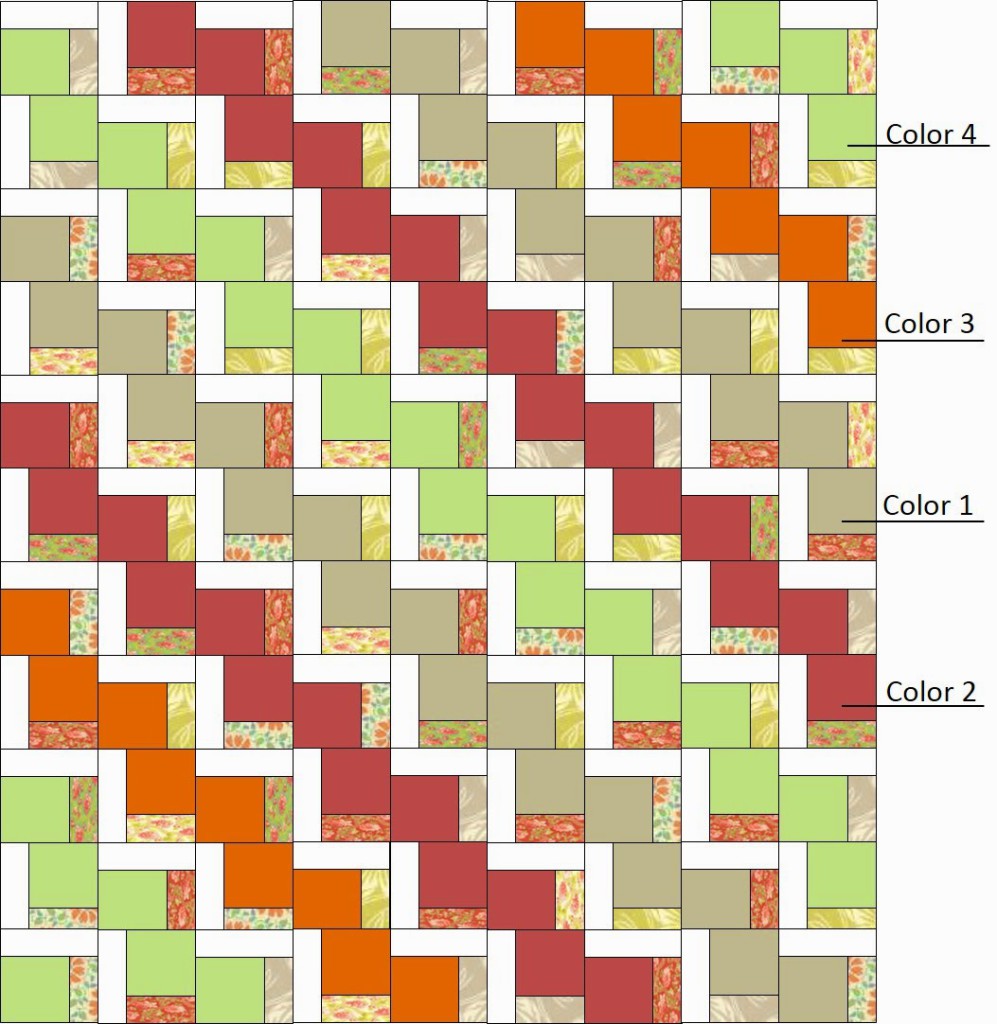
Step 2: Divide your layer cake into 4 piles of similar colors: color 1, color 2, color 3 and color 4. From color 1, choose 7 squares.
From color 2, choose 7 squares.
From color 3, choose 4 squares.
From color 4, choose 7 squares.
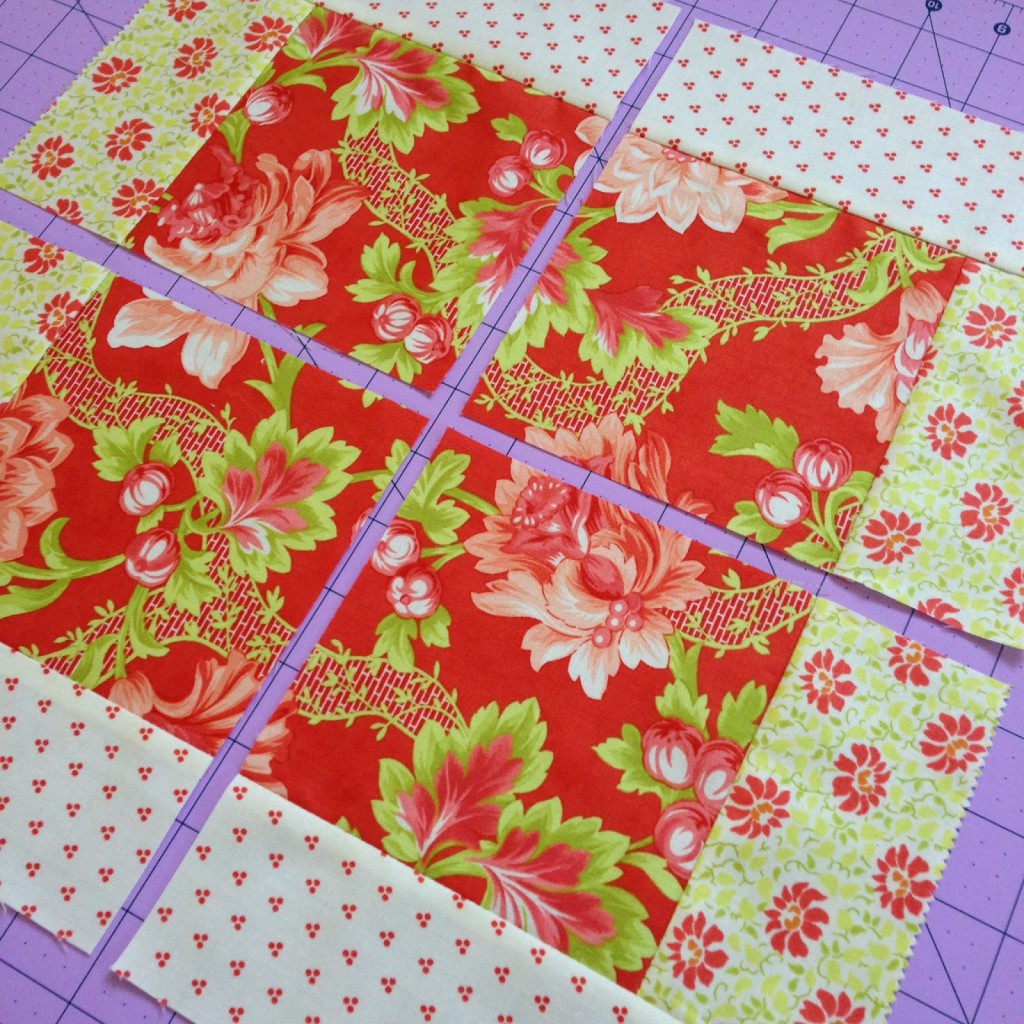
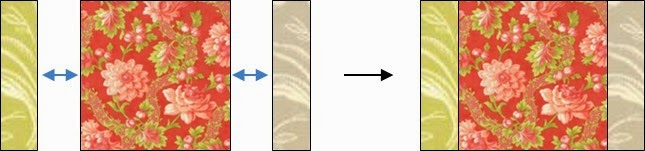
Step 3: Using fabric scissors, trim a jelly roll strip to the same length as the layer cake (I simply aligned the strip to the layer cake and then trimmed). Assemble two strips to the left and right sides as shown below. Note: these strips can be any color/design you want.
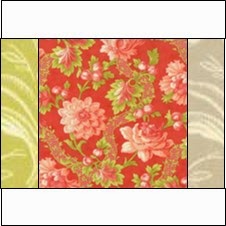
Repeat the above for all 25 of your layer cake squares, for a total of 25 blocks:

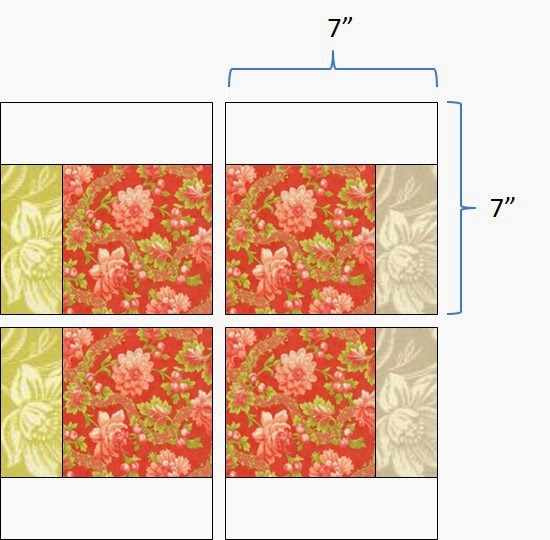
Step 4: Next, use a rotary cutter to quarter all of your blocks. This will give you a total of 100 7″x7″ blocks.
Step 5: Arrange your blocks as shown below. It helps to start by laying out the top row first, then the first block in each row, and then fill the rest in from there.
On my list. And I cannot wait for your book to come out.
Thank you!
I keep forgetting about "the quilt as you go method". It is a good old fashioned way to make a quilt especially if you limited in space, like I am in my winter condo by the seaside. I look forward to seeing more ideas in your new book.
Thanks for another great free tutorial! Looking forward to your book!
The books looks awesome and love all the beautiful colors in the quilts.
Thanks for the opportunity to participate in the give away! !
tomdcranford@yahoo.com
can you run block.horizontal like a chevron
Hi, lovely quilts and colors are to die for.
starting a quilting classes for the disadvantaged ladies in my country. can you supply patterns for me? DUDU
This one is totally on my 'to do' list. I really want to try the quilt as you go method too…as I have way too many quilt tops that are not quilted….thanks for sharing!
it doesn't mention the batting in tutorial and this is a QAYG right?
Hi…Just found your site and I'm "Happy". I'm a beginner and always looking for good tutorials. You offer your time and your skills to us newbies. The site is stock full of information for projects and you explain in your tutorials just how to do those projects.I'm retired now and have the time to learn a new craft. Thank you and I'll be visiting many times in the future.
??? Beautiful Quilt pattern and great choice of fabrics! It look amazing! ??
It's lovely & on my list. Thanks.
Please post the fabric names and brands you used for the quilt top, binding, and backing. I love this!
loving this have just found it through a Piecing it together email
Thank you so much for my first Quit block a day from facebook . What a great name, for your quilt.
I also love dogs.
I am looking for a pattern for one of your quilts on this page. It is the more vintage looking one (flowers…soft colors), but I don’t where else to look. Have been through your blog and website several times. I didn’t know if it was in one of your books or not and which one? Thanks for your help. You can email me at ftdmidd@yahoo.com Thanks, Teri
Hi! Love the Stairway to Heaven quilt!! I’d like the printable version of the tutorial, but the links aren’t working 🙁
Love this quilt! I made two lap quilts for a friend’s son, and I used rail fence. I am now making her a quilt and I wanted to stay away from rail fence, but with this quilt, I can use a little larger block (to showcase the florals in hers) while still having the zigzag of one color like rail fence – kind of a tribute to the quilts of her boys!!!! She will love it!!!!!! Thank you!
P.S. Every one of my quilts ends with my dog on it!!!! Recipients are just told “If you are allergic, wash immediately!!!!! (I don’t make them for money; just gifts!!!)
What a pretty quilt! Looking forward to making three for my granddaughters.
I am trying to make the quilt, I’m not using jelly rolls so can you tell me what size the middle square is?
I am using scraps and so far I’m thinking the middle square is 9 5/8? Is this correct in order to cut the large square into 4 individual 7 inch squares.
I have made this quilt 10 times! It is the best quilt to make in flannels. My daughter loved hers so much, she made me make her a second one, so she would always have one!
Love this can not wait to do this quilt . Love the name after one of my favorite songs .