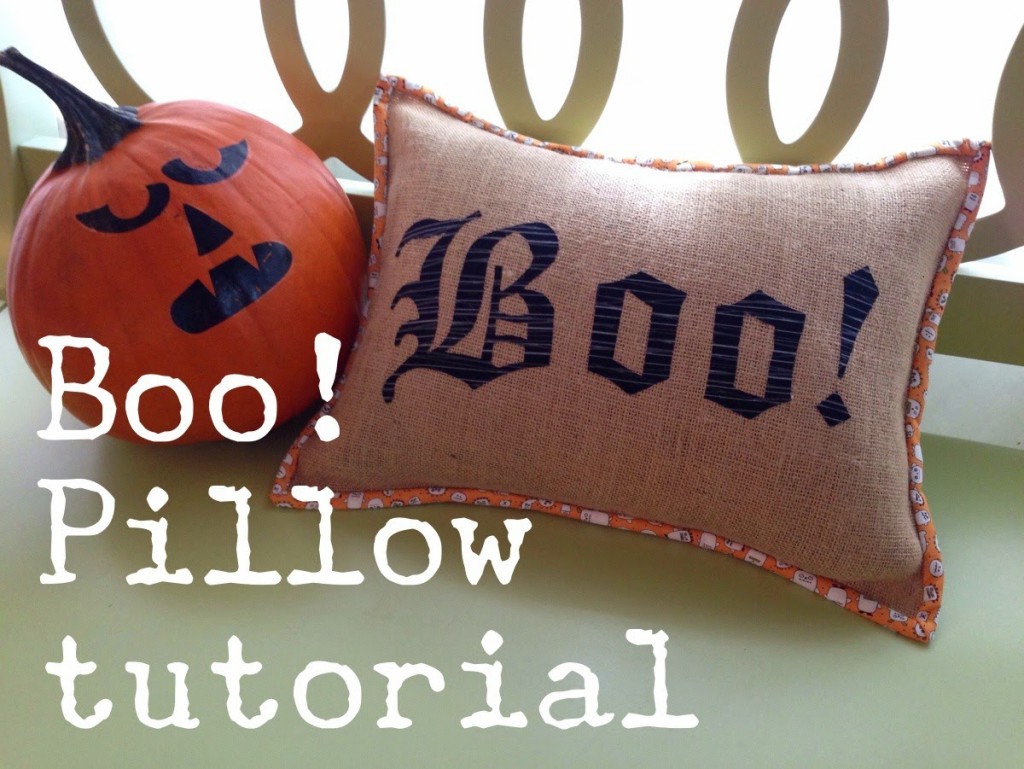
In celebration of Autumn (my fave season of the year!) I’ve put together this fun and simple pillow tutorial for you all. I used EZ-Steam by Pellon to quickly applique “BOO!” onto this pillow. This stuff lasts and doesn’t fray. Thank you all for supporting my work! I hope you enjoy this project!
This makes a 16″x12″ pillow cover with an envelope closure, and binding around the edge for a nice finish.
Materials:
- One fat quarter of burlap (or enough to cut a 17″x13″ rectangle)
- 3/8 yard backing
- 1/8 yard binding
- scraps for “BOO!”
- EZ-Steam by Pellon
- pillow insert (16×12)
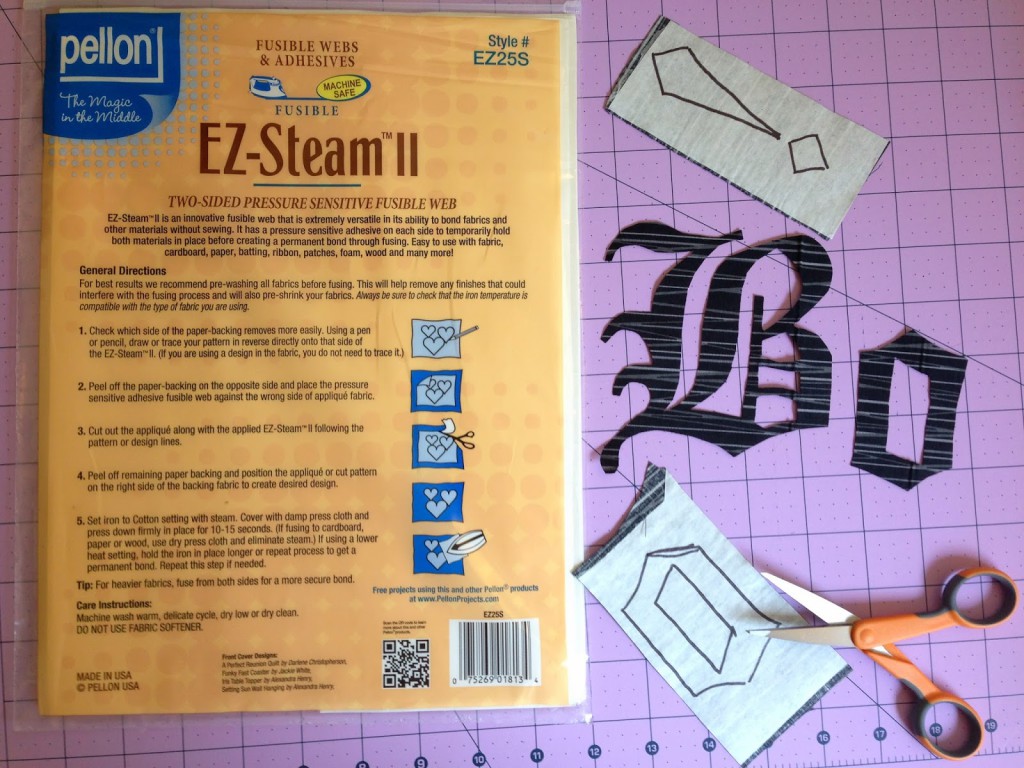
Step 1: From the burlap, cut a 17″x13″ rectangle. Then, download and print my “BOO!” template HERE. (Note: the letters are in reverse since you will be tracing it onto the EZ-Steam and essentially making a sticker out of it).
Step 2: Follow the instructions on the EZ-Steam package to attach the fusible web to your scrap fabric. But first you will need to trace the “BOO!” template onto the EZ-Steam sheet per the directions. Tip: it helps to trace it up against a window for better lighting.

Tip: When ironing, be sure to put some fabric or muslin in between your EZ-Steam and the iron to prevent glue from accidentally getting on your iron. I forgot to do this in the picture above, but got lucky.
Using sharp scissors, cut out the word “Boo!”.
Step 3: Then, peel the backing off like a sticker (Tip: it helps to start peeling it with the tip of a pin to get it started). Place the letters on the center of your burlap and then iron it on. EZ-Steam is a permanent adhesive and will not fray. If you want, you can stitch around the letters but it is not required.
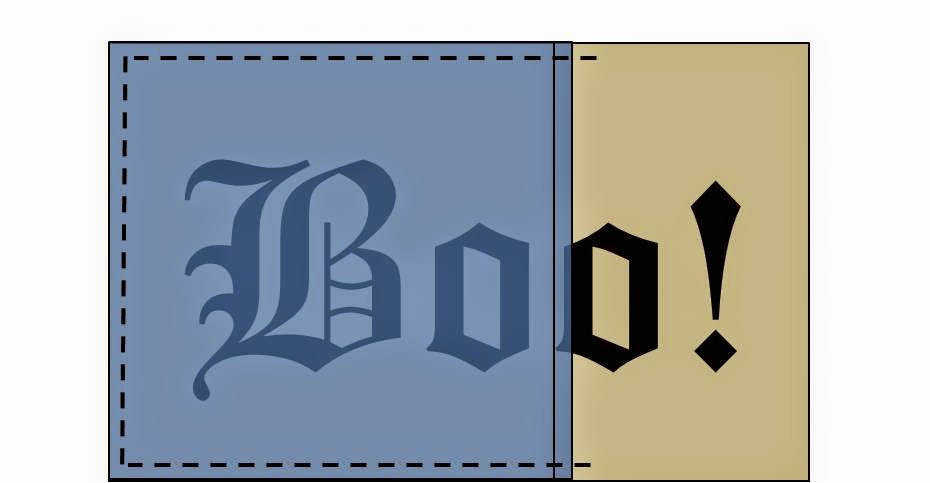
Step 4: Create an envelope closure for the backing. From your backing fabric, cut two 11″x13″ rectangles. Along the length (13″), turn the edge 1/4″ under, press, then turn under 1″,
then press again. Stitch along the fold to keep in place to create a
pretty seam. Repeat on the other rectangle as well.
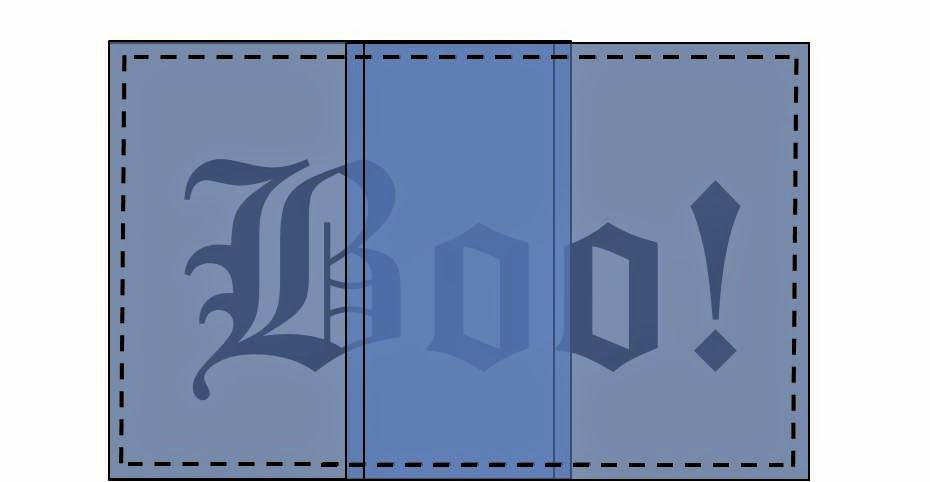
With right sides facing together, take one rectangle and align it along
the left side of the pillow cover. The finished seam you created from
the previous step should be facing toward the right. Pin to keep in
place, then sew a 1/4″ seam allowance along the perimeter as illustrated
by the dashed line below. Start and end your stitch with a back-stitch.
Repeat with the other rectangle, but align it on the right side of the
pillow. Trim the corners to get rid of bulk fabric, and then
turn right side out through the envelope opening.

And you’re done! Hope you enjoyed the tutorial 🙂 Have a happy and warm autumn!
It's probably me, but when I try to print the BOO, all I get is a blank page with a couple of lines.
Hi jody – thanks for letting me know! I have fixed this. Try the new link now. Thanks!!!
Done! What a cute Halloween pillow and so easy to do. Thank you for the tutorial.
Hola Jera. He comprado tu libro y es maravilloso!!!! Gracias y espero mas. Besos. Silvia. Desde Barcelona (Spain)
thank you!!!!! xoxo
Perfect – Thank you! Also, I'm loving your new book – I have two blocks started and am anxious to see how it all comes out.
yay – thank you, so happy to hear that!!
Cute pillow! Thanks for sharing.
This is so cute, I cut my ez steam first with my cricut machine
Hi–would love to make this but when I hit the link for Boo template I got a security warning that phishing has been detected. Can you put it up again somehow, or perhaps send the template to my e-mail? I would really appreciate it. Thanks so much! Sharon