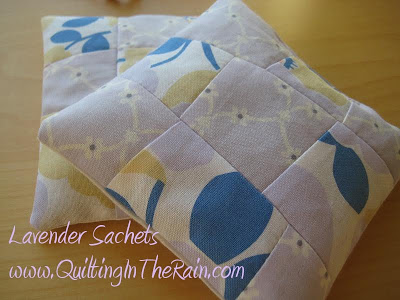
I just love quick little projects! Toss these yummy scented lavender sachets in your undie drawer ;), or bundle them with ribbon or rick-rack to make a cute little gift! The tutorial below is quick and easy, and is a fun way to use your scrap fabrics. Also, if you like to quilt you can use this pattern to make quick quilt blocks, simply start with a bigger square (e.g. 10″ square instead of 6.5″).
Materials (for 2 sachets):
- 2 different fabric prints (enough to cut a 6.5″ square from both prints)
- Thin backing fabric (enough to cut two 5.5″ squares)
- Dried lavender buds (optional: lavender oil)
Step 1 – Cut two 6.5” squares.
Step 2 – Layer both squares evenly. Then, make two diagonal cuts as shown below.
Step 3 – Because you layered both squares (previous step), you will have a total of 6 pieces. Lay them out as shown below.
Then, switch the middle top and bottom pieces (numbers 2 & 5).
Step 4 – Sew pieces 1, 5 and 3 together; and then sew pieces 4, 2 and 6 together. (Sew with right sides facing together, pin in place, stitch a ¼” seam, then press open).
Step 5 – Layer both pieced-together-squares evenly on top of one another.
Rotate the square 90 degrees as shown below. Similar to Step 2, make two diagonal cuts again.
Step 6 – Because you layered both squares (previous step), you will have a total of 6 pieces. Lay them out as shown below.
Then, switch the middle top and bottom pieces (numbers 2 & 5).
Step 7 – As shown below, sew pieces 1, 5 and 3 together; and then sew pieces 4, 2 and 6 together. (Sew with right sides facing together, pin in place, stitch a ¼” seam, then press open).
Step 8 – From the backing fabric, cut two 5.5” squares. Take one finished square (from previous step) and one backing square. Layer both squares with right sides facing together.
Step 9 – Sew a ¼” seam allowance around the perimeter of the square, leaving ~3” opening at the top. As shown below, snip the corners of the square off.
Step 10 – Turn right-side out through the 3″ opening, and then press flat with an iron.
Step 11 – Fill the sachet with dried lavender buds through the 3” opening. For a really fragrant sachet, add a few drops of lavender oil to the buds. Lastly, stitch the opening closed.
Yay you’re done!! :o) If you like the concept of this pattern, you might be interested in this tutorial: Cuttin’ Corners Quilt

Your sachets are a really cute and fun gift idea. Thanks so much for sharing with us!
Hello from a fellow Washington quilter and blogger. Love those Lavender Sachets. Thanks for sharing your talents!
Thank you, both!
To Kay: The lavender buds are from the Lavender farm on Whidbey Island, WA. 🙂
Thanks for this very cute idea. I just used up some scraps to make my MIL a sachet based on your instructions. I'll be giving you a shout-out on my next podcast episode (www.quiltingfortherestofus.com). This is a very well-written tutorial!
I have access to a lavender farm and have been wanting to make some sachets. These will make wonderful gifts.