 You all asked for it, so here it is! A binding/blind stitching tutorial just for you. 🙂 Thanks for your patience…though binding is something I do regularly, this tutorial took a lot of thought. I try to stay away from posting lengthy and wordy tutorials, so I tried my best while still trying to depict everything clearly. Part I of this tutorial is how to attach the binding to your quilt top, and Part II is how to blind stitch. I made videos of me blind stitching in hopes it would be easier to learn.
Also, I wanted to say that I’m a self taught quilter, therefore my way of binding and blind stitching might not be as traditional. But it’s how I roll, and it works! There are many ways to bind a quilt, and this is just one of them.
One last thing (so much for not wanting to post wordy tutorials :-p), this tutorial is just one way to bind. Check out my Quick Quilt Binding Tutorial for an alternative method.
Update: If you prefer not to blind stitch the back of your binding and would rather machine stitch it, check out my Machine Binding Tutorial.
Part I – Binding (Steps 1-7)
Note: This tutorial assumes a 1/4″ seam allowance. Start and end all stitches with a back-stitch.
Step 1 – Start by cutting 2.5″ strips from the length of your fabric. If your binding fabric is less than or equal to 1 yard, then typically the length of your fabric will be about 40-44″. You can divide the total perimeter of your quilt top by 40″ to calculate how many 2.5″ strips you will need to cut (example: if the total perimeter of the quilt top is 120″, then you will need 120″/40″=3 binding strips).
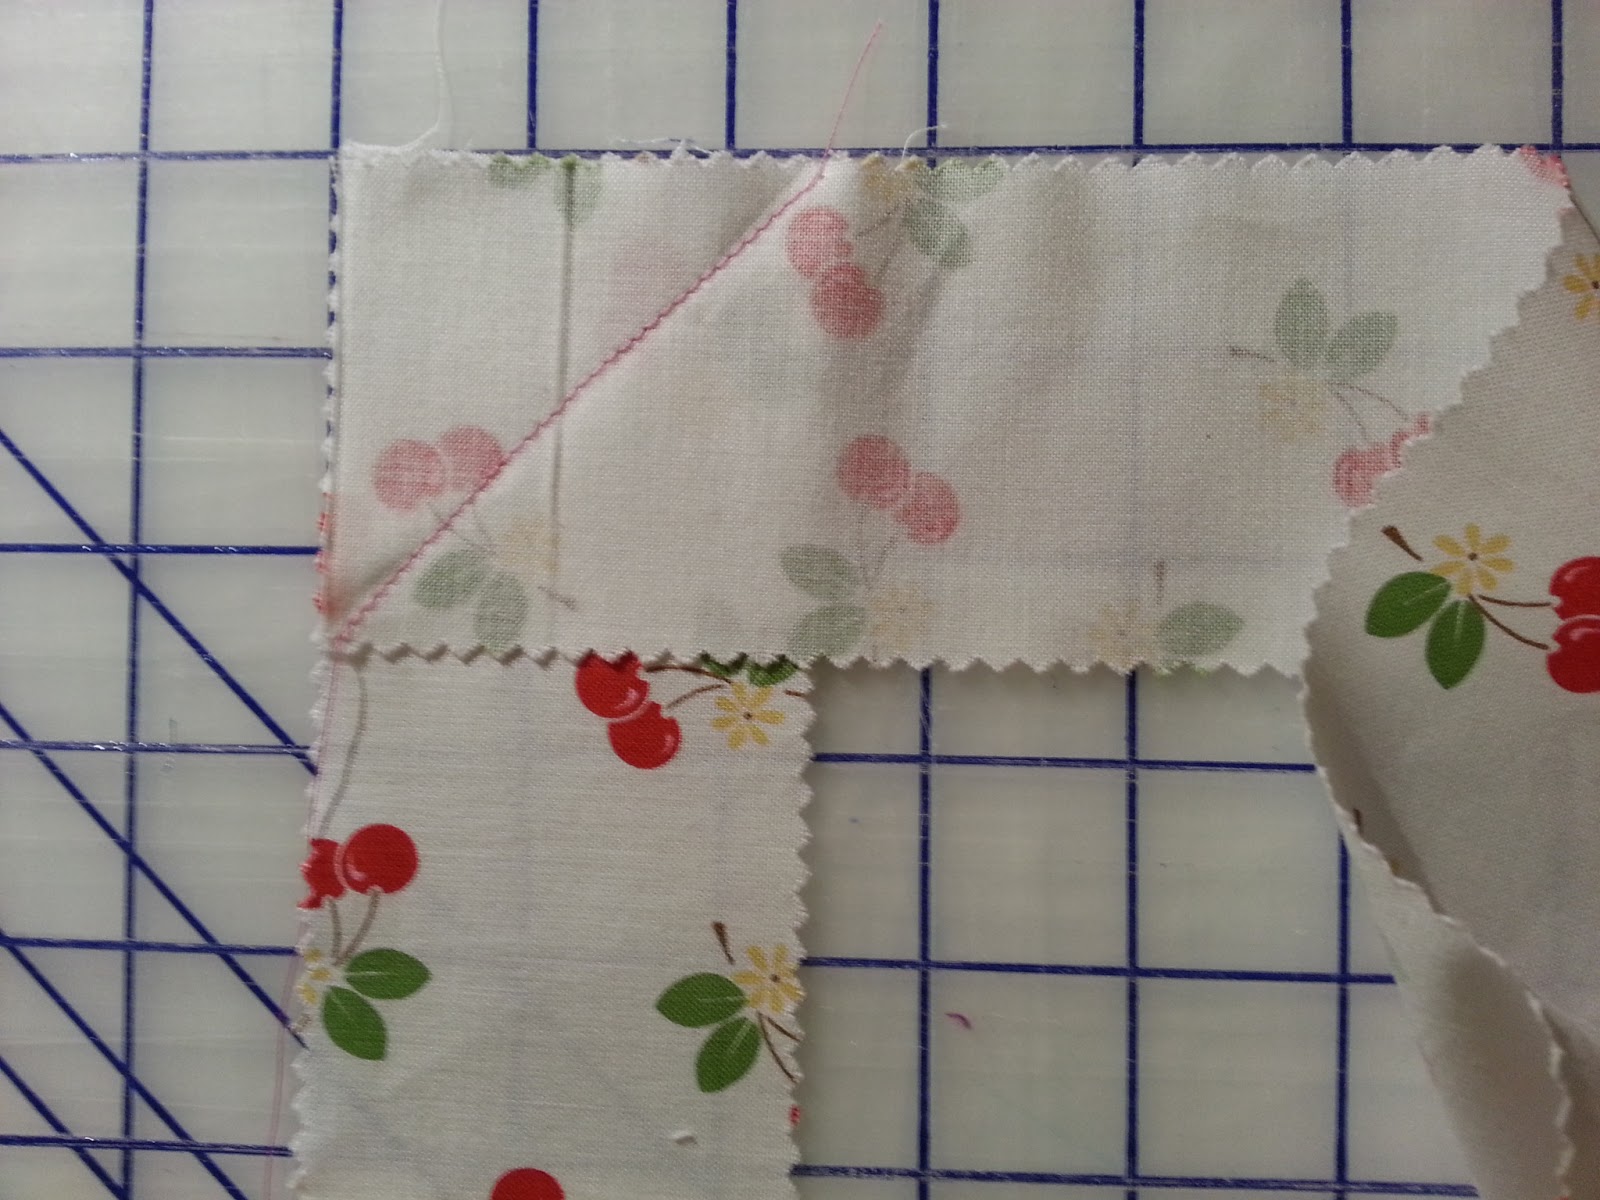
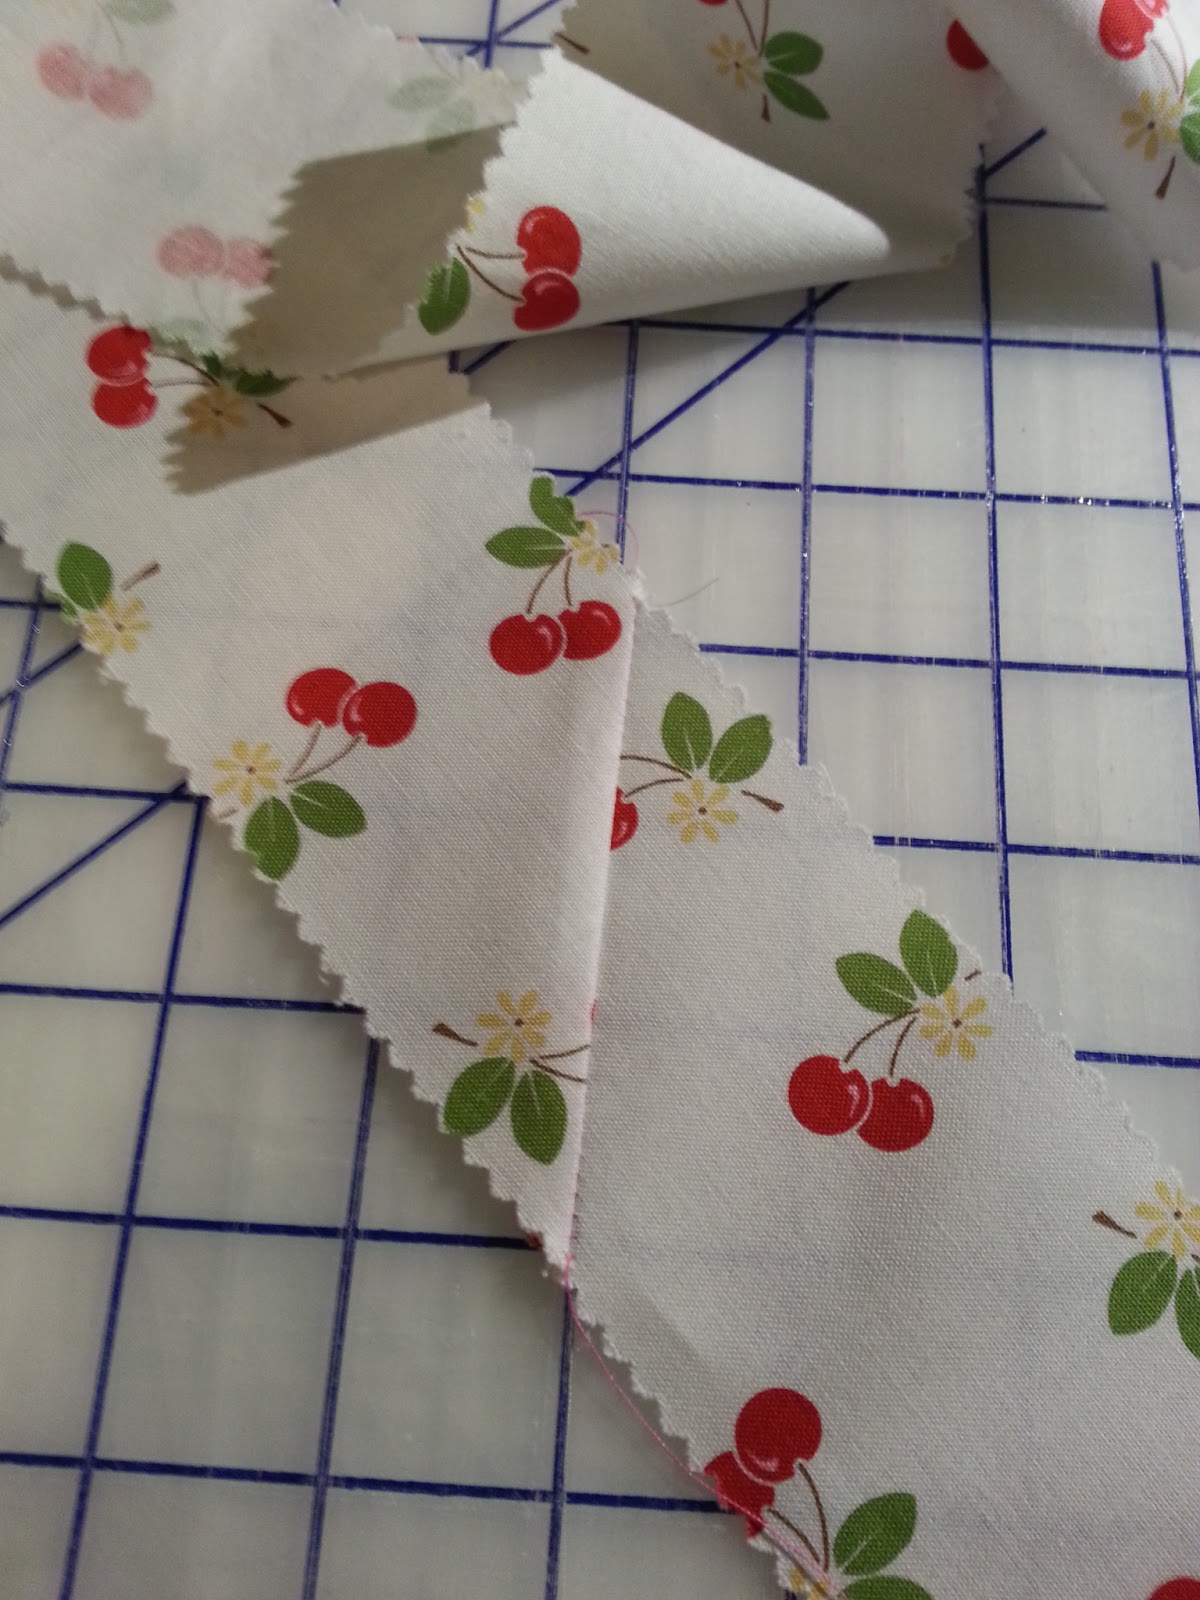
As shown below, sew the strips together to create the length of binding you will need to bind the perimeter of your quilt. To do this, align two strip so that they are perpendicular to one another with the right sides facing each other. Sew a diagonal line from the bottom left corner to the top right corner as shown below.

Step 2 – With an iron, press the binding in half lengthwise so that the width measures 1.25″.

Step 3 – On one end of your binding, create a 45 degree angle seam: a) Open up the binding on one end. Create a 1/4″ seam by folding the fabric over 1/4″ at the top, then press. b) Fold the top left corner down to form a 45 degree angle, press. c) Press in half lengthwise.
(Click to enlarge)

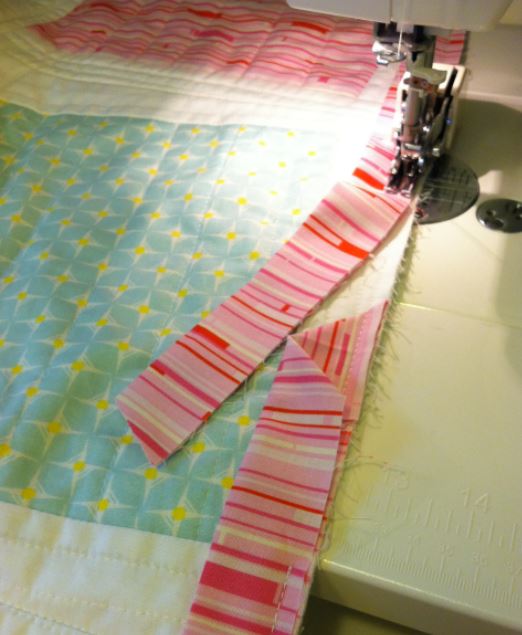
Step 4 – Start binding along the side of your quilt top and away from all corners. As shown below, attach the binding to your quilt top by opening the binding, and then sewing through the first layer. Make sure you start with the end that has the 45 degree angle seam (from the previous step). From the top of the binding, sew 4-5″ down.

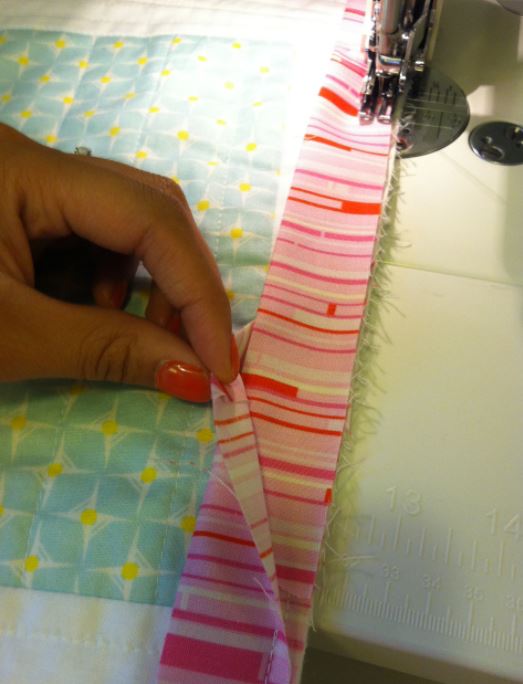
Step 5 – Close the binding so that you can no longer see the 4-5″ that you previously sewed. From the top of the binding, measure about 3″ down and start sewing (as depicted with the black arrow below). You will overlap with the previous stitch by at least 1″. This will leave you with an open ‘pocket’ at the start of your binding that’s about 3″ long.

Step 6 – Continue sewing the binding to your quilt top. Use pins to help keep the binding in place. When you get to the corners, do the following four steps (a, b, c &d):
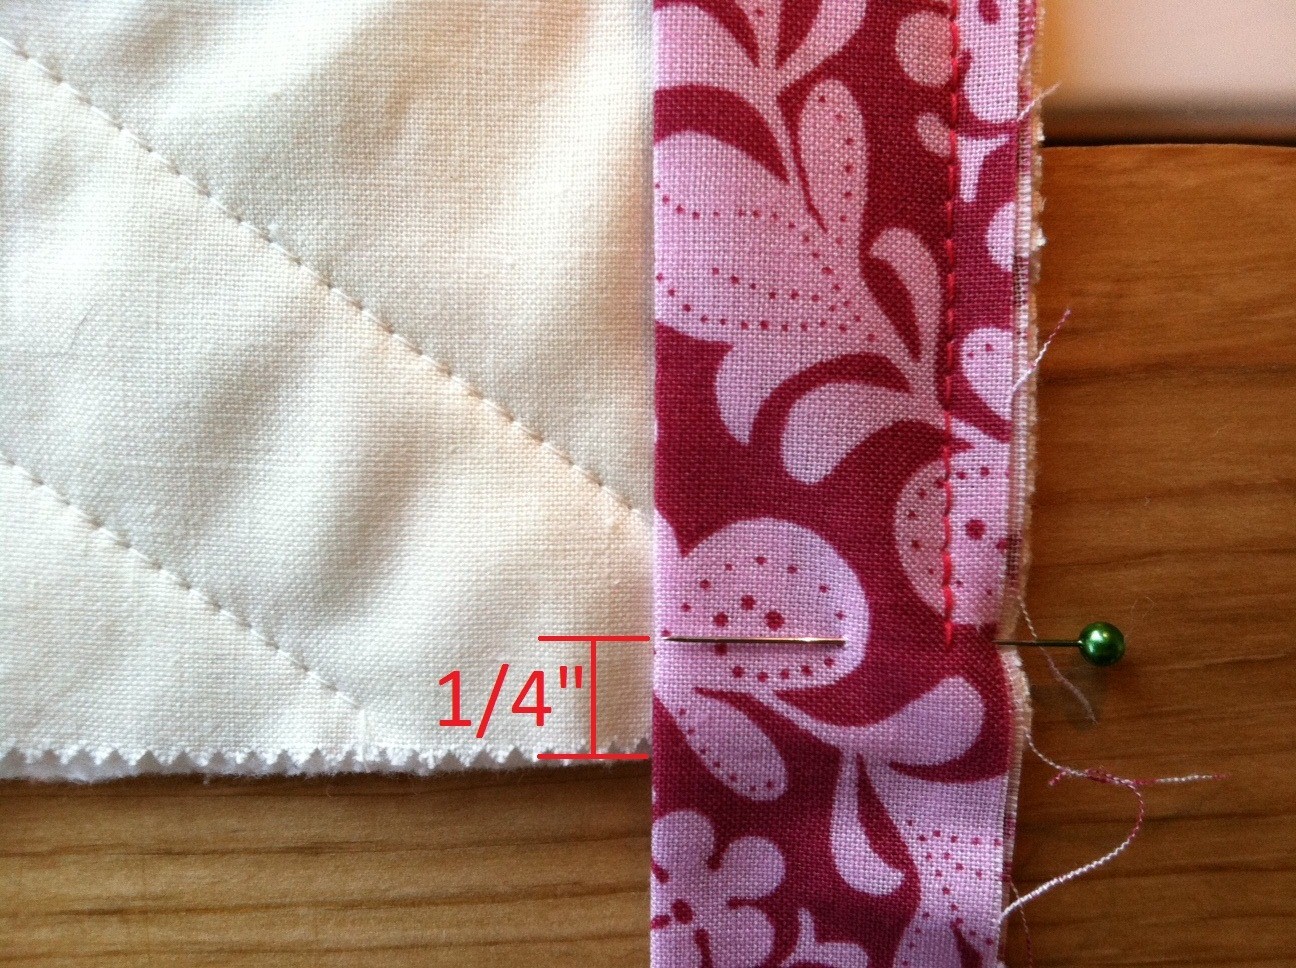
a) Stop sewing 1/4″ from the bottom of the corner. End your stitch with a back-stitch.
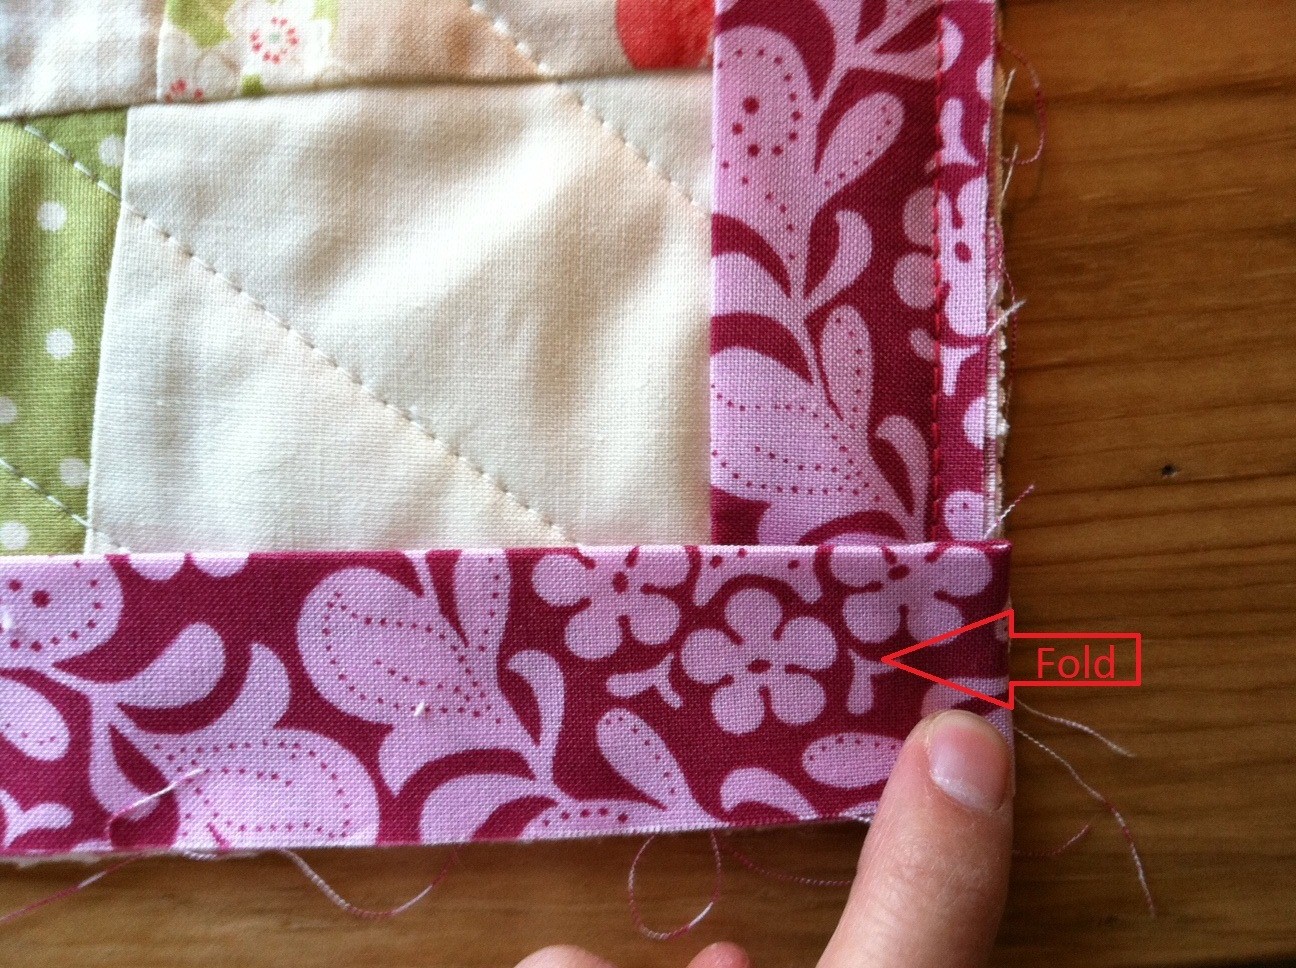
b) As shown below, fold the binding over so that it’s in line with the edge of your quilt top.

c) Then fold the binding over again but in the other direction; still make sure the binding is in line with the edges of the quilt.
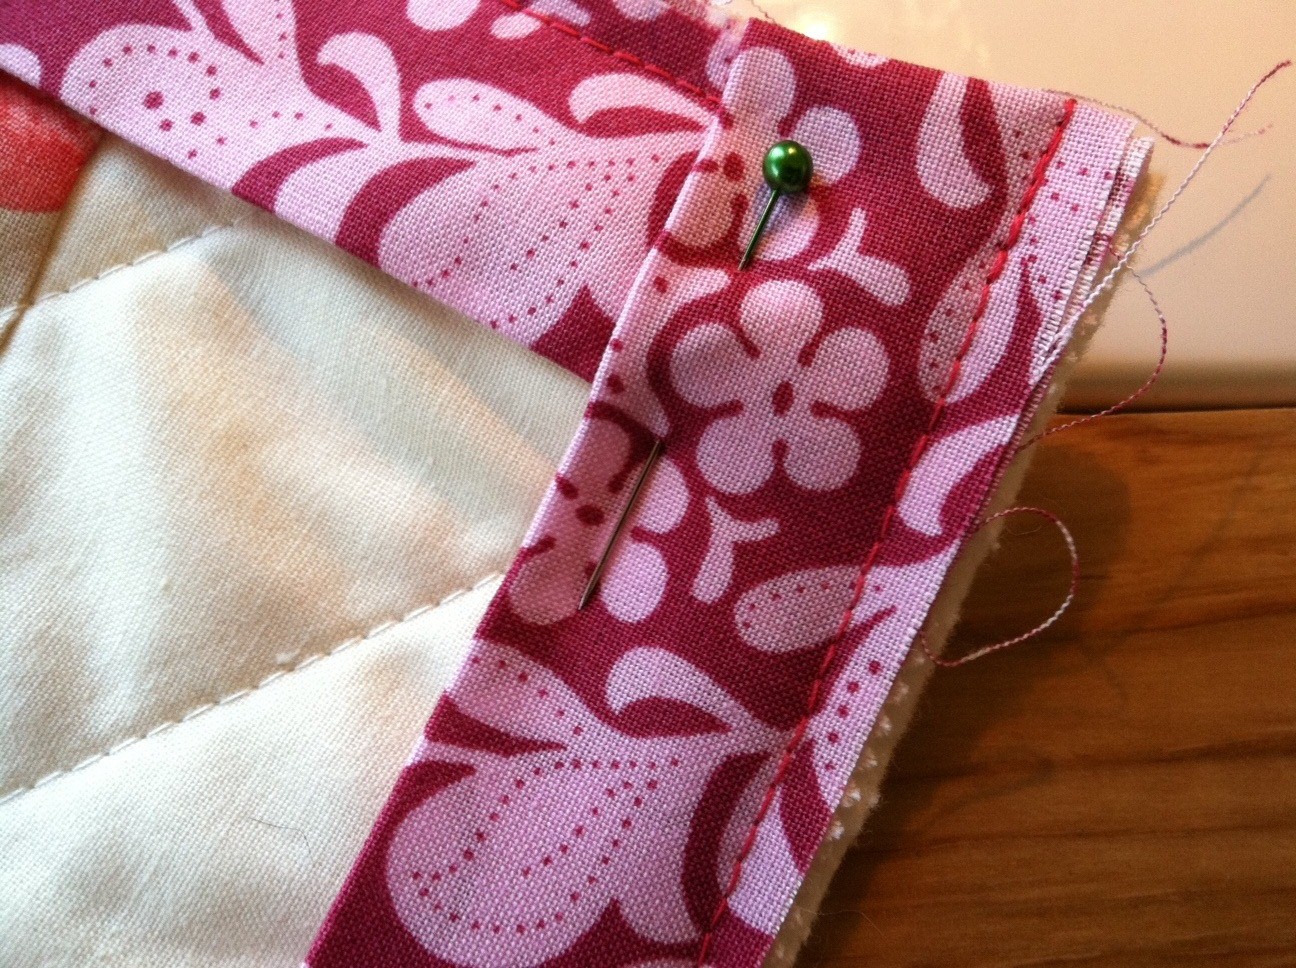
d) Pin the corner folds and binding to keep in place…

…and then start sewing again from the top of the fold to stitch it down. Continue sewing and repeat Step 6 for all corners.
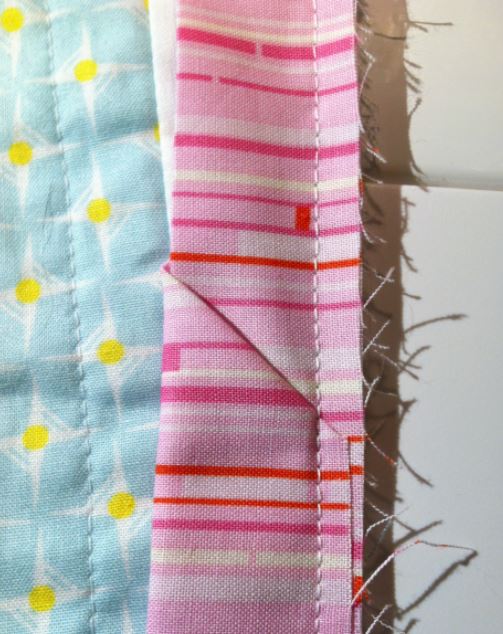
Step 7 -When you get to the end, you will come upon the open ‘pocket’ from Step 5.
Tuck the unfinished end under the flap as shown below.
And then continue sewing to stitch it closed.
Part II – Blind Stitching
Update: If you’d rather machine bind, please see my machine binding tutorial.
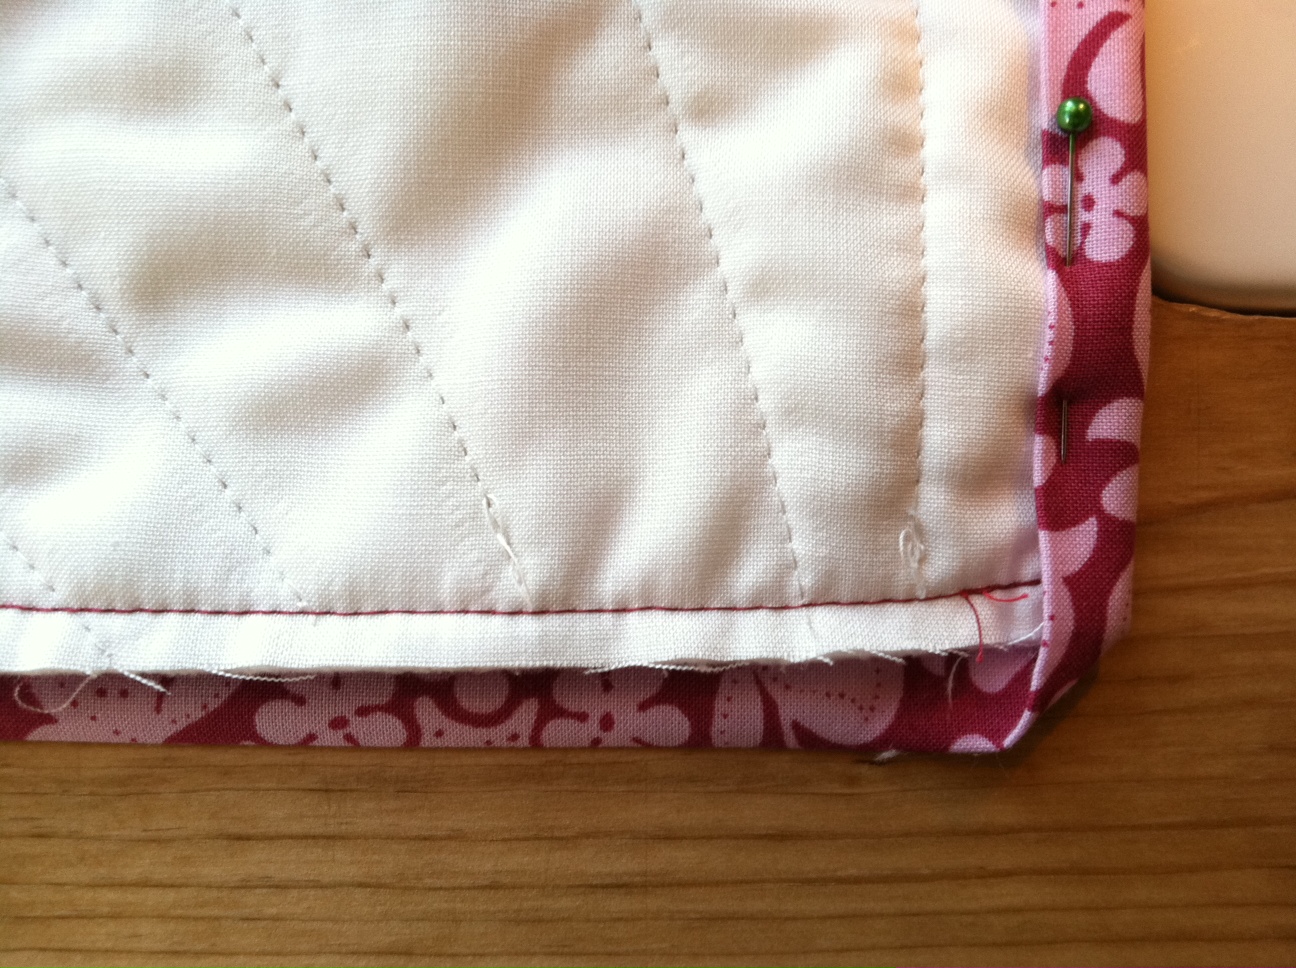
Now that you’ve finished attaching the binding to your quilt top, the last part is to blind stitch the binding to the backing of your quilt. Start by folding the binding over to the back, and pin it to the backing of your quilt.
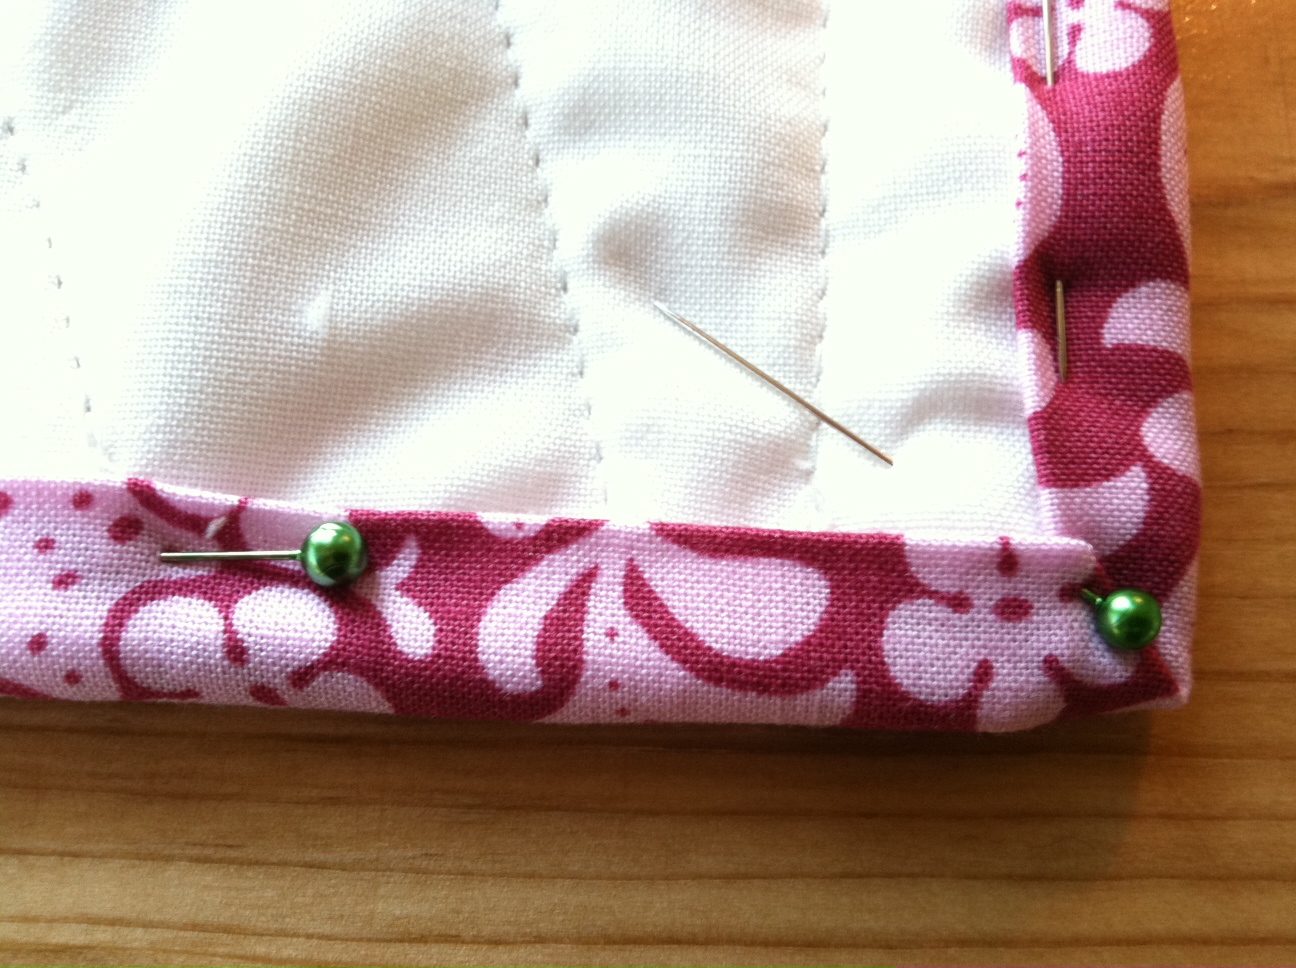
When you get to the corners, simply fold the bottom edge of the binding straight up and then pin the corners down to keep everything in place.
 I made three videos showing how to blind stitch…it was just too hard trying to show it via photo.
When blind stitching, use a strong thread that won’t break. The last thing you want is your thread to snap halfway through blind stitching your entire quilt! For the purpose of the tutorial, I used a thick and bright pink flossy thread so you can easily see me blind stitching.
Video #1: This first video shows how you start the blind stitch. I typically start with at least three feet of thread and tie a knot at one end. Start by hiding the knot underneath the binding as shown in the video. And remember, when blind stitching the thread should never show on the quilt top (it should stay in between the backing fabric and batting). Once the knot is secure, your needle should come up from the quilt backing and nick the edge of the binding, and then come straight back down from where you came up. Then, come back up again but roughly 1/4-1/2″ away from where you originally started. Repeat.
Video #2: This second video shows how to blind stitch the corners of your binding. It’s the same process as the first video; the main thing I wanted to show you is when you come up to nick the binding, make sure you nick the corner flap of the binding to ensure it gets stitched down. If you stitch the corner flap down as shown in the video, the entire corner is good to go. 🙂
Video #3: This video shows how to tie a knot when blind stitching. Since you start with only about 3 feet of thread, you will have to do this a handful of times depending on how big your quilt is. This might make you go a little cross-eyed, but once you’ve done it a few times it sticks with you. 🙂
Update: Here’s a 3-step picture tutorial on how to start and end a knot.
I hope this helps. As always, I’m happy to answer any questions! And remember, this is just one way to bind a quilt. Check out my Quick Quilt Binding Tutorial for an alternative method (that doesn’t involve any blind stitching!)
Comments: 46 | Leave a comment