Simple is Good!

You might recognize this quilt from my earlier post Quilting with my Furry Children.
Well, I finally finished it last night! It was one of those neglected quilt tops that kept giving me the evil eye for not finishing it right away. I really like the simplicity and modern feel of this quilt. The top is made up of 54 charm squares and 1 yard of white fabric. Though it’s a simple, straight forward quilt, as promised in my earlier post I will post a tutorial.

I’m proud of this one. 🙂 I basted it myself (I usually use my quilting frame which naturally bastes quilts for me). I used my 6″x23″ ruler to help flatten out any bumps.

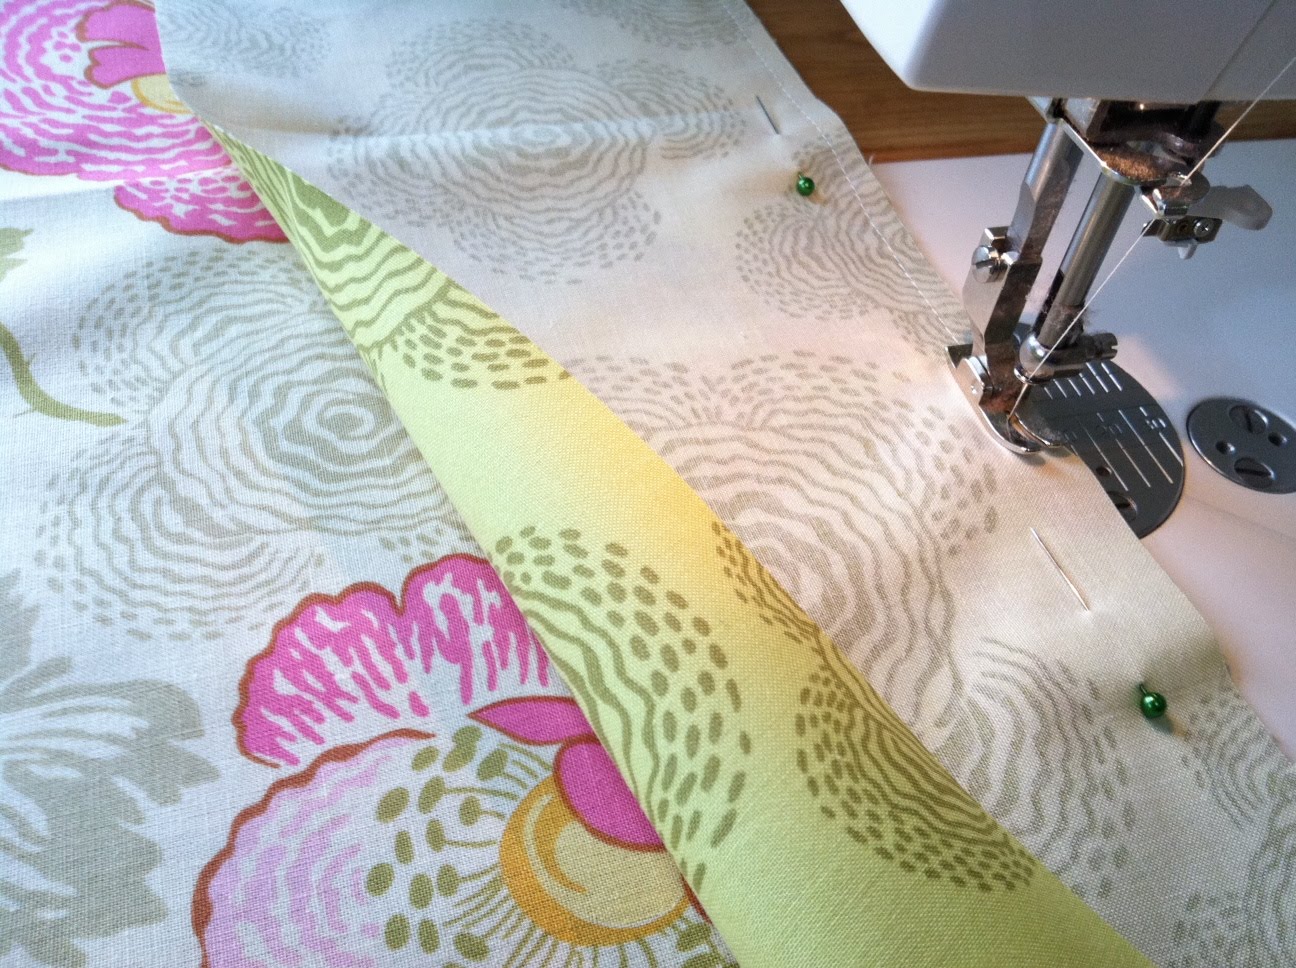
I also machine quilted this without my quilting frame 🙂 I quilted wavy grid lines using my walking foot. I’m really loving straight-stitching designs, and hope to do more of that.
I binded it last night, followed by blind-stitching the back within an hour. I was in the zone.
I just love the Hullabaloo collection my Moda. I snagged the charm pack as soon as I saw them, and whipped up this quilt in no time. This is a great quilt to show off your latest and greatest charm pack collection, so stay tuned for my upcoming tutorial. 🙂

Oh and I haven’t forgotten…I’ll be posting the fabric giveaway winner on Friday, so stay tuned for that also. Thanks for stopping by! 🙂

Comments: 8 | Leave a comment


MBS Tutorial and a Giveaway!!!

As a celebration of my latest Moda Bakeshop (MBS) tutorial called Strawberry Fields Forever! (I’d love it if you left me a comment if you feel so inclined), I wanted to host this Layer Cake giveaway as my tutorial requires only one layer cake to make the quilt top.

For those of you that frequent my blog, you may recognize this quilt as I’ve already made two using this pattern: my Quilt for Japan using the Sunkissed collection, and of course, Strawberry Fields Forever (original post found here). Make one yourself using your favorite collection by checking out my MBS tutorial!

Anyway, onto the good stuff… To enter to win the Layer Cake, simply answer the following question via a comment to this post:

What are your favorite kind of patterns (e.g. intricate quilt patterns, garments, accessories, patterns using pre-cuts, etc.)? I really love this craft, and am genuinely interested in knowing what you all like to sew. 🙂

And just as a side note, if you like sewing tutorials and if you’re addicted to fabric, I urge you to ‘Like’ me on Facebook (by clicking the button below). See how convenient I’ve made it for you?! And/or if it’s more convenient to follow me on blogger, there is a ‘Follow’ button to the right.

That’s it! I will draw your name using a random number generator so be sure to leave some way for me to email you. I will post the winner next Friday. And yes, I will ship international!

Happy Friday!

Have You Tried Spray Basting?

Hi All! Just a quick update to say that I added a tid bit about spray basting at the end of my recent basting tutorial, click here (then scroll down). It’s a quick alternative to pinning together all three quilt layers.

I’m sure you all can agree that basting a quilt is the least fun part of quilting :-|, so anything that helps make it go by quicker is always a plus! I’ve spray basted before and have been very pleased with the results. Just wanted to share this with you in case some of you have never heard of it, or perhaps you have, but were skeptical of the method.

Let me know if you have any questions, or if you have any spray basting experiences of your own. I’m always interested in learning new tips, hearing about your basting horror stories (hopefully there are none), etc. 😉

Have a great week, and as always, Happy Quilting!

Comments: 11 | Leave a comment


New sewing machine


I’ve been MIA…it’s been 10 days since I last blogged! Quick update. I treated myself and bought the above sewing machine (Brother XL-3750). Do I plan to stop using my current Pfaff Grand Quilter? Heck no! Am I hoarding sewing machines now, in addition to fabric? Yup!

This was a fun little treat for myself. For one, it only cost $116 on Amazon (and it comes with a walking foot!), free shipping too. Also, I’ve been getting emails from people asking me for sewing machine recommendations. After replying, I realized my answers were biased as I’ve only ever owned Pfaff’s. Plus I’ve never owned a sewing machine this inexpensive. Is it possible to have a great sewing machine for only $116 bucks???

I did a lot of research on the Brother XL-3750 and it had excellent reviews from all sewing backgrounds, ranging from the occasional sewer to the avid quilter (such as muah ;). I should receive it in the mail this week, so once I test it out I’ll be sure to give you my review. 🙂

I’m curious…if any of you own(ed) a Brother sewing machine, let me know your thoughts. Or if you don’t, but know a brand that you absolutely love and/or hate, I’d be really interested in hearing about it.

On a totally different update… I’m working on that traditional binding tutorial. Also, I have a Moda Bakeshop tutorial coming up pretty soon, so stay tuned. I’ll be hosting a fabric giveaway along with it. 🙂

Happy Quilting!

Comments: 19 | Leave a comment


Sunny Santa Monica Quilt

Here’s how the back looks:
Last week my husband and I visited Los Angeles, CA. Being a fabric-aholic, I searched for nearby fabric boutiques on my iPhone and stumbled across the Urban Crafts Center in Santa Monica. What a cool shop…it was like the Urban Outfitters of craft supplies instead of clothing. Anyway, while there I saw a quilt similar to this one. Inspired by the simplicity of the design and by their modern fabric selection, I eye-balled the quilt measurements, picked out some cool fabrics (the line I used is called Midwest Modern by Amy Butler) and made this lovely quilt. 🙂 If you’re a beginner quilter, or if you need a quick quilt that showcases some of your favorite prints, this is the project for you.

Materials (refer to the diagram below):

  • Fabric A – 1/4 yard (choose two prints)
  • Fabric B – 1/4 yard (choose two prints)
  • Fabric C – 1/2 yard (choose one print)
  • Backing – 1 yard
  • Batting – 1 yard
  • Binding – 3/8 yard

Step 1 – From your A, B and C fabrics, cut them so they measure the following and then arrange them as shown in the figure above.

  • Fabric A – 8″x32″
  • Fabric B – 6″x32″
  • Fabric C – 15″x32″

Step 2 -Sew all rows together. (With right sides facing together, pin along the length to keep the fabric in place and then sew a 1/4″ seam allowance as shown below).
Then press open with an iron.
Continue until you’ve sewn all five rows together. That’s it for the quilt top!

Step 3 -Form a quilt sandwich with your quilt top, batting and backing fabric and baste so that everything stays put. Click here for a tutorial on how to baste a quilt.

Step 4 – Using a walking foot, quilt it! Start by quilting a wavy line in the center of the quilt, and then work your way outwards (as shown below, I started in the center and then worked my way towards the right. Then, I simply rotated the quilt 180 degrees and did the same). I stitched straight lines but made them wavy by guiding the quilt in long, wavy motions beneath the walking foot. Remove pins as they get in your way.

Step 5 – Bind it! If any of you are interested in a binding tutorial, let me know and I’ll post one sooner rather than later. 🙂
That’s it! I told you it was fast. I finished this one in only 3 hours. It makes a great weekend project. 🙂 Happy quilting!

Comments: 11 | Leave a comment


Site by Spunmonkey.