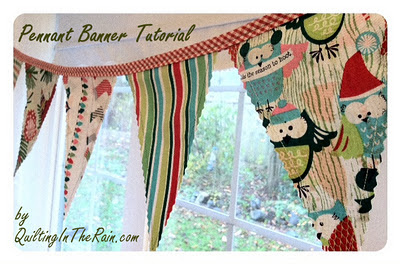
 Hi All – I’m so excited to share this one with you! Not sure if you’ve noticed, but these pennant banners are everywhere in the crafting world nowadays. Yup, they’re totally ‘in’ right now so hurry up and make one! 😉 Most pennant tutorials I’ve seen involve a lot of time to assemble. However, if you’ve been following my blog, you’ll know that I like to keep it simple.
That being said, this is my take on these pennant banners. They’re super quick to assemble but best of all, they’re totally adorable!
I made a Christmas-themed banner. But think of all the other possibilities depending on what fabrics you choose – these would make excellent decorations for birthday parties, baby showers, etc…the list goes on!
 Materials for a *3 yard long pennant strand:
- 6 fat quarters (18″ x 22″ cuts)
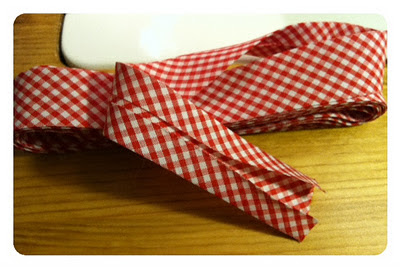
- 4 yards biased tape binding (or make your own with 1/4 yard of fabric)
- Steam-A-Seam double sided fusible webbing (four 9″x12″ sheets was enough)
- Coordinating thread
- pinking blade for your rotary cutter
*You can make your own length with these measurements: 1 fat quarter = 3 pennants = 18″ long strand.
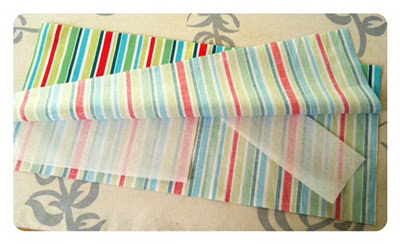
Step 1 – To make three pennants, fold one fat quarter in half lengthwise so that it measures a 9″x22″ rectangle. Press flat with an iron. Trim the non-folded sides of the rectangle so that it measures an 18″x8″ rectangle.
Step 2 – Cut your Steam-A-Seam fusible webbing into strips, and place a couple strips inside the 18″x8″ folded rectangle as shown below. Press with an iron to fuse closed. (Note: the Steam-A-Seam does not need to fill-in the entire rectangle. You just want enough to keep it fused shut).
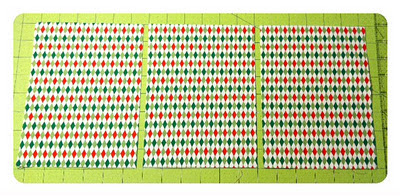
 Step 3 – Then, sub-cut the 18″x8″ rectangle into three 6″x8″ rectangles, as shown below.
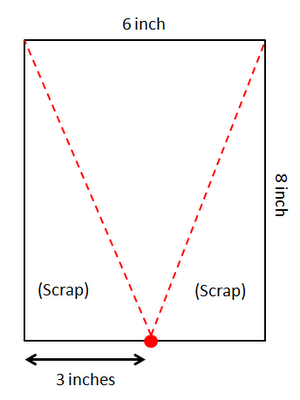
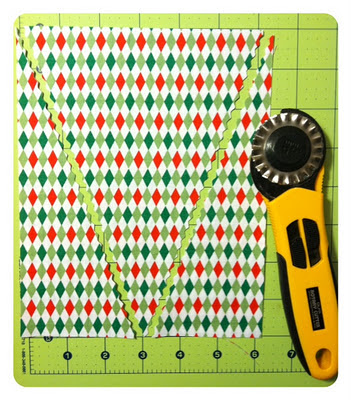
 Step 4 – Using a pinking blade on your rotary cutter, make two diagonal cuts (as designated in red) on each 6″x8″ rectangle. Note that the image below is not to scale.
 It will look like this:
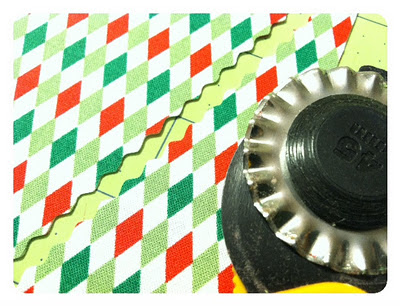
 The pinking blade will give it a cute wavy-looking cut, which also happens to help prevent fraying.
 Repeat steps 1 through 4 for all of your fat quarters to make a total of 18 pennants.
Step 5 – Using coordinating thread, sew a 1/4″ seam allowance along the edges where you made the wavy cuts. Do this for all of the pennants.
 Step 6 – I bought 4 yards of bias tape binding pre-made. If you need to make your own, you will need 1/4 yards of fabric. From this, cut four 2 1/4″ strips lengthwise. Sew these strips together to create the length of the binding strip (with right sides facing together, sew a 1/4″ seam and then press open with an iron). Then, fold 1/2″ over lengthwise on each side, pressing flat with an iron as you fold.
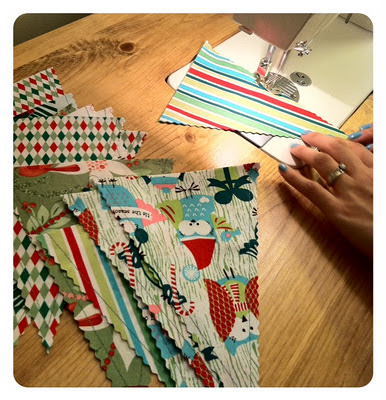
 Step 7 – Lastly, measure 9 inches from one end of the binding strip, and then start sewing the pennants into the binding as shown below. To sew them in, the binding strip is folded in half lengthwise, and the pennants (non-wavy end) is placed snug against the binding strip. Stitch down with a 1/4″ seam allowance. Start and end your stitch with a back-stitch.
 Once all of the pennants are sewn in, measure 9 inches out from the last pennant and then trim. You can use this extra 9 inches of binding on each end to help tie your pennant banner up.
That’s it! Simple, fast and fun. My kind of crafting. 🙂 Let me know if you have any questions.
Happy Quilting!
 Shall I use Reunion by Sweetwater, or Ten Little Things by Jenn Ski?
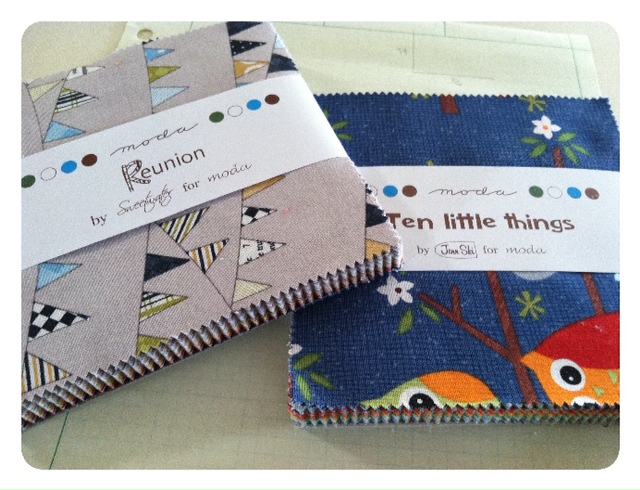 I plan on incorporating that fuzzy minky fabric too – this will be a cute one!


Comments: 23 | Leave a comment