 Earlier this month I made a quilt top called Sugar Flowers – you can find the tutorial here. Anyway, the quilt top had been hanging out in my sewing room for weeks, so I finally had it quilted (thanks again Darlene for the awesome job!). Darlene was able to quilt it over the weekend – with all the projects I have lined up in addition to working away to get the fabric webstore up, who knows how long I would have taken to quilt it myself!
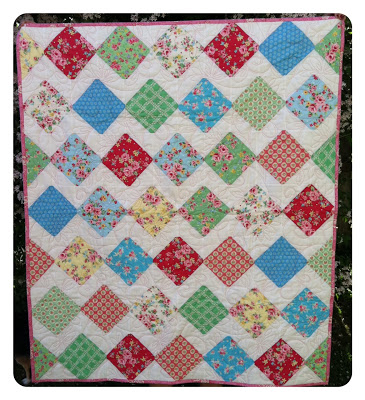 The finished quilt turned out beautiful! Darlene used a hot pink thread for the top which was a jump from my play-it-safe white. I just love how it turned out. 🙂
I really love the back of the quilt too:
 As shown below, I pieced the backing together using 6 fat quarters and 3/4 yd of white muslin. The total cost for the backing only ended up being ~$19.50. I simply trimmed the fat quarters to measure 17″x21″ and then lined them up in two rows of 3 each as shown below. From the white muslin I pieced together three 6″x50″ strips.
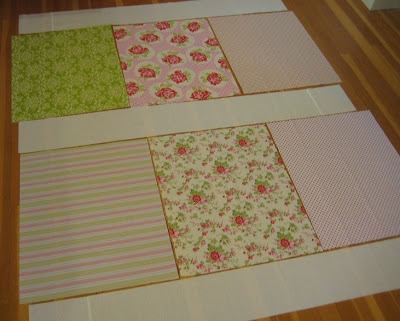 It’s a thrifty way to save on backing yardage and to use up fat quarters you might have laying around.
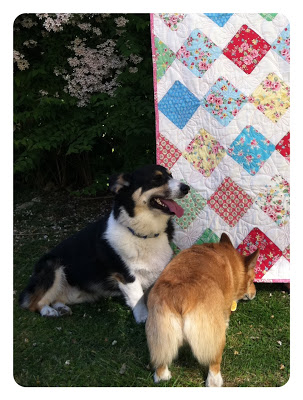
I thought I’d sneak this photo in of my furrballs checking out the quilt. 🙂 It was a beautiful and warm day in Seattle so everyone was outside enjoying the sun. Bodie and Paige were accompanying the quilt in the shade.
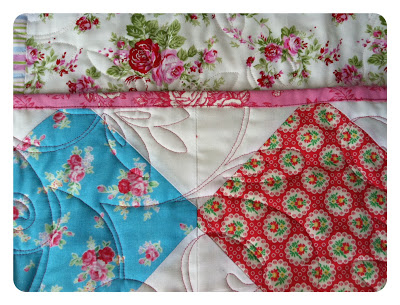
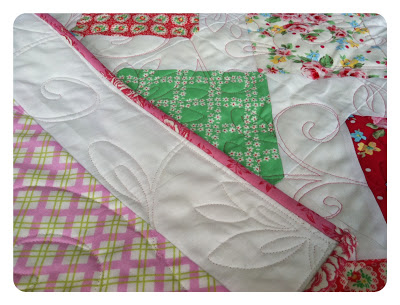
 And lastly, here’s another up-close photo of the quilting. If you click and enlarge the image, you can see the hot pink thread (the backing has white thread). 🙂
 Anyway, that’s it for now. I just wanted to share with you how it turned out. Ahh, isn’t it a great feeling finishing a quilt?!
Happy Quilting!
 Thank you all again for participating in the giveaway, and for checking out the blog!


Comments: 10 | Leave a comment