Archive | November, 2010

How to Tie a Quilt

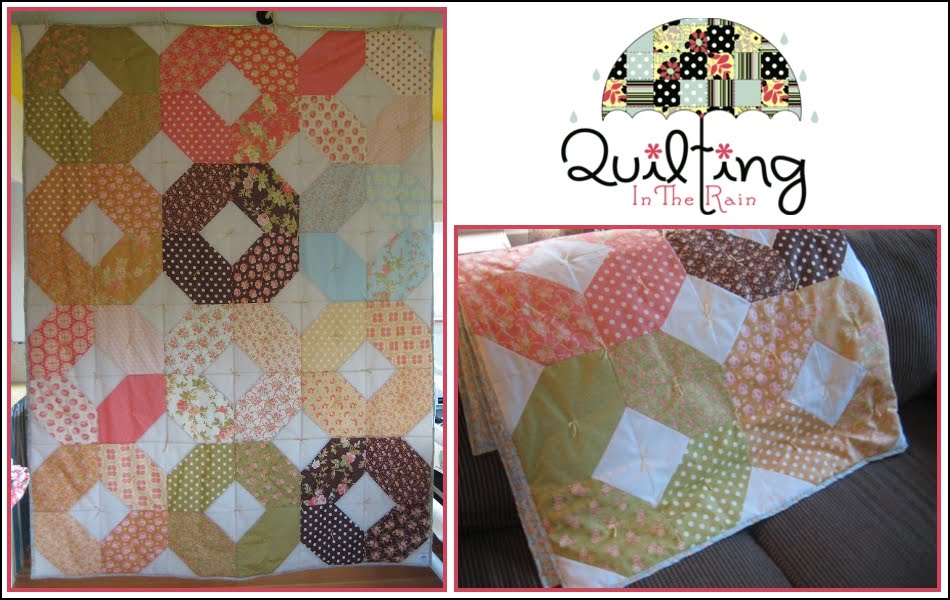
If you want your quilt to have a fluffier feel to it, I suggest tying it. Use a medium to high loft batting for the best effect. Tying holds all 3 layers of a quilt (quilt top, batting and backing) together by threading yarn through all 3 layers and then tying a knot to secure it.

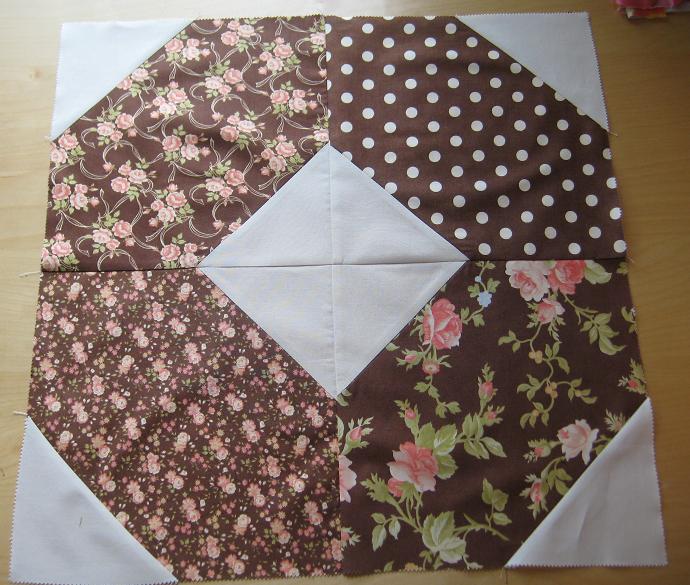
The ties should be in evenly spaced intervals throughout the quilt top. Start by tying all of the intersections of a quilt (circled below in red). You can also place a tie in a non-intersection such as the center of a block (circled below in blue). Typically it’s good to tie every 5-10 inches which is what I’ve done below. Try not to exceed 10 inches between ties.


The 5 steps below illustrate the basics of tying and should be done after basting your quilt:

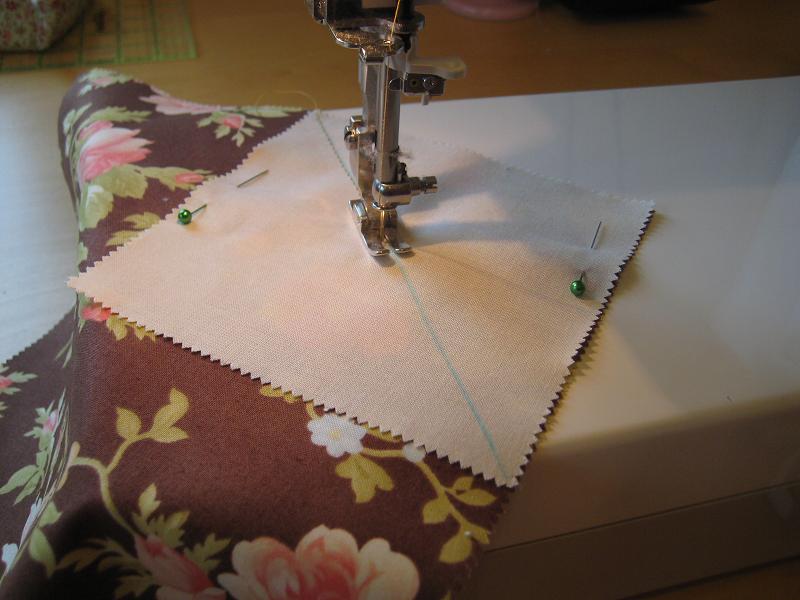
    1. Start by inserting the needle down through all 3 layers, leaving approximately a ¼” gap, and then bringing the needle back up through all 3 layers. I suggest using yarn that’s not too thick (the thicker it is, the harder it is to thread through all 3 layers of the quilt).

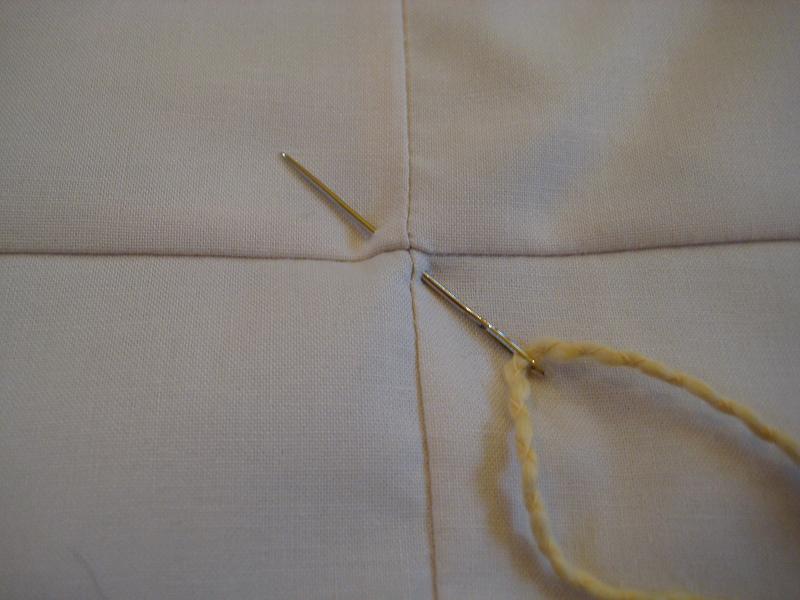
    1. Pull the yarn all the way through all 3 layers of the quilt.

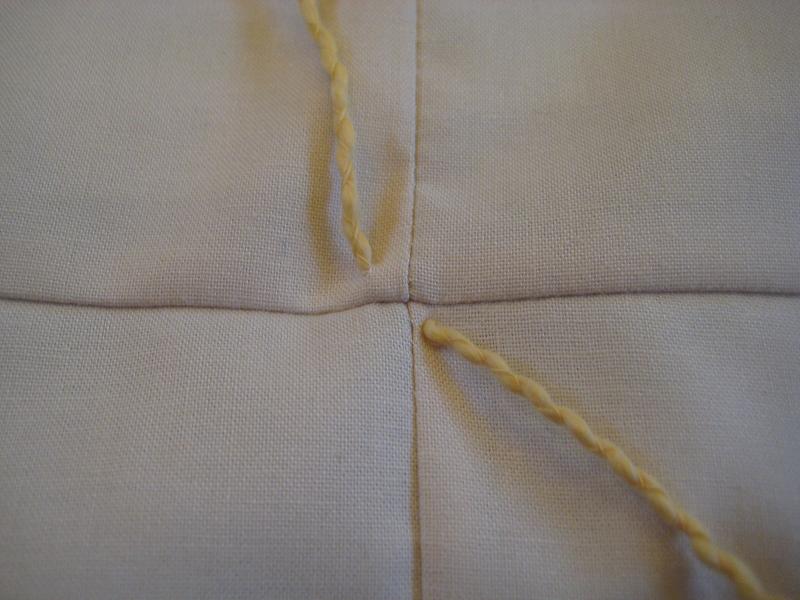
    1. Continue the above in evenly spaced intervals. When tying, start from the center of the quilt and then work your way outwards. As shown below, don’t cut the yarn (leave the string of yarn connected).

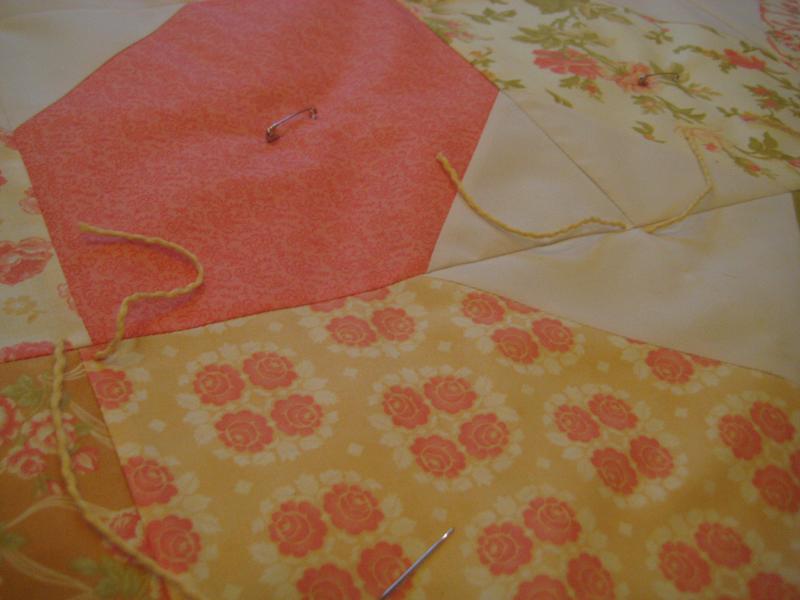
    1. Once you’ve finished threading in evenly spaced intervals, go back and cut all of the connecting strings between the ties.


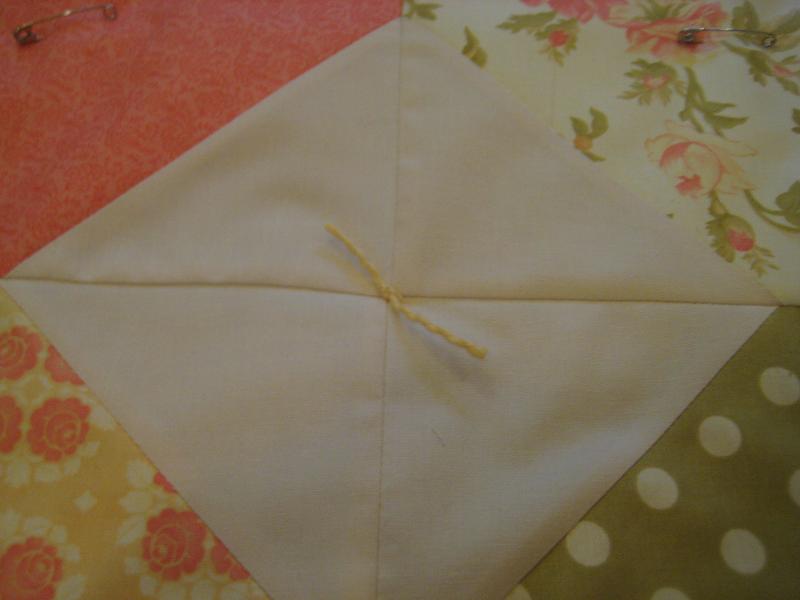
  1. Tie a double knot, and then trim the yarn.


That’s pretty much the basics of it. It’s a simple and quick way to finish a quilt! Also, you don’t always have to use yarn when tying a quilt; just be sure to use a sturdy thread that will keep your quilt layers together. Below are some different types of yarn/thread that I like to use for tying. You can find these at your local yarn store.

Comments: 50 | Leave a comment


Custom Quilt Labels

Just a short and sweet post to show off my new quilt labels! I had them custom made from Jennifer’s Jewel’s on Etsy. She has lots of designs to choose from if you don’t have your own. It adds a final touch to a quilt (and it’s inexpensive)!
What better way to end this short and sweet post with my short and sweet furry babies!? Literally short, being that they’re Corgi’s, and sweet, because…well just look at them 😉 Here’s Bodie (left) and Paige (right) enjoying my latest Tiffany Diamond’s quilt. 🙂

The tutorial on tying a quilt is on it’s way. 🙂 My next project will be the rug that i mentioned in an earlier post. Happy quilting!

Comments: 5 | Leave a comment


Tiffany Diamonds Quilt

I finally finished the Tiffany Diamonds Quilt! Thanks again, Sarah at Fabric Crush, for the fabulous name 🙂 This is the first quilt that I’ve tied instead of machine quilting (click the image below for a close-up). Finished Quilt size is 76″x57″. Check out the 6-Step Tiffany Diamonds tutorial below!

I love the simplicity of this quilt. Working backwards, it is made up of 12 of the following finished blocks:

And the above finished block is made up of 4 of these guys pieced together:
Basically, to make this quilt all you need to learn is how to make the above block. Step 1 (below) will get you started!

Materials:

  • Total of 48 ten inch squares (1 layer cake pack which has 42 squares + 3/4 yard of fabric cut into 6 squares)
  • Total of 96 five inch squares, same print (2 charm packs + 1 fat quarter cut into 6 squares)
  • 65”x90” of backing fabric (about 4 yards)
  • Batting

Note: 1 yard of fabric = 12 ten inch or 48 five inch squares

Step 1: Sort all 48 of your ten inch squares into 12 piles of 4 squares each. As shown below, have each pile match with similar colors/prints.

Step 2: For each ten inch square (all 48), do the following Steps A-E:

A) Take 2 five inch squares, and on each square mark a diagonal line from corner to corner. As shown below, I used a Hera marker which is a plastic tool that creates a crease on the fabric when pressed with a firm hand. With a Hera marker, you can layer the fabric (~2 layers), and the crease will show through both layers.
If you don’t have a Hera marker, simply draw a line using a ruler and pen, or fold the square diagonal and press with an iron and then unfold.

B) Align 1 five inch square along the top left corner of a ten inch square. Make sure the placement of the diagonal line is the same as below.

Pin in place, and then sew directly along the diagonal line:

C) As shown below, cut a ¼” seam along the left outer part of the diagonal line that so that the corner comes off.

Up-close photo (be sure to cut a 1/4″ allowance from the stitched line):

D) Press open with an iron:

E) Repeat steps B through D, but on the bottom right corner of the ten inch square.

Step 3: After completing Step 2 for all 48 ten inch squares, you can assemble the piles of 4 that you sorted in Step 1. First, arrange the 4 blocks as shown below. Sew the top 2 blocks together and then the bottom 2 blocks together to create 2 units.

Last, sew the top and bottom units together.

(Note for Newbies: when I refer to sewing, sew with the right sides facing together, sew a ¼” seam, and then press open with an iron). Step 4: Arrange your finished blocks in 4 rows of 3 blocks each.
Start by sewing each of the 3 blocks in each row together. And then sew each row together to create the pieced quilt top.

Step 5: Baste and quilt it! For this one, I decided to tie it (shown below) rather than machine quilt. Click the following for a tutorial on How to Tie a Quilt. If you’ve never done it before, you’ll love it because it’s quick and you don’t have to worry about the fabric layers puckering like you do when machine quilting. It looks great too, and makes for a much fluffier quilt.

Step 6: Bind it! Click the following for a Quick Quilt Binding Tutorial.

>Tip!: Save the corners you cut from Step 2c. You can use them for an easy half square triangle scrap quilt project down the road!

That’s it! Let me know if you have any questions.
Click HERE for a printer friendly version of this tutorial. =)

Comments: 10 | Leave a comment


Upcoming Projects for November

Wow, can you believe it is November already!? October seemed to fly by so quickly and I hardly noticed that it ended! I have been busy working on a number of different projects (all of which will be tutorials in the near future) and I wanted to give everyone a sneak peak on what you can expect.

My next project is the Tiffany Diamonds quilt for Moda Bake Shop:I have Sarah at Fabric Crush to thank for the snazzy name for this quilt 🙂 The fabric collection is called “Breakfast at Tiffany’s” by Fig Tree Quilts at Moda, hence the suitable name. As you can see above it is very close to finished. And for those of you that shy away from machine quilting, I plan to tie this quilt rather than machine quilt it and will have a tutorial on that as well =) The tutorial (printable version) will be on Moda Bake Shop on December 2nd and will be available on Quilting In The Rain shortly before.

I am also working on another non-quilt project for Moda Bake Shop: a woven rug made with a Jelly Roll pre-cut. This one will be very fun for me because it is something completely new. It is going to be a bit of a quilt/weave hybrid…and it also needs to be tough enough to survive people stepping all over it. I hope it turns out!

Finally, my last project will remain a mystery until I can prove that it’s going to work….but lets say that I just dropped by the hardware store to buy a coil of 14 gauge wire and I had my husband order me a soldering iron on Amazon 🙂 This is for a upcoming winter-themed project. I will let you all know what it is very soon – and pray for me that I won’t burn something with my new toy (my arm hairs have already been singed and regrown after a past run-in with a chemistry Bunsen burner). :-

Happy Quilting!!! Stay tuned… 😉

Comments: 3 | Leave a comment


Site by Spunmonkey.