Archive | September, 2010

Patchwork Coasters


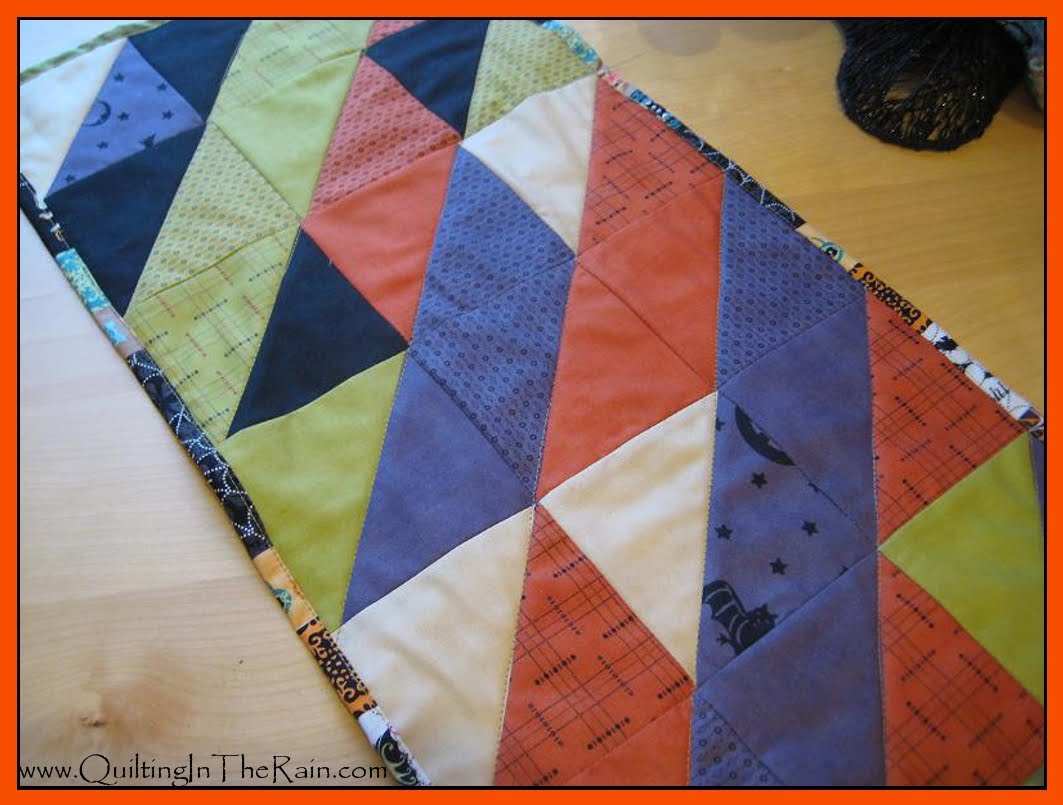
This tutorial will make you four coasters and one coaster cozy. I made these for a friend that just moved into a new house – it makes a great housewarming gift 🙂

Materials:

  • Scrap fabrics
  • Scrap batting
  • Steam-a-seam

Step 1 – From your scrap fabrics, cut 12 2”x5” rectangles. As shown below, put them in four coordinating piles with three rectangles each. These will be your coaster patchwork tops.

Step 2 – From your scrap fabrics, cut four 5” squares for the coaster backing. From your scrap batting, cut four 5” squares.

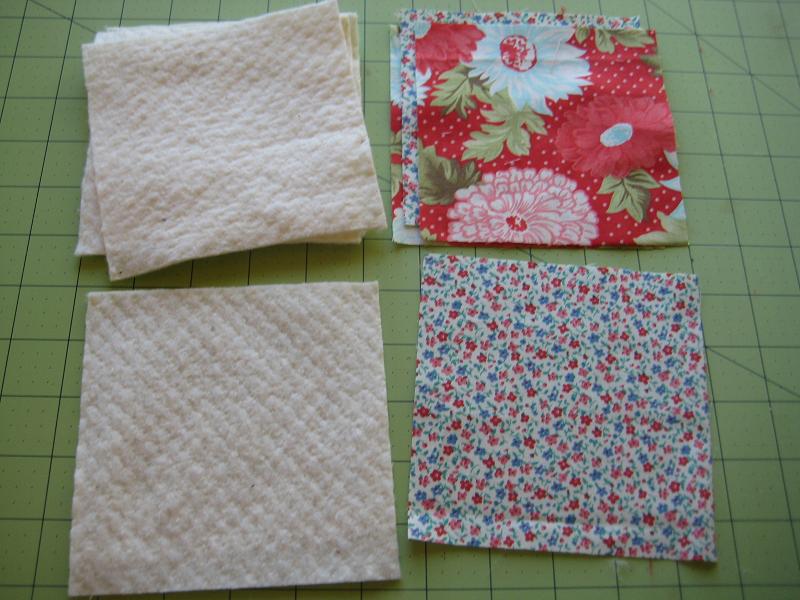
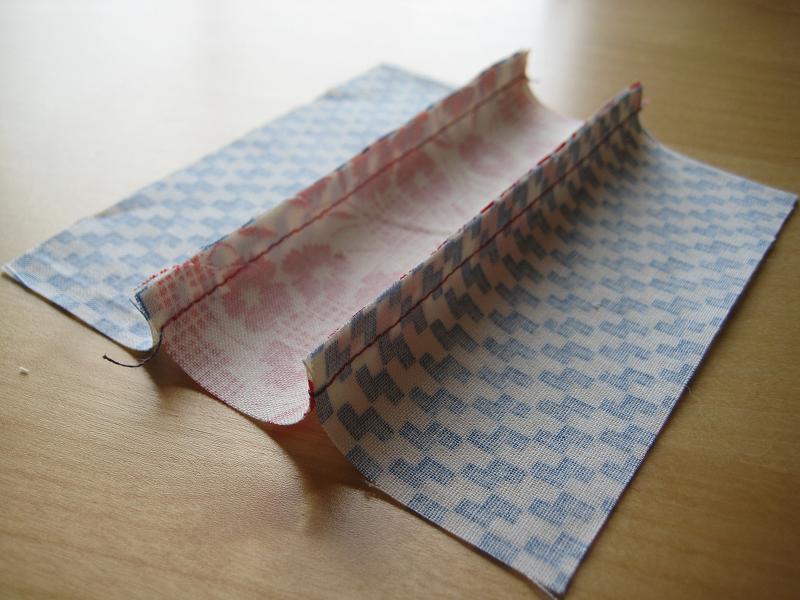
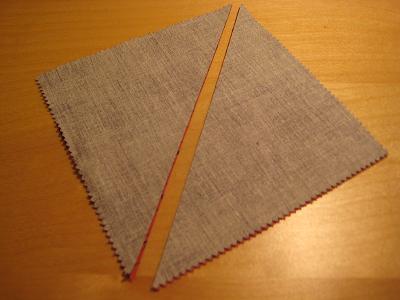
Step 3 – Take a pile of three rectangles (from step 1) and piece them together: With right sides facing together, sew a ¼” seam along the length. The back will look like the first picture below. Press flat with an iron.

Step 4 – Take the patchwork top, backing and batting and layer them in that order. The right sides of the patchwork top and backing should be facing each other. Make sure everything is aligned, and then pin to keep in place.

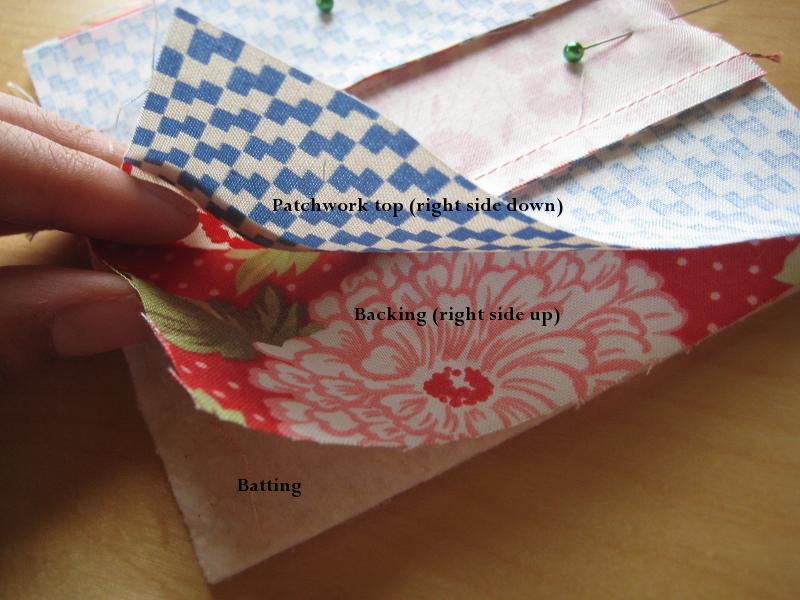
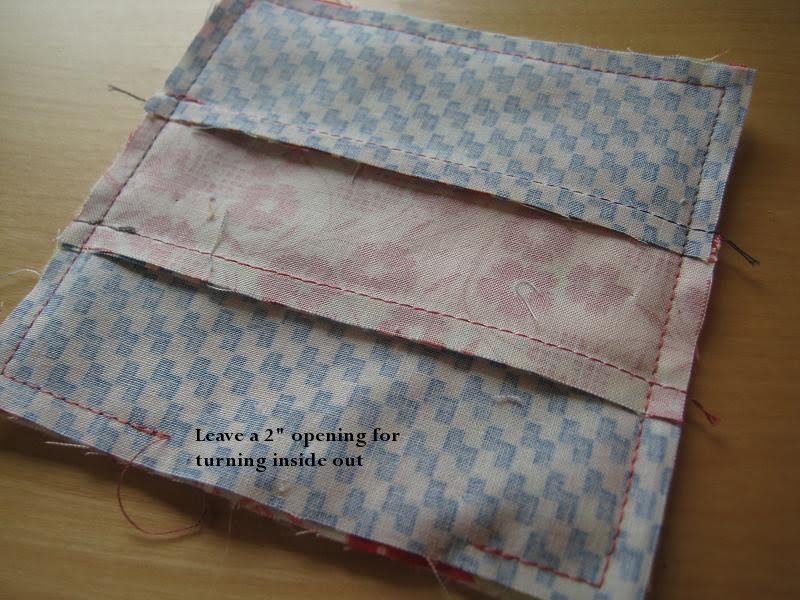
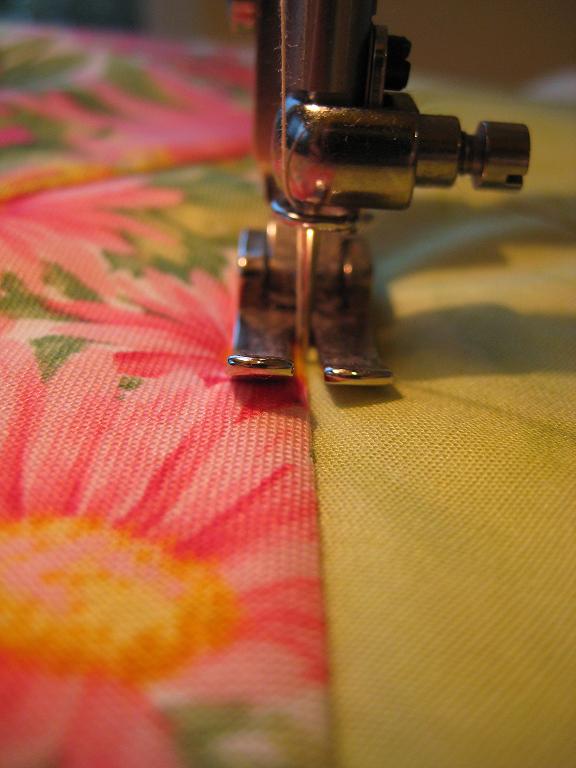
Step 5 – Sew a ¼” seam along the perimeter of the coaster but leave a 2” opening for turning inside out. Start and end your stitch with a back-stitch. Using scissors, trim the excess fabric from the corners.

Step 6 – Through the 2” opening, turn inside out so that the batting is sandwiched in between the patchwork top and backing fabric. To seal the opening, fold the opening inward ¼”, press with an iron, and then apply a thin strip of steam-a-seam to glue it closed.

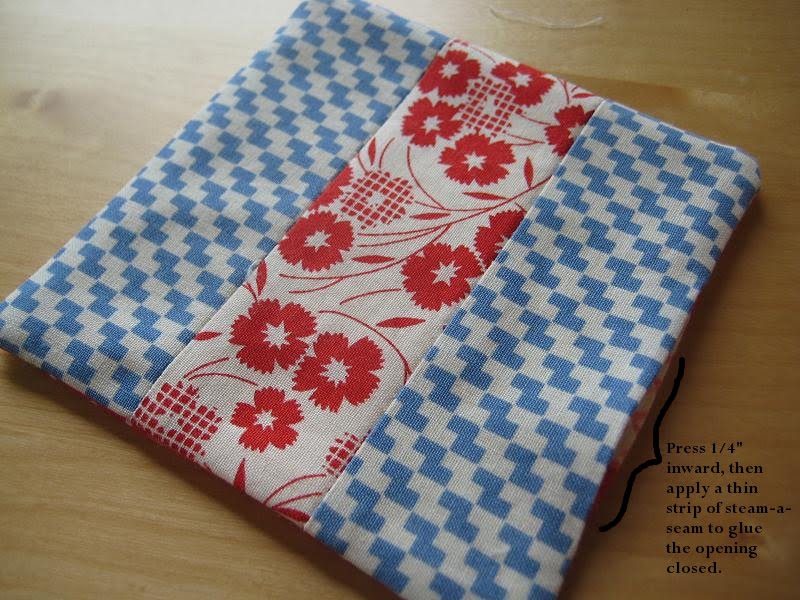
Step 7 – To make the coaster cozy, sew enough fabric scraps together so that you can cut two 6.5” squares. From your scrap batting, cut one 6.5” square. Follow Steps 4 through 6 (above), but using these 6.5” squares.

Step 8 – As shown below, pinch each corner so that a 1” wall forms on each side. Pin the corners to keep them pinched. (Tip: put a coaster in the center before pinching the corners of the coaster cozy to help give you even walls)

Step 9 – Use embroidery floss and a needle to tie all 4 corners closed.

You’re done!

Comments: 16 | Leave a comment


Autumn Table Runner


The tutorial below is for a 25.5” x 13” table runner (good for a coffee table) which requires 18 5” fabric squares. Simply double the number of materials depending on how long you want the runner to be (e.g. for a 51”x13” runner you will need 36 5” squares). I made this Halloween theme table runner using leftover fabric from the fabric ornament tutorial – i just love using every last bit!

Materials:

  • Charm pack (a charm pack is a bundle of pre-cut 5″ squares)
  • Backing fabric (for a 25.5″x13″ runner, get 29″x16″ of backing)
  • Batting
  • Coordinating thread

Step 1 – Pair your 5” squares into 9 groups of 2 squares each. When choosing pairs, pick colors/patterns that complement each other. Pair the squares so that the right sides are facing each other.

Step 2 – As shown below, cut a diagonal line to form 2 half square triangles.

Step 3 – For both half square triangles, sew a ¼” seam along the diagonal line that you cut in the previous step.

Step 4 – After sewing the ¼” seam, press open with an iron. This will create 2 squares. As shown in the 2nd picture below, trim the excess fabric tags.

Step 5 – Repeat the above for all the squares you paired in step 1. Then arrange the squares in 6 rows of 3 squares each. I arranged mine as follows.

Step 6 – Sew the 3 squares in each row together: with right sides facing together, sew a ¼” seam. Press open with an iron.

Step 7 – Then, sew all 6 rows together: with right sides facing together (pin to keep in place), sew a ¼” seam. And then press open with an iron. Continue until you have all rows sewn together.

Step 8 – Now layer your quilt top, batting and backing (in that order) to create a quilt sandwich. Layer it so you can see the right sides of the quilt top and backing fabric (i.e. wrong sides should be facing the batting). Pin to keep the quilt sandwich in place. Then using your sewing machine, quilt the runner however you like. I simply stitched diagonal lines, using the stitch-in-the-ditch method.

Finish the quilt via the Quick Quilt Binding Tutorial, which uses the extra backing fabric. : )

Comments: 3 | Leave a comment


Fabric Ornaments

I know it’s only mid-Sept., but it REALLY feels like Fall in Seattle! So, I went to my local arts and crafts store the other weekend to buy 2 simple items. I ended up leaving with a bag full of foam balls, candy pumpkins, fake leaves, a sack of buttons, Mod Podge, the list goes on… And of course the 2 items that I was originally there for were forgotten, ancient history. :-}

Anyway, after getting all my supplies I thought up the idea of fabric ball ornaments. This is a fun weekend project; only 5-steps below. If anyone else tries it out, I’d love to see how it turns out!

Materials:

  • Scrap fabrics – I used a charm pack (pre-cut 5” squares)
  • Foam balls
  • Wire
  • Mod Podge
  • Clear brush-on glaze finish (optional)
  • Ribbon (optional)
  • paint brush

All of the above can be found at your local arts and crafts store. For the wire, I used fabric-coated stem wire which can be found in the floral section.

Step 1 – Cut fabric scraps into 5” long strips no wider than 1”. If you’re using smaller foam balls, I wouldn’t cut them any wider than ½ ”.

Step 2 – Get your hands messy! (Tip: I covered my table with parchment paper). With a paint brush, apply a single coat of Mod Podge where you plan to place a fabric strip:
Place the fabric strip over the Mod Podge and smooth down with your fingers. Then, secure the strip by brushing it down with more Mod Podge. Don’t brush it on too thick:
Repeat the above steps but with another strip. Simply layer the fabric strips as needed until the entire foam ball is covered:
Let the fabric/Mod-Podged ball(s) dry on parchment paper overnight.

Step 3 – After the fabric balls have dried, apply a thin coat of clear brush-on glaze coating and then let it dry again overnight.

Step 4 – Create the ornament hanger. As shown below, cut approx. 4” of stem wire. Bend approx. 2” of one end over to create a ½”-1” loop, and using the remaining wire secure the loop by wrapping the wire around the main stem to create a little knot.

Step 5 – Using a thin blade (e.g. the tip of an old pair of appliqué scissors), make a small incision on the fabric ball so that the blade cuts through the fabric. Insert the end of the wire hanger (the end that doesn’t have the loop) into the incision until it stops at the knot. The foam secures the wire better than I thought, but you can also apply clear glue around the base of the knot to reinforce it. If desired, add a bow using ribbon at the base of the loop.
That’s it! I’d love to see someone use Christmas-themed fabric. In case anyone is wondering where I got the black tree in the first photo, it’s from JoAnne’s (an arts and crafts store in WA).

Also, I plan on posting a tutorial for the Halloween table runner (also shown in the first picture). Should have that up shortly!

Comments: 11 | Leave a comment


Machine Quilting – the basics

This is a wall-hanging quilt I finished last Saturday using scrap fabric and leftover charm squares. This quilt makes for a perfect example of various and simple ways to machine quilt (e.g. for this small quilt, I machine quilted this via straight-stitching, stitch-in-the-ditch, echoing, free-motion quilting).
Here’s how the back looks like – you can really see the quilting in this lighting.

Stitch-in-the-Ditch:
This is probably one of the easiest ways to quilt as it only involves straight lines. The placement of the stitch is in the pressed seams. In this photo I’m using a presser foot.
All you have to do is decide what shaped you want outlined (or stitched in the ditch), and then go for it. When deciding what shapes on your quilt top you want outlined, try to keep in mind how the back of the quilt will look.

Echoing: After stitching-in-the-ditch, I then echoed the heart with a straight stitch using a 1/4″ seam. Again, I used a presser foot.
Here’s how the back of one heart looked after outlining and echoing with a straight-stitch:

Straight-stitch: After outlining and echoing each heart, I quilted inside of each heart differently. For the first heart, I simply quilted symmetrical lines using a straigh-stitch with a presser foot. I started and ended each stitch with a back-stitch:
For the last heart, I quilted wavy-lines, still using a straight-stitch. I simply guided the quilt top in long, wavy motions underneath the presser foot.

Free-Motion Quilting: For the middle heart, I used a darning foot (picture below). Follow your sewing machine’s instructions to replace the presser foot with a darning foot. Also, you will need to cover the feed dogs on your sewing machine (there should be instructions in your machine’s manual for that too). 
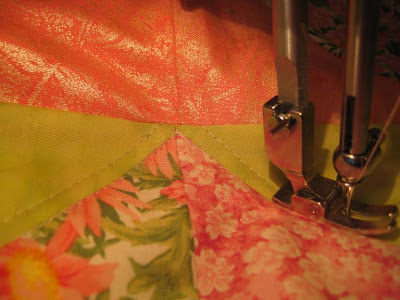
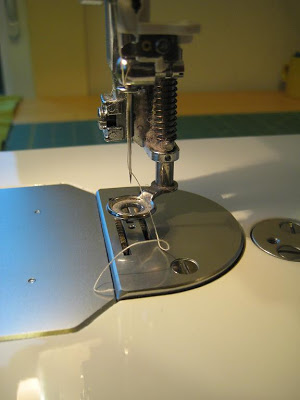
With free-motion quilting, you have total control of the movement of fabric beneath the needle because the feed dogs on your sewing machine are covered. On the contrary, when using a regular presser foot for straight-stitching the feed dogs are exposed (which is why you should never pull the fabric when straight-stitching, simply guide the fabric through). Maintaining a constant sewing speed and fabric movement under the needle will help you sew even stitches. To secure a stitch, simply hold the fabric in place and sew several times in the same spot. This is basically the equivalent of doing a back stitch but with a darning foot. Do this when you start and end a stitch. When free-motion quilting, it helps to choose a continuous pattern (i.e. loopy-loops or swirls).

With the darning foot, I quilted free-motion stippling which is basically a bunch of squiggilies that never overlap (though i confess i messed up several times, you can see my mess-ups in the video below :-o). In this video I’m wearing what I call my Michael Jackson-Gloves, aka quilting gloves that have traction on the finger tips to help give me more control over the quilt top. You can get these at your local crafts shop; i can definitely tell the difference when i use them vs. not using them.

Here’s a mini video of me free-motion quilting with my MJ gloves 😉

Anyway, for those of you that have never machine quilted and are thinking about it, I hope this gives you some helpful insight. Feel free to post any questions and I’d be happy get back to you. I’m no machine quilting guru, but i’d be happy to try help!

Comments: 16 | Leave a comment


Site by Spunmonkey.